Installing Power Supply Modules in GigaVUE‑HC3
The GigaVUE‑HC3 chassis is shipped with two power supply modules (PSMs) installed. However, you can order and install additional PSMs. Up to four PSMs can be installed for 2+2 redundancy. The GigaVUE‑HC3 also has a power management feature that makes sure that there is enough power available for the modules installed in the chassis. For more information about power management, refer to Power Management.
Note: If you are installing DC power supply modules, you will need to wire power to the screw terminals on the PSMs before installing them in the chassis. There is not enough room to service the screw terminals once the modules are installed in the chassis. Refer to Connecting -48V DC Power Supply Modules for instructions on connecting DC power supply modules.
Use the following procedure to install power supply modules:
| 1. | Make sure you are wearing an ESD-preventive wrist or ankle strap. |
| 2. | Locate the power supply modules and remove them from their packaging. Each PSM is shipped in its own box. |
| 3. | Carefully slide the first PSM into the matching receptacles at the lower rear of the node (1 Power Supply Modules (AC Version Shown)). Push gently to seat the PSM firmly in the chassis until the thumb latch snaps into place. |
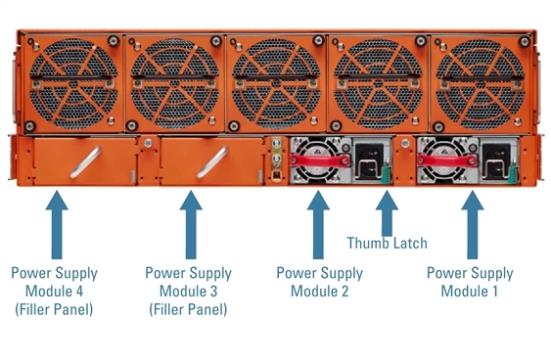
| 1 | Power Supply Modules (AC Version Shown) |
Note: If using two PSMs, leave filler panels in as shown in 1. The filler panels aid in air flow distribution. If a PSM fails, leave it in the chassis.
| 4. | Repeat the previous steps for the next PSM. 2 Four Power Supply Modules Installed shows the GigaVUE‑HC3 node with all four power supply modules installed. |

| 2 | Four Power Supply Modules Installed |


