Connect to VMware NSX-T
After creating a environment create a connection between the VMware NSX-T and GigaVUE‑FM.
Refer to the following sections for details:
- Rules and Notes
- Steps
Rules and Notes
- NSXT- manager version must be 3.1.3. Otherwise after editing the solution, the packets will not reach the GigaVUE V Series Node.
- NSX-T manager cannot be registered for more than one GigaVUE-FM.
- For GigaVUE-FM software version 5.13.00, you cannot deploy more than one GigaVUE V Series Node.
- For GigaVUE-FM software version 5.13.00: If you configure a GigaVUE V Series Node with the Application intelligence solution, then you must not configure other basic GigaSMART applications, such as slicing, masking, and vice-e-versa. These GigaSMART applications cannot work in parallel.
Create Connection
To create a new Connection:
- Select Inventory > Resources > Environment.
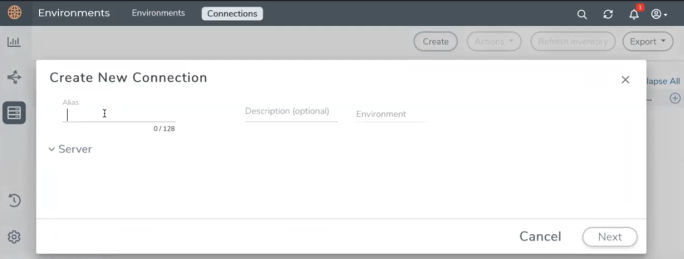
- On the Environments page, on the Connections tab, click Create.

- The Create New Connection dialog box opens. Enter the details as mentioned in the below section.
Note: When creating a connection in the connections page, the corresponding monitoring domain created for internal use in GigaVUE‑FM will not be displayed in the Monitoring Domain list page.
To connect to VMware NSX-T, select or enter the following details:
|
Field |
Description |
| Alias |
Alias name used to identify the connection. |
| Description | Brief description about the connection. |
| Environment | Select the environment configured in the Connect to VMware NSX-T |
| Server | The IP address or the DNS name of the virtual server. |
| vCenterUserName | Valid user name |
| vCenterPassword | Password for the user |
| NSX-T Manager IP Address | IP address or Hostname of your VMware NSX-T. |
| NSX-T User Name | Username of your NSX-T account. |
| NSX-T Password | Password of your NSX-T account. |
| Image URL | Web Server URL of the directory where V Series node OVA, VMDK, and OVF files are available. The Web Server URL must be in the follwoing format: http://<server-IP:port>/<path to where the OVF files are saved> and the port can be any valid number. |
| GigaVUE‑FM User Name | GigaVUE‑FM username. |
| GigaVUE‑FM Password | GigaVUE‑FM password |
Once the connection is established, enter the following details in the fabric launch configuration page, and click Save:
|
Field |
Description |
|---|---|
| Datacenter | vCenter Data Center with the ESXi hosts to be provisioned with V Series nodes |
| Cluster | Cluster where you want to deploy V Series nodes |
| Datastore | Network datastore shared among all ESXi hosts. |
| Management Network | Management network for V Series nodes |
| IP Type | Select the management network IP type as Static or DHCP |
| Tunnel Network | Tunnel Network for the V Series nodes |
| IP Type | Select the tunnel network IP address type as Static or DHCP |
| Tunnel Gateway IP | Gateway IP address of the Tunnel Network |
| MTU | The Maximum Transmission Unit (MTU) is the maximum size of each packet that the tunnel endpoint can carry. |
| Netmask Length | CIDR value of the Tunnel. |
| User Password: (gigamon) | SSH Password for the built-in user, 'gigamon' on the V Series node |
| Confirm User Password | Confirm the SSH Password of the V Series node |
| Form Factor | Instance size of the V Series node |
|
Service Attachment |
Service segment created on NSX-T |
|
Deployment Type Deployment Count (for Clustered deployment type) |
Deployment type is clustered. Note: Host-based deployment option is disabled, as there can be one V series node per ESXi host. Deployment count is restricted to one V Series nodes (Service Instances). |
Use the following buttons to manage your VMware NSX-T connections :
|
Button |
Description |
| Create | Use to create new connection. |
| Actions |
Provides the following options:
|
| Refresh Inventory | Use to refresh the entire connections page. |
| Export | Use to export the details from the Connections page into an XLS or a CSV file. |
To create Application Intelligence sessions, refer to Create an Application Intelligence Session in Virtual Environment.
Refer Deploying Application Intelligence Solution at Scale on VMware NSX-T 3.1.3 for more detailed information.


