Configure GigaVUE Fabric Components in GigaVUE‑FM
After configuring the Monitoring Domain, you reach the OpenStack Fabric Launch Configuration page. On the same page, you can configure the following fabric components:
In the OpenStack Fabric Launch Configuration page, enter or select the required information as described in the table below.
|
Fields |
Description |
|
SSH Key Pair |
The SSH key pair for the UCT-V Controller. For more information about SSH key pair, refer to Key Pairs. |
|
Availability Zone |
The distinct locations (zones) of the OpenStack region. |
|
Security Groups |
The security group created for the UCT-V Controller. For more information, refer to Security Group for OpenStack . |
|
Prefer IPv6 |
Enables IPv6 to deploy all the Fabric Controllers, and the tunnel between hypervisor to GigaVUE V Series Nodes using IPv6 address. If the IPv6 address is unavailable, it uses an IPv4 address. Note: You can enable this option only when deploying a new GigaVUE V Series Node. If you wish to enable this option after deploying the GigaVUE V Series Node, then you must delete the existing GigaVUE V Series Node and deploy it again with this option enabled. |
|
Enable Custom Certificates |
Enable this option to validate the custom certificate during SSL Communication. GigaVUE‑FM validates the Custom certificate with the trust store. If the certificate is not available in Trust Store, communication does not happen, and an handshake error occurs. Note: If the certificate expires after the successful deployment of the fabric components, then the fabric components moves to failed state. |
|
Certificate |
Select the custom certificate from the drop-down menu. You can also upload the custom certificate for GigaVUE V Series Nodes, GigaVUE V Series Proxy, and UCT-V Controllers. For details, refer to Install Custom Certificate on AWS. |
Select Yes to configure a GigaVUE V Series Proxy.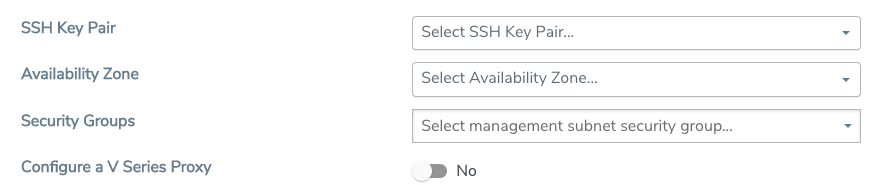
Configure UCT-V Controller
A UCT-V Controller manages multiple UCT-Vs and orchestrates the flow of mirrored traffic to the GigaVUE V Series nodes. While configuring the UCT-V Controllers, you can also specify the tunnel type to be used for carrying the mirrored traffic from the UCT-Vs to the GigaVUE V Series nodes.
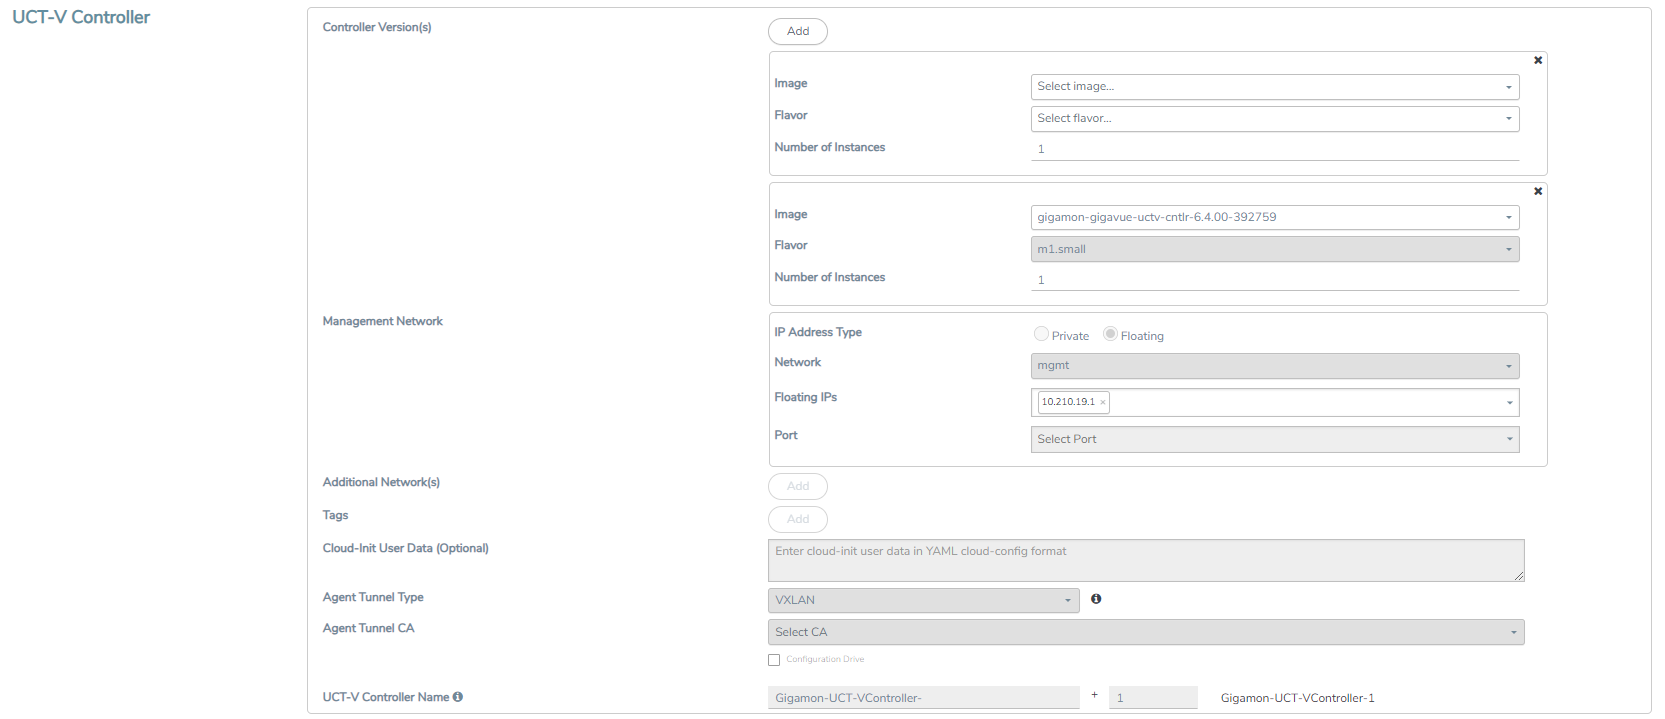
- Only if UCT-Vs are used for capturing traffic, then you must configure the UCT-V Controllers in the OpenStack cloud.
- A UCT-V Controller can only manage UCT-Vs that have the same version.
Enter or select the required information in the UCT-V Controller section, as described in the table below.
Configure GigaVUE V Series Proxy
The fields in the GigaVUE V Series Proxy configuration section are the same as those on the UCT-V Configuration page. For details on the field description, refer to Configure UCT-V Controller.
Configure GigaVUE V Series Node
Creating a GigaVUE V Series node profile, automatically launches the V Series node. Enter or select the required information in the GigaVUE V Series Node section as described in the following table.
Prerequisites
Enable Host pass through. You can edit the nova.conf file and change cpu_mode = host-passthrough.
|
Parameter |
Description |
|||||||||
| Image | Select the GigaVUE V Series node image file. | |||||||||
| Flavor | Select the form of the GigaVUE V Series node. | |||||||||
|
Management Network |
For the GigaVUE V Series Node, the Management Network is what is used by the GigaVUE V Series Proxy to communicate with the GigaVUE V Series Nodes. Select the management network ID. Ports— Select a port, you can choose a port related to the selected management network ID. Note: When both IPv4 and IPv6 addresses are available, IPv6 address is preferred, however if IPv6 address is not reachable then IPv4 address is used. |
|||||||||
|
Data Network |
Click Add to add additional networks. This is the network that the GigVUE V Series node uses to communicate with the monitoring tools. Multiple networks are supported.
|
|||||||||
|
Tag(s) |
(Optional) The key name and value that helps to identify the UCT-V Controller instances in your environment. For example, you might have UCT-V Controllers deployed in many regions. To distinguish these UCT-V Controllers based on the regions, you can provide a name (also known as a tag) that is easy to identify such as us-west-2-uctv-controllers. To add a tag:
|
|||||||||
| Cloud-Init User Data (Optional) | Enter the cloud-init user data in cloud-config format. | |||||||||
|
Min Instances |
The minimum number of GigaVUE V Series nodes that you can launch in OpenStack. The minimum number is 1.
Note: GigaVUE-FM will delete the nodes if they are idle for over 15 minutes. |
|||||||||
|
Max Instances |
The maximum number of GigaVUE V Series nodes that you can launch in OpenStack. |
|||||||||
|
V Series Node Name |
(Optional) Enter the name of the V Series Node. The V Series Node name must meet the following criteria:
|
Select Save to save the OpenStack Fabric Launch Configuration.
To view the fabric launch configuration specification of a visibility node, click on a visibility node or proxy, and a quick view of the Fabric Launch Configuration appears on the Monitoring Domain page.
Setting MTU for OVS Mirroring
When using OVS (Open vSwitch) port mirroring, it's important to configure the MTU (Maximum Transmission Unit) of VM interfaces correctly to avoid packet fragmentation issues in the data path.
-
If the original MTU is 1450, reduce it to 1376:
-
Calculation: 1450 - (50 bytes VXLAN header + 24 bytes extra headroom)
-
If the original MTU is 8950, reduce it to 8816 using the same logic.
For Example: In an OpenStack deployment with a default MTU of 1450, packets are fragmented at the VM based on this MTU. When mirrored via OVS with VXLAN tunneling (which adds ~50 bytes), the total packet size exceeds the path MTU, causing further fragmentation. This can lead to out-of-order IP frame delivery at the VseriesNode.


