Upgrade GigaVUE V Series Node for VMware NSX-T
GigaVUE V Series Nodes can be deployed in two ways. You can either directly use VMware NSX-T manager to deploy your GigaVUE V Series Nodes or use GigaVUE-FM to deploy your GigaVUE V Series Nodes. Based on the method you deploy GigaVUE V Series Nodes, you can upgrade them in two ways. Refer to the following topic for more detailed information.
Version Compatibility
GigaVUE-FM version 6.11 supports the latest version (6.11) of GigaVUE V Series Node as well as (n-2) versions. For better compatibility, it is always recommended to use the latest version of GigaVUE V Series Node with GigaVUE-FM.
Refer to the following sections:
- Upgrade GigaVUE V Series Nodes Deployed using GigaVUE-FM
- Upgrade GigaVUE V Series Node Deployed using VMware NSX-T Manager
Prerequisite
Before you upgrade the GigaVUE V Series Nodes, you must upgrade GigaVUE-FM to software version 5.13 or above.
Obtaining Software Images
To obtain software images:
| 1. | Login to the Gigamon Community portal. |
| 2. | Search for V Series OVA images. |
| 3. | Download the file to the local servers and place it in Internal server / External server. |
Upgrade GigaVUE V Series Nodes Deployed using GigaVUE-FM
Before upgrading the nodes ensure that all the current V Series nodes are of same version. To upgrade GigaVUE V Series Node in GigaVUE-FM:
- Go to Inventory > VIRTUAL > VMware NSX-T (V Series), and then click Monitoring Domain. The Monitoring Domain page appears.
- Select a deployed monitoring domain and click Actions. From the drop-down list, select Upgrade Fabric, the V Series Node Upgrade dialog box appears.
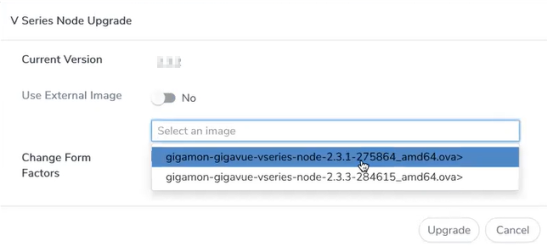
- Use the Use External Image toggle button to choose between internal and external image.
- Yes to use an external image. Enter the Image URL of the latest V Series Node OVA image. Ensure all the contents of the OVA file are extracted into VMDK and OVF files and placed in the directory that represents the Image URL.
- No to use an internal image. To use an internal image, select the uploaded OVA files from the Select an image drop-down menu.
- Click the Change Form Factors check box to modify the form factor (instance) size.
Note: Both the new and the current V Series nodes appears on the same monitoring domain until the new nodes replaces the current and the status changes to Ok.
- Click Upgrade.
You can view the status of the upgrade in the Status column of the Monitoring Domain page.
To view the detailed upgrade status click Upgrade in progress or Upgrade successful, the V Series Node Upgrade Status dialog box appears.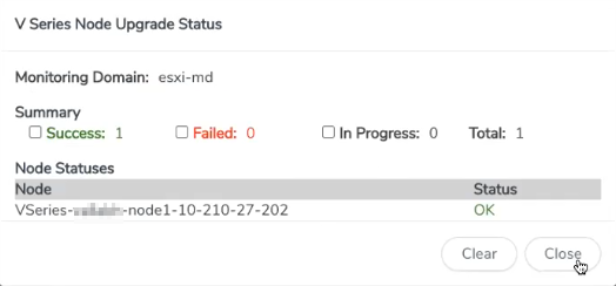
Click Clear to delete the logs of successfully upgraded nodes.
Note: Monitoring Domain upgrade can be only done when there is a single service deployment in the monitoring domain.
Upgrade GigaVUE V Series Node Deployed using VMware NSX-T Manager
To upgrade V Series Nodes deployed using VMware NSX-T, follow the steps given below:
- Delete the existing V Series Node in VMware NSX-T Manager.
- Click Actions > Edit in the Monitoring Domain page. The VMware Configuration page appears.
- Enter the new Image URL or select a new image if Use External Image toggle button is disabled.
- Then, deploy the new V Series Nodes in the VMware NSX-T manager
-
When you deploy your V Series Nodes using VMware NSX-T manager, you cannot directly upgrade V Series Node in GigaVUE-FM. In this case, the upgrade button in GigaVUE-FM is disabled.
-
If a V Series Node upgrade on the VMware NSX-T platform fails initially but later succeeds, GigaVUE-FM does not receive the updated status and continues to show the upgrade as failed. Since VMware NSX-T does not trigger an event to automatically retry the upgrade, the failed V Series deployment must be manually deleted from GigaVUE-FM and redeployed to reflect the correct status.


