Regular Cluster Formation Workflow
Gigamon’s Cluster formation can be done for maximum of 64 devices.
GigaVUE‑FM supports workflow-based configurations for forming a cluster. This workflow walks through the required steps to form a complete cluster for a regular cluster.
Note: Refer to Leaf-Spine Cluster Formation Workflow for how to use the Leaf-Spine Cluster workflow
Deployment Checklist
Before forming a Cluster, it is strongly recommended that you familiarize yourself with the relevant documentation and review the following deployment checklist:
|
■
|
Gigamon Fabric Management must be upgraded to GigaVUE‑FM 5.3.00 or later. |
|
■
|
Gigamon device must be upgraded to GigaVUE‑OS 5.2.00 or later |
|
■
|
Advanced Features License must be installed on GigaVUE-TA devices. |
|
■
|
Physical connection must be established to create stack links. |
|
■
|
Devices must be physically connected to create links among devices from GigaVUE‑FM. |
Create Regular Cluster Formation
To create a cluster:
|
1.
|
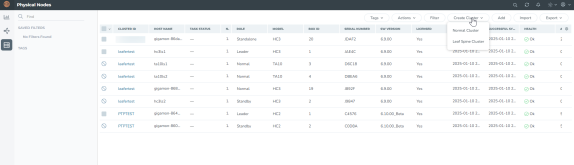
From the left navigation pane, go to Inventory > Physical > Nodes.. |
|
2.
|
Click Create Cluster and select Normal Cluster. |
|
3.
|
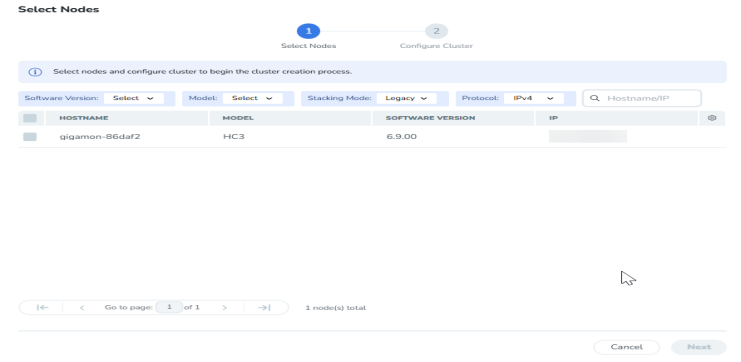
Filter the nodes based on the Software Version, Model, Stacking Mode, Hostname or IP address, and the Protocol through which the nodes communicate with each other.
|
Notes:
- GigaVUE-TA and GigaVUE-HCT devices are not supported in Legacy stacking mode.
|
4.
|
Select the nodes to include in this cluster and click Next. (Click a device to select it; click it again to deselect it). |
|
5.
|
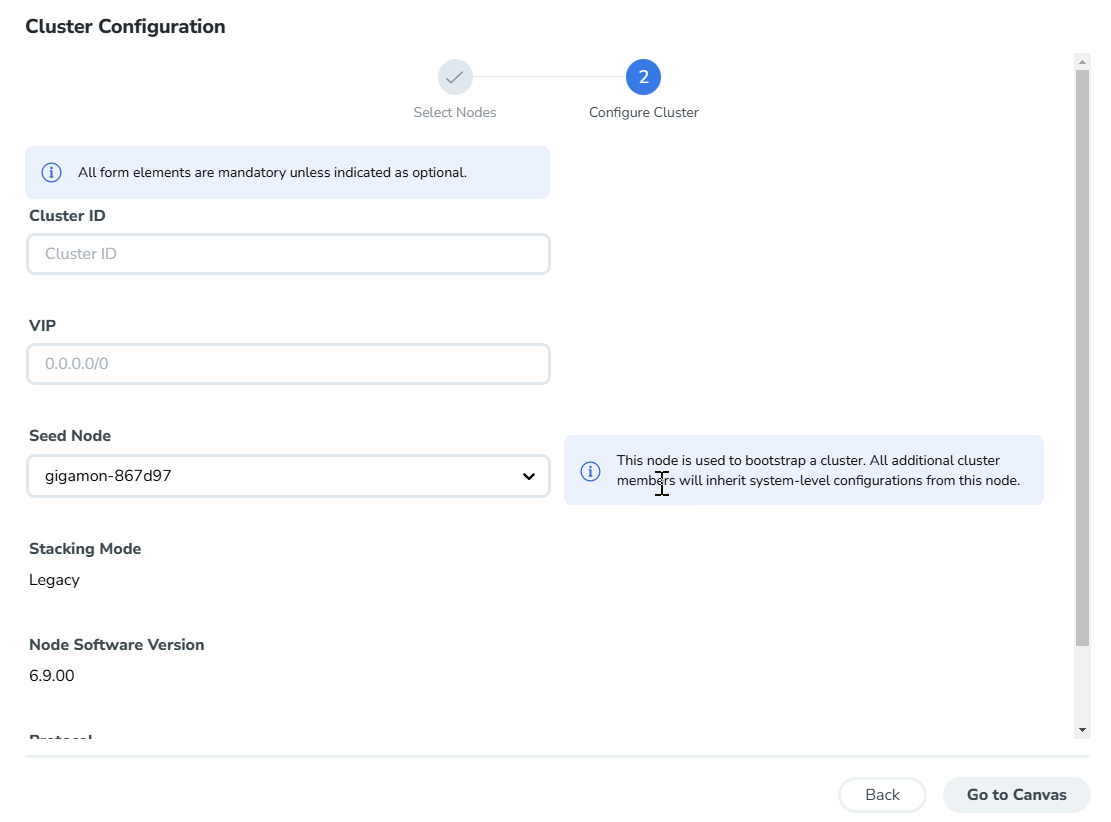
In the Cluster Configuration window, enter a valid Cluster ID and Virtual IP (VIP) and select the leader in the Seed Node list. |
Note: The leader cluster preferences in GigaVUE‑FM determine which of the nodes will be the default seed node. GigaVUE-TA devices cannot be a leader.
|
6.
|
After completing the Cluster Configuration details, click Go to Canvas. |
Note: Use the Back button to return to the Select Devices page and revise the device selection for this cluster.
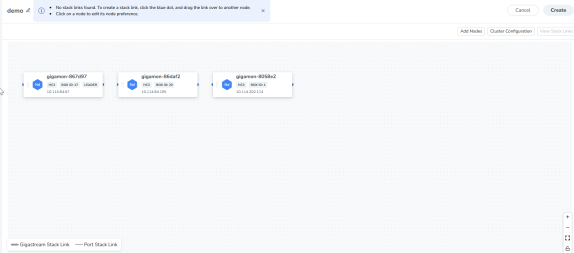
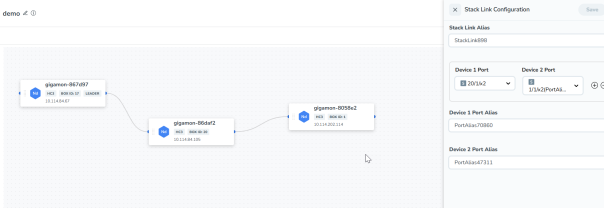
Customize Stack Links
Finally, customize the stack links to define how the nodes should be connected.
|
7.
|
Connect any two devices to create a stack link between those two devices. Click the tip of the node and drag your cursor to the second node tip to create a link. After you create the link, a dotted line illustrates the connection. |
|
8.
|
Configure the formed links in the Stack Links Configuration panel: |
|
a.
|
Select ports in each device that are compatible, for example: x-x ports, x-q ports, q-c ports, and x-c ports. |
|
b.
|
Select one or more ports from each device to create a GigaStream stack link. |
GigaVUE-FM generates the aliases for each Port stack link and GigaStream stack link. You can edit these aliases.
Note: While creating cluster, click View Stack Links on the right corner of the canvas to view the details of the stack links of the cluster.
|
9.
|
Click Create to start the cluster creation process. |
The Create Cluster progress window in the lower right corner of the page shows the status of every node as it joins the cluster. It takes a few minutes for the cluster to form. The cluster creation process involves the following steps:
|
o
|
Cluster[clusterName] Creation Successful followed by Seed device |
|
o
|
Verifying Nodes[Will display HostName of all devices] |
|
o
|
Adding Node[HostName] to cluster [clusterName] |
|
o
|
Node[HostName] successfully joined to the cluster. |
|
o
|
Configuring cards for cluster[clusterName] |
|
o
|
Rediscovering cluster[clusterName] |
|
o
|
Configuring ports for the cluster[clusterName]. |
|
o
|
Configuring ports will display the status of each stack link and GigaStream whether the creation is successful or not. |
When the cluster formation process is complete, you can view the completion message in the progress window.
Note: Refer to Check Cluster Status for Events.

|
10.
|
Click Go to Cluster in the progress window to view the cluster overview.
|
Edit a Cluster
The Edit cluster option supports only the following operations to the existing cluster:
|
■
|
Multiple devices can be added to the existing cluster in a single update operation. |
|
■
|
Stack links can be created only from the new device which is added into the cluster wizard. |
|
■
|
Leader preferences can be changed for each device through edit cluster option. |
|
■
|
Stack link alias and GigaStream alias can be edited for newly created links. |
|
■
|
Stacking mode can be changed from Legacy to Default and vice versa. |
Notes:
- You cannot change the stacking mode and also add or remove a device simultaneously. Only one task can be performed at a time.
Note:
|
■
|
No option to remove the existing stack links through cluster canvas. |
|
■
|
No option to create links in existing devices. |
|
■
|
Addition and deletion of devices in a single update operation should not be appreciated. |
|
■
|
No option to edit the existing stack link alias and GigaStream alias. |
Prerequisites
Standalone devices that have maps cannot be added to cluster if ports used in maps overwrites with the selected ports in stack link table.
This workflow describes how to add a node to a existing cluster.
|
1.
|
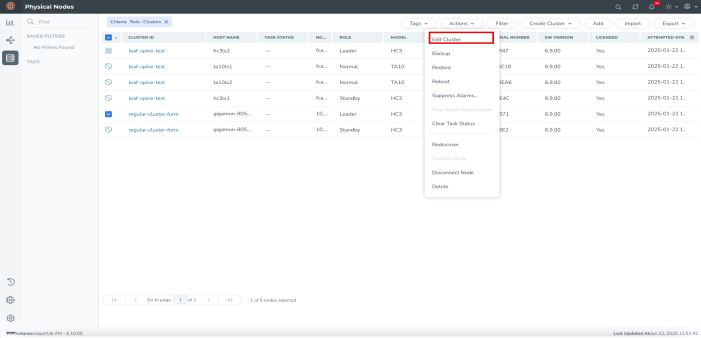
Select a cluster and choose Actions > Edit cluster.
|
|
2.
|
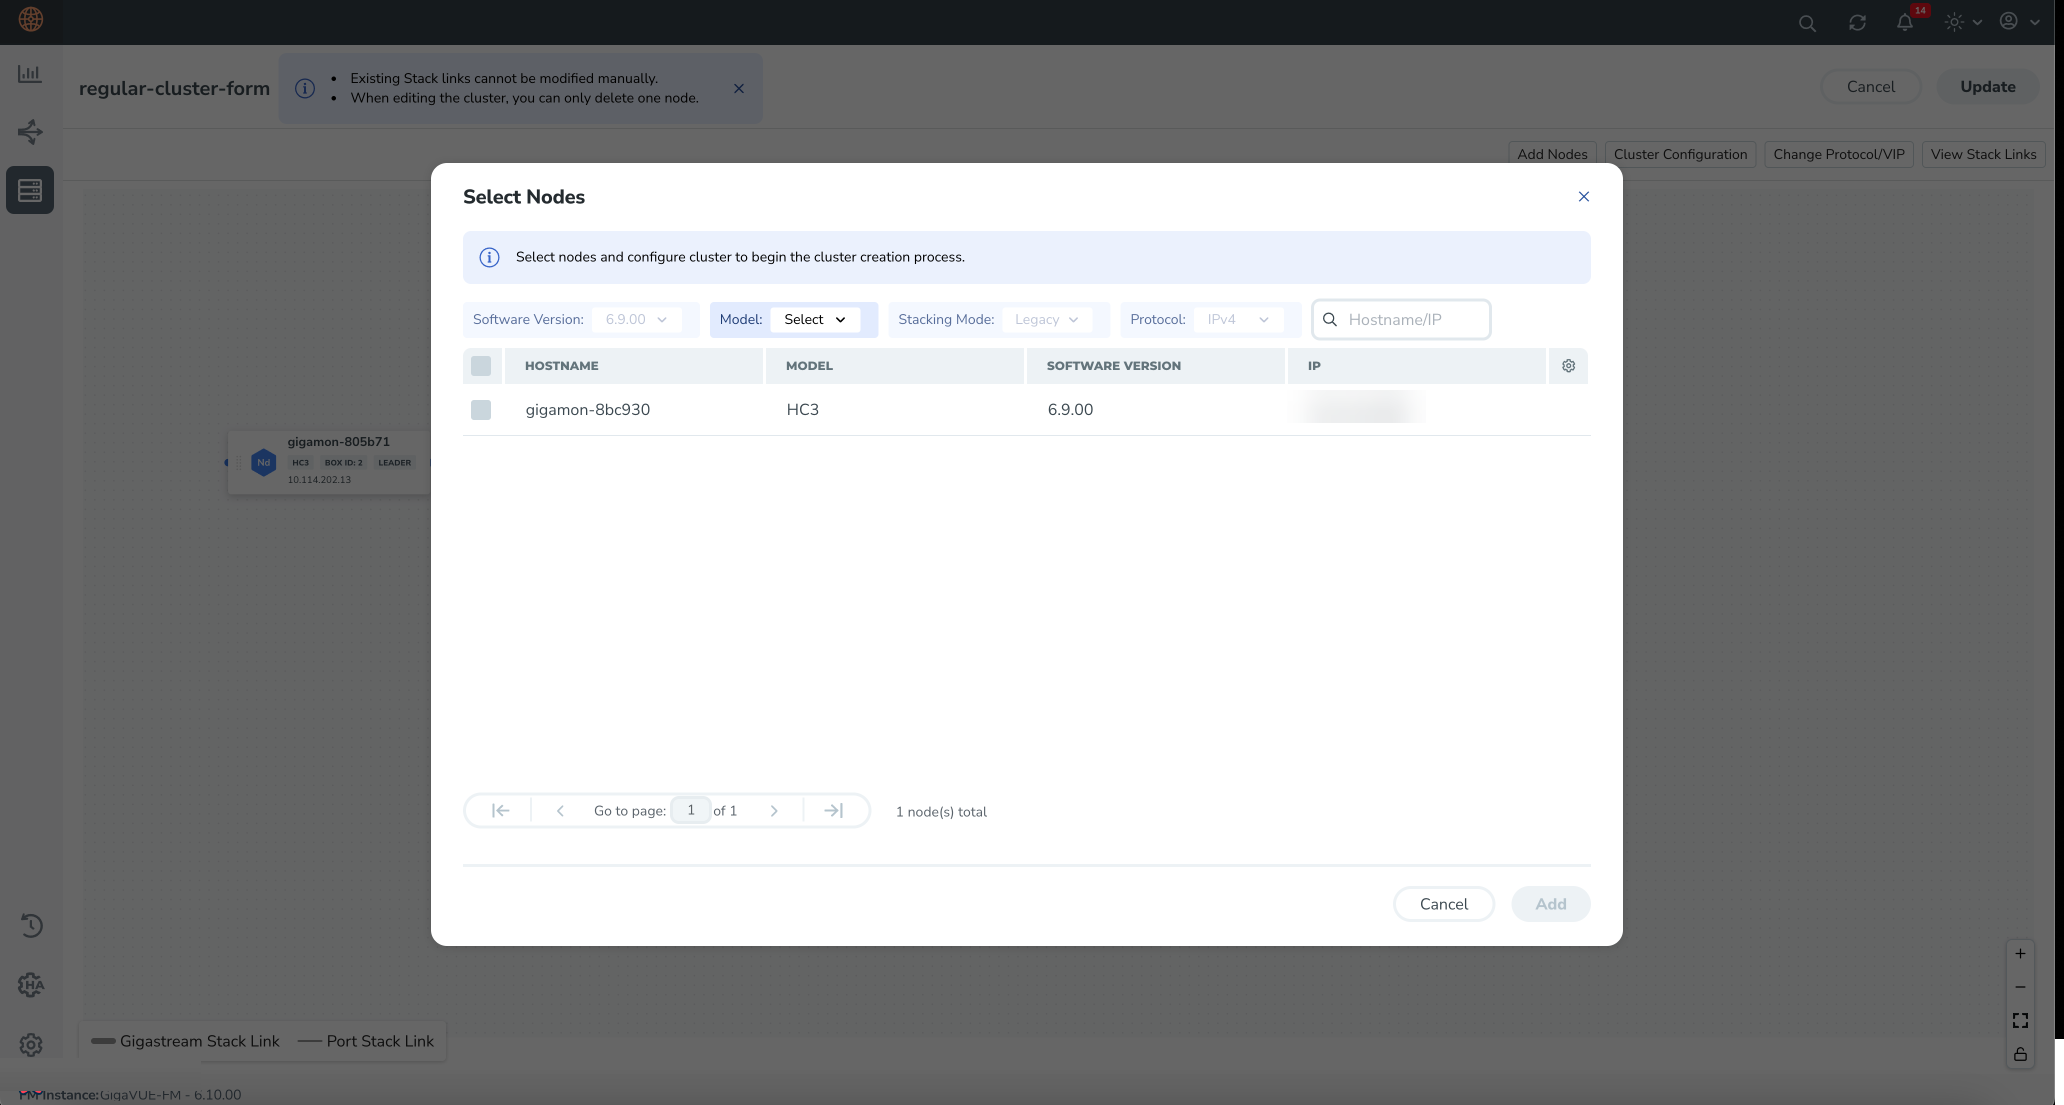
The Edit Canvas displays the existing stack link configuration details in the cluster canvas. Click Add Nodes to view the standalone devices. |
|
3.
|
Select the required devices from the table in the Select Nodes window and click Add. |
|
4.
|
In the canvas, draw the links between the newly added device. (Note: no new link is created for the existing device.) |
|
5.
|
Configure the stack link details in the stack link quick view. |
|
7.
|
Change the stacking mode as required. |
|
8.
|
Click Update to initiate the update process. A confirmation window appears advising that a backup file is generated with the updated traffic configurations. The configurations saved in the backup file must be applied manually to restore the traffic configurations. |
|
9.
|
Click OK to run the cluster update. |
When the cluster update operation starts, a notification window appears at the right corner of the GigaVUE‑FM window to show the status progression of each node, card, GigaStream and stack link.
When the cluster update operation is complete, a notification window confirms the completion of the cluster updates.
|
10.
|
Click Go to Cluster to go to view the cluster overview. |
The created GigaStreams appears in the device Port Groups page, and the created stack links appear in the device Stack Links page.
Delete a Node from a Cluster
This workflow describes how to remove a device node from a cluster.
Note: Only one device can be removed from the cluster per update operation.
The device should not contain any map configurations in a cluster. Those devices cannot be removed until the maps are present.
|
1.
|
Select a cluster and choose Actions > Edit cluster. Only one device can be deleted from the canvas. |
|
2.
|
To remove a device, click the device to be removed from the canvas and click Remove Node. |
The removed device will be deleted from canvas.
|
3.
|
Click Update to initiate the cluster-update operation. |
The Manage Cluster notification window shows the progress of nodes being removed from the cluster. When the device is successfully removed from the cluster, a notification window confirms the successful deletion of the cluster.
|
4.
|
Click Go To Cluster to go into device overview page and see the cluster details. |
How to Change the Leader Preference of a Device
This workflow describes how to change the device’s leader preference.
|
1.
|
Select a cluster and choose Edit cluster under Actions. |
|
2.
|
To set the leader preference for a device, click the device and update the Leader Preference details in the Node Configuration quick view that appears in the side pane. |
|
3.
|
Update the leader preference text box and click Update to proceed. |
The Update Cluster notification appears to show the progress of the cluster update. When the process is complete, Cluster updation completed, message appears in the notification window.
|
4.
|
Click Go To Cluster to go to the device overview page and see the cluster details. |


