Connect to Azure
After creating a environment create a connection between the Azure and GigaVUE‑FM. Refer to the following step given below for detailed information on how to create a new connection.
Create Connection
To create a new Connection:
- Select Inventory > Resources > Environment.
- On the Environments page, on the Connections tab, click Create.
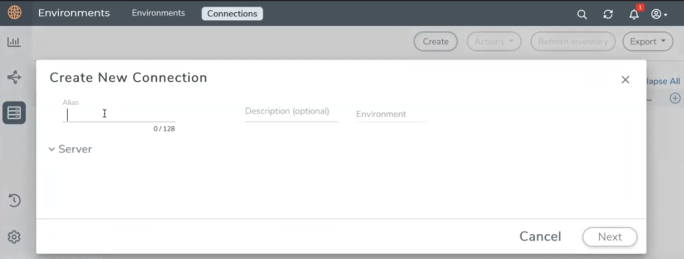
- The Create New Connection dialog box opens. Enter the details as mentioned in the below section.
Note: When creating a connection in the connections page, the corresponding monitoring domain created for internal use in GigaVUE‑FM will not be displayed in the Monitoring Domain list page.
To connect to Azure, select or enter the following details:
|
Field |
Description |
||||||
|---|---|---|---|---|---|---|---|
|
Name |
Name used to identify the connection. |
||||||
|
Credential |
Select your credentials from the drop-down menu. Refer Create Credentials for detailed information on how to create credentials. |
||||||
| Subscription ID |
Select the subscription ID. |
||||||
|
Region Name |
The Azure region for the connection. For example, East Asia. |
||||||
| Resource Groups |
The Resource Groups created in Azure for communication between the controllers, nodes, and GigaVUE-FM. A Resource Group must contain the VMs that needs to be monitored. |
||||||
| Traffic Acquisition Method |
Select a Tapping method. The available options are:
|
||||||
| MTU |
The Maximum Transmission Unit (MTU) is the maximum size of each packet that the tunnel endpoint can carry. Note: The default MTU is 1450. You can edit the MTU value according to your requirements. The valid range is between 1450 to 9000. |
In the Azure Virtual Node Deployment page, select or enter the following details and click Save:
|
Field |
Description |
|
Centralized Virtual Network |
Alias of the centralized VNet in which the G-vTAP Controllers, V Series Proxies, and the GigaVUE V Series nodes are launched. |
|
Authentication Type |
SSH Public Key is the only supported authentication type for V Series 2 solution. |
|
SSH Public Key |
The SSH public key for the GigaVUE fabric nodes. |
|
Security Groups |
The security group created for the GigaVUE fabric nodes. |
|
Configure a V Series Proxy (optional) |
Enable the Configure a V Series Proxy toggle button if you wish to deploy V Series nodes using a proxy. |
In the G-vTAP Controller section, select or enter the following details:
|
Field |
Description |
||||||||||||
|
Controller Version(s) |
The G-vTAP Controller version you configure must always be the same as the G-vTAP Agents’ version number deployed in the VM machines. If there are multiple versions of G-vTAP Agents deployed in the VM machines, then you must configure multiple versions of G-vTAP Controllers that matches the version numbers of the G-vTAP Agents. Note: If there is a version mismatch between G-vTAP controllers and G-vTAP Agents, GigaVUE-FM cannot detect the agents in the instances. To add G-vTAP Controllers:
|
||||||||||||
|
Management Subnet |
IP Address Type: Select one of the following IP address types:
Subnet: Select a management subnet for G-vTAP Controller. The subnet that is used for communication between the G-vTAP Controllers and the G-vTAP Agents, as well as to communicate with GigaVUE-FM. Every fabric node (both controllers and the nodes) need a way to talk to each other and GigaVUE-FM. So, they should share at least one management subnet. Note: Some instance types are supported in Azure platform. Refer to Microsoft Azure documentation to learn on supported instance types. |
||||||||||||
|
Additional Subnets |
(Optional) If there are G-vTAP Agents on subnets that are not IP routable from the management subnet, additional subnets must be specified so that the G-vTAP Controller can communicate with all the G-vTAP Agents. Click Add to specify additional data subnets, if needed. Also, make sure that you specify a list of security groups for each additional subnet. |
||||||||||||
|
Tags |
(Optional) The key name and value that helps to identify the G-vTAP Controller instances in your Azure environment. For example, you might have G-vTAP Controllers deployed in many regions. To distinguish these G-vTAP Controllers based on the regions, you can provide a name that is easy to identify such as us-west-2-gvtap-controllers. To add a tag:
|
Note: In a connection, you can configure multiple versions of a G-vTAP Controller and you can only configure one version of a V Series Proxy.
In the V Series Proxy section, select or enter the values for the fields as described in the previous G-vTAP Controller configuration table. The fields of the V Series Proxy configuration are similar to G-vTAP Controller configuration.
In the V Series Node section, select or enter the following details:
|
Fields |
Description |
|||||||||
|
Image |
From the Image drop-down list, select a V Series node image. |
|||||||||
|
Size |
From the Size down-down list, select a size for the V Series node. The default size for V Series configuration is Standard_D4s_v4. |
|||||||||
|
IP Address Type |
Select one of the following IP address types:
|
|||||||||
|
Management Subnet |
Subnet: Select a management subnet for V Series node. The subnet that is used for communication between the G-vTAP Agents and the V Series nodes, as well as to communicate with GigaVUE-FM. Every fabric node (both controllers and the nodes) needs a way to talk to each other and GigaVUE-FM. So, they should share at least one management subnet. |
|||||||||
|
Data Subnets |
The subnet that receives the mirrored VXLAN tunnel traffic from the G-vTAP Agents. Select a Subnet and the respective Security Groups. Click Add to add additional data subnets. Note: Using the Tool Subnet checkbox you can indicate the subnets to be used by the V Series node to egress the aggregated/manipulated traffic to the tools. |
|||||||||
|
Tag(s) |
(Optional) The key name and value that helps to identify the V Series node instances in your Azure environment. For example, you might have V Series node deployed in many regions. To distinguish these V Series node based on the regions, you can provide a name that is easy to identify. To add a tag:
|
Use the following buttons to manage your Azure connections :
|
Button |
Description |
| Create | Use to create new connection. |
| Actions |
Provides the following options:
|
| Refresh Inventory | Use to refresh the selected connection. |
| Export | Use to export the details from the Connections page into an XLS or a CSV file. |
To create Application Intelligence sessions, refer to Create an Application Intelligence Session in Virtual Environment.
Refer the following Gigamon Validated Design for more detailed information on how to achieve deep observability in Azure


