Install New GigaVUE‑FM using OVA file on VMware ESXi
The GigaVUE‑FM software package is distributed as an OVA file.
Use the vSphere Client to install the GigaVUE‑FM OVA file. Starting from software version 5.3, you cannot deploy GigaVUE‑FM directly from the ESXi host. You must login to the VCenter on the vSphere client to deploy a GigaVUE‑FM instance.
Note: The OVA file must be stored in a location that is accessible to the vSphere Client. This location cannot be a datastore accessible to the ESXi host which will be the target of the deployment.
The following steps are shown using the ESXi version 6.x. To deploy a GigaVUE‑FM instance:
- Log in to the VMware vCenter web interface.
- Go to Menu > VMs and Templates.
- Right-click the ESXi Host or data center on which you want to deploy GigaVUE‑FM 5.16, and then select Deploy OVF Template.
Note: GigaVUE‑FM v5.8 is used for illustration purposes only throughout this example. In your deployment, you will select the version that you are deploying.
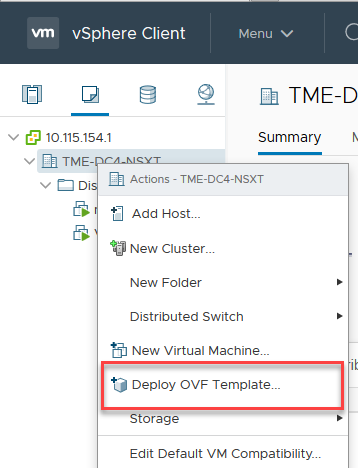
| 1 | vSphere Client: OVF Template |
The Deploy OVF Template wizard opens.

| 2 | vSphere Client: Find the Location of the OVA File |
- In the Select an OVF template page of the Deploy OVF Template wizard, choose one of the following options:
| a. | URL—Enter the URL from where you want to download and install the OVF package. |
| b. | Local file—Click Browse to navigate to the OVA file available on your local machine, and then select the OVA file. |
- Click the Next. The Select a name and folder page of the Deploy OVF Template wizard appears.
Note: This example uses GigaVUE‑FM v5.8 for illustration purposes only. In your instance, you will see the version you are deploying.
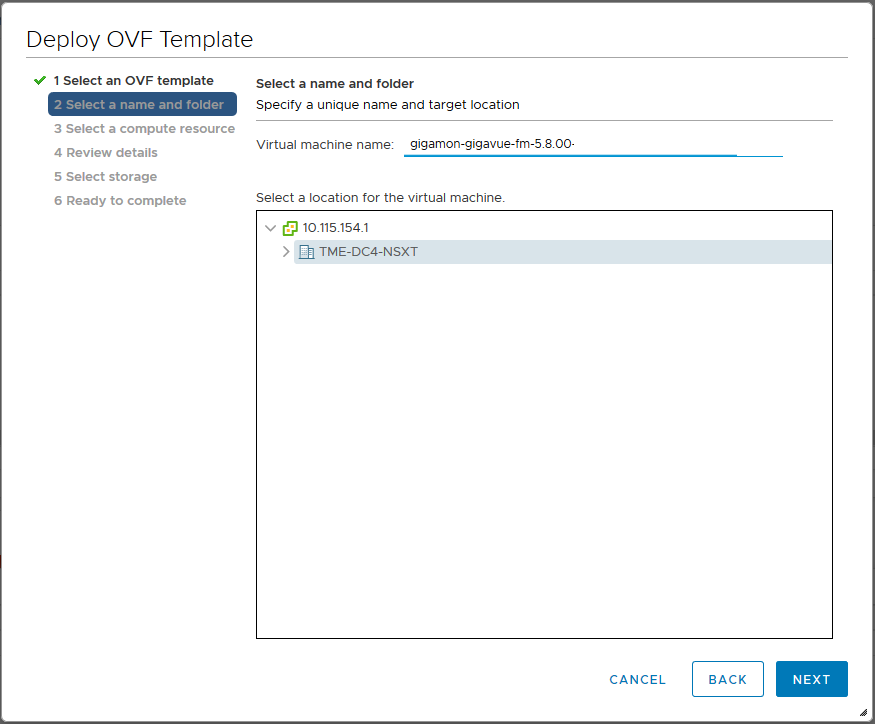
| 3 | vSphere Client: Enter Name and Location for OVA File on ESXi Server |
- Specify a unique name for the GigaVUE‑FM instance, and then select a location and host to which you want to deploy the GigaVUE‑FM instance.
- Click Next. The Select a compute resource page of the Deploy OVF Template wizard appears.
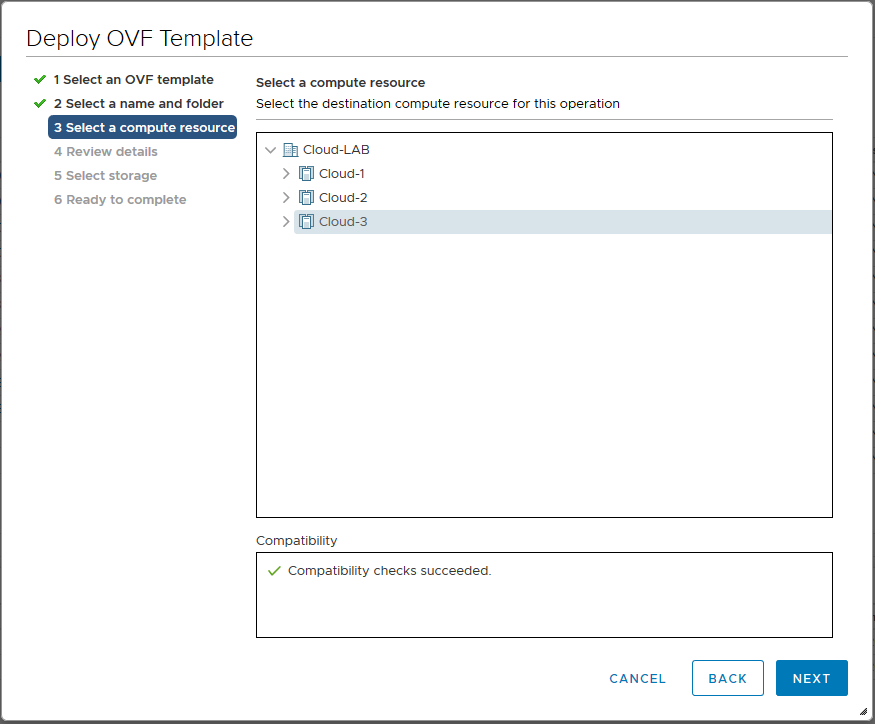
| 4 | vSphere Client: Select a Compute Resource for the OVF Deployment |
- Select a destination compute host for the OVF deployment. The Deploy OVF Template wizard performs a validation to ensure that the selected host has all the resources required for the GigaVUE‑FM deployment.
- Click Next. The Review details page of the Deploy OVF Template wizard appears.
Note: This example uses GigaVUE‑FM v5.8 for illustration purposes only. In your instance, you will see the version you are deploying.
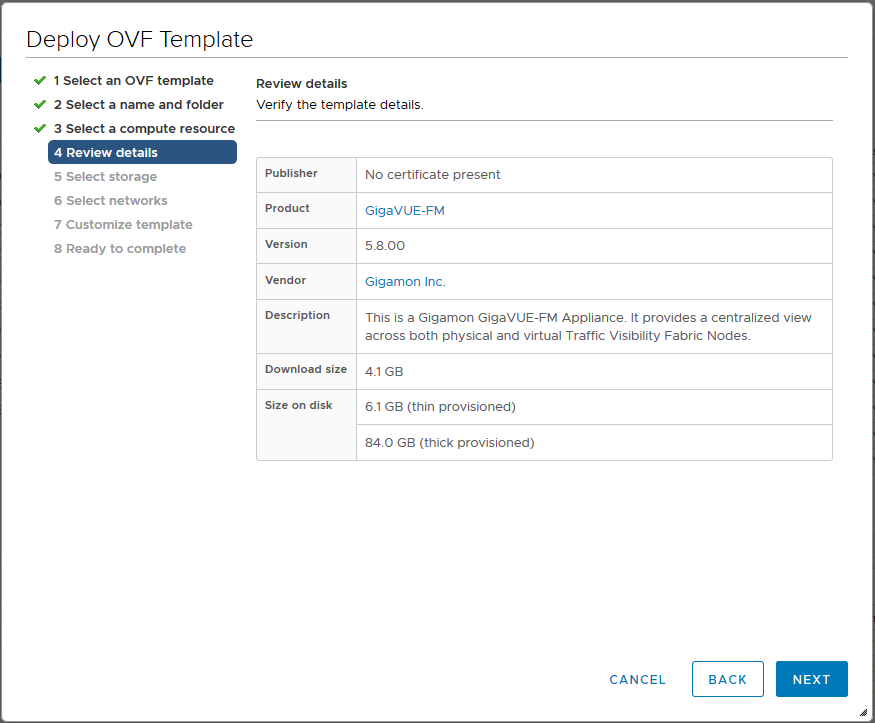
| 5 | vSphere Client: Review Details |
- Verify the OVF template details, and then click Next. The Select storage page of the Deploy OVF Template wizard appears.
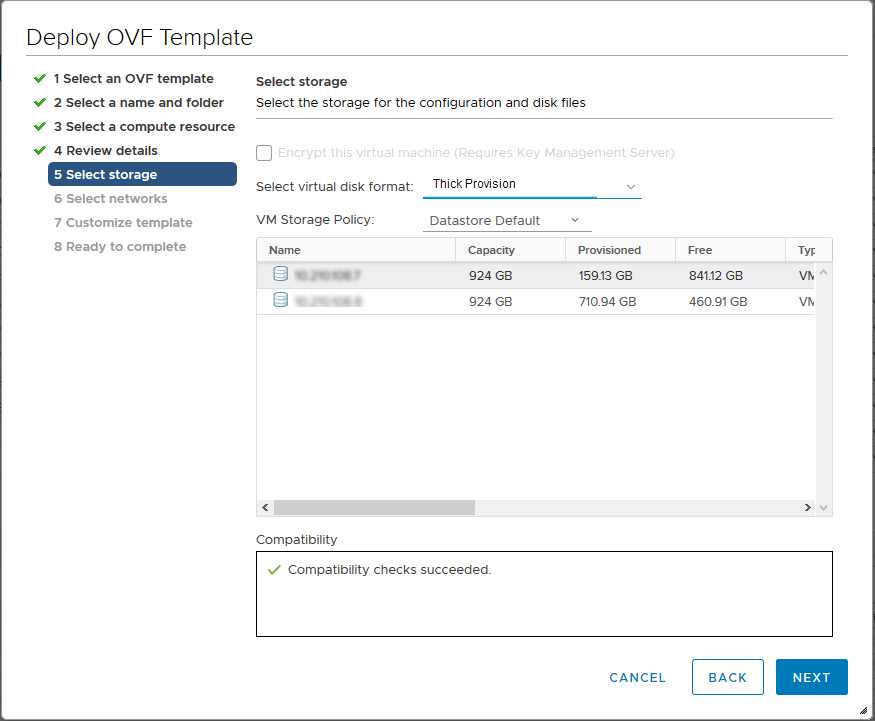
| 6 | vSphere Client: Select Storage |
- Select the format for the virtual disks and provisioning from the Select virtual disk format drop-down list.
- Select the datastore where the virtual machine’s files will be stored.
- Click Next. The Select networks page of the Deploy OVF Template wizard appears.
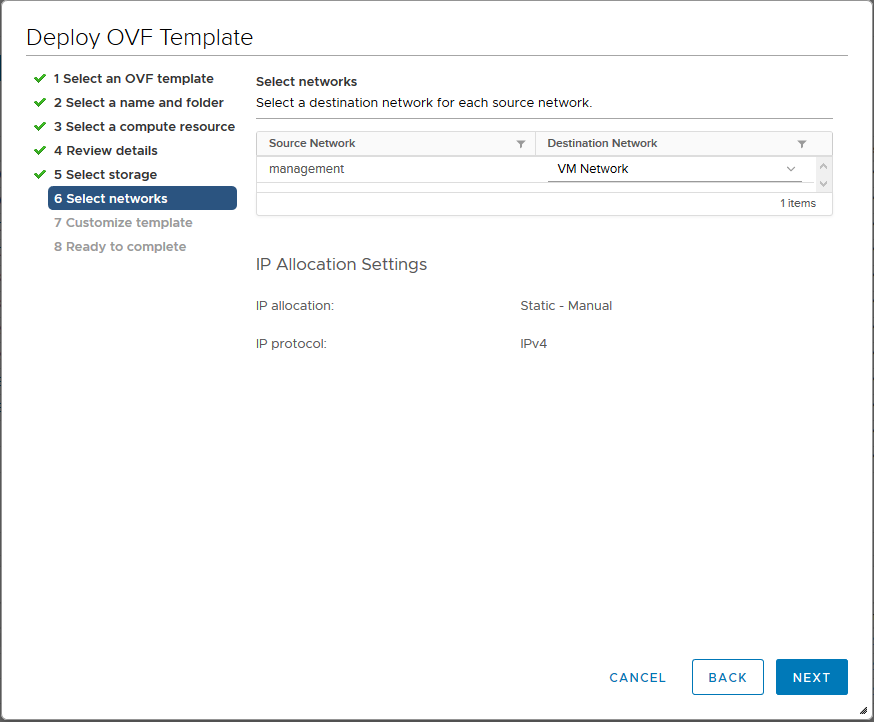
| 7 | vSphere Client: Select Networks |
- Set network mapping by doing either of the following, depending on how your are deploying, and then click Next:
| If you are not deploying on a standalone ESXi host, the Network Mapping displays under Source Networks. Use the drop-down lists to assign the correct Destination Network to the source network. |
| If you are deploying GigaVUE‑FM on a standalone ESXi host, the network mapping is set automatically by assigning the destination network to the VM Network. In case of multiple port groups, you need to manually assign the destination network to the VM Network. |
- Click Next. The Customize template page of the Deploy OVF Template wizard appears.
- In the System Hostname field, enter the hostname of the GigaVUE‑FM instance, and then specify 40 GB as the size of the data disk.
- Set the admin password. When setting the admin password using GigaVUE‑FM UI, then the password must be a minimum of 11 characters and a maximum of 30 characters. The characters must include at least:
| One numerical character |
| One upper case character |
| One lower case character |
| One special character |
Note: The password that you set here is applicable only to the GigaVUE‑FM Shell. To access the GigaVUE‑FM UI, the default username is admin and password is admin123A!!. You can change the password when you first login to the GigaVUE‑FM UI.
If the password does not meet the complexity requirements:
| The system displays an error message in the GigaVUE‑FM UI. |
| The parameters configured above are not passed on to the GigaVUE‑FM except the host name parameter. |
| The static IP addresses that were configured originally will be unavailable after GigaVUE‑FM is deployed. |
- (Optional) Complete the IP Networking configurations such as the default gateway for the management port, IP address of the DNS server, and the domain name for this GigaVUE‑FM instance.
- (Optional) Complete the NTP configurations such as the IP address and version of the NTP server, and then click Next.
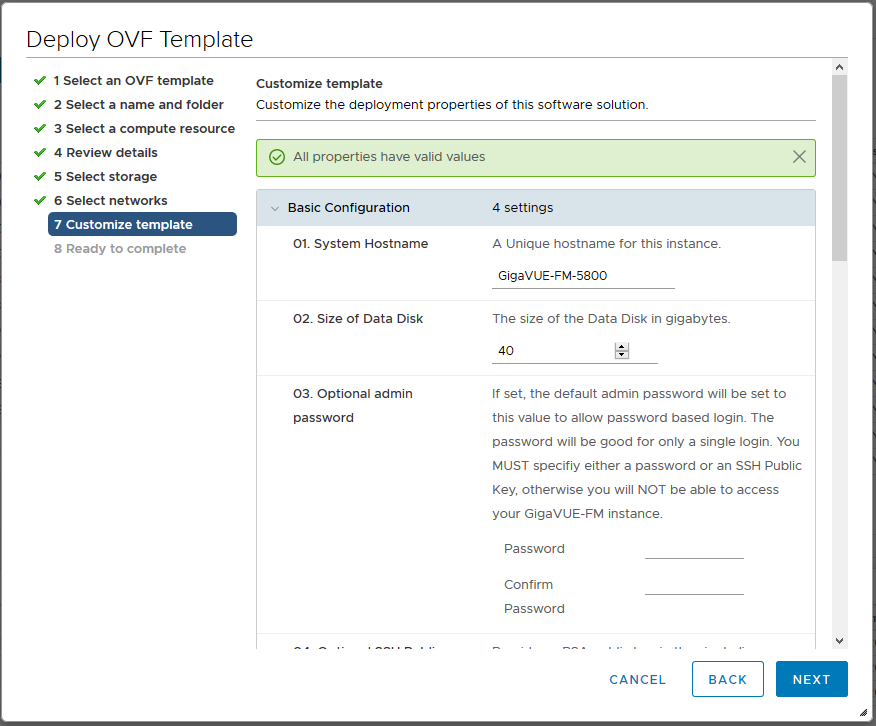
| 8 | vSphere Client: Customize Template |
Note: You can also choose to perform the IP Networking and NTP configurations by running the fmctl jump-start command after you power on the GigaVUE‑FM instance at the successful completion of the OVF template deployment. For details, refer to Perform Network Configurations
The Ready to Complete page of the Deploy OVF Template wizard appears.
Note: This example uses GigaVUE‑FM v5.8 for illustration purposes only. In your instance, you will see the version you are deploying.
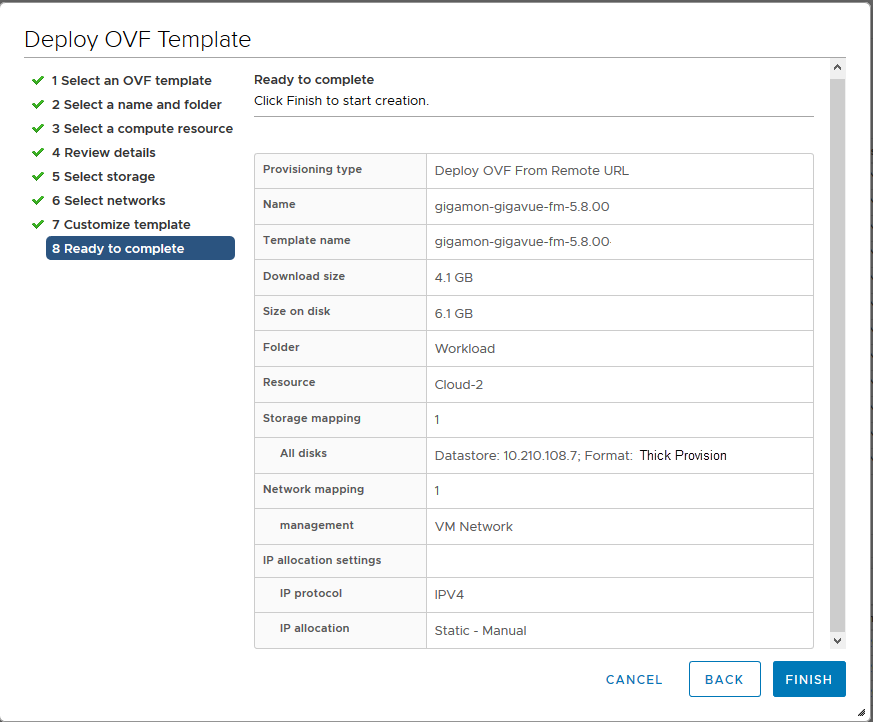
| 9 | vSphere Client: Final Verification Before Installation |
- Verify that all of the settings are correct, and then click Finish. The Recent Tasks pane of the vSphere Client Home page shows the progress of the deployment operation.

| 10 | vSphere Client: OVF Deployment Progress |
When the operation completes, you have successfully deployed a GigaVUE‑FM instance.
Important: Clear the browser cache before logging in to GigaVUE‑FM.


