Perform Initial Configuration
Before powering on GigaVUE‑FM, you can optionally perform the following:
Perform Network Configurations
To perform the initial configuration:
|
1.
|
Log in to GigaVUE-FM using one of the following methods: |
|
o
|
If you have a static IP address set up for the GigaVUE-FM, log in through SSH. |
|
o
|
If you do not have a static IP address set up for the GigaVUE-FM, complete the following steps: |
|
a.
|
Log in to the VMware vCenter web interface. |
|
b.
|
Go to Menu > VMs and Templates. |
|
c.
|
Right-click the GigaVUE-FM virtual machine, and select Open Remote Console. |
|
d.
|
Log in with your GigaVUE-FM Shell credentials. |
|
2.
|
Perform the following steps to complete the initial configuration: |
- Run the fmctl jump-start command. The Initial System Configuration screen appears as shown in the following figure:
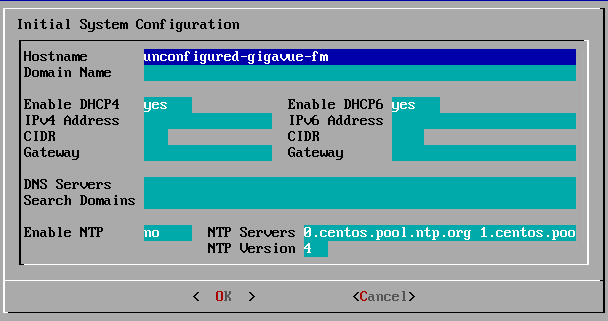
- Provide a unique hostname for GigaVUE‑FM. Note that the hostname may contain letters, numbers, periods (.), and hyphens (-), but may not begin with a hyphen. No other special characters are permitted.
- Enter the required domain name.
- Decide whether to use DHCP for the management interface. Choose one of the following options:
- If you enter yes, the IPv4 Address or IPv6 Address, CIDR, Gateway, DNS Servers, and Search Domains are dynamically set up for the management interface.
- If you enter no, you must provide the following:
- IPv4 Address or IPv6 Address, and the respective CIDR and Gateway.
- In the DNS Servers field, provide the address of any additional name servers required. Enter the set of IP addresses with spaces in between.
- In the Search Domains field, provide the required DNS domains with spaces in between.
- You can choose to either enable or disable NTP. In the Enable NTP field, enter one of the following:
- Yes—Use NTP to synchronize the time between GigaVUE‑FM virtual machine and the NTP server. In the NTP Servers and NTP Version fields, enter the NTP server address and the version number of the NTP server.
- No—you can skip the next step and directly save your configurations.
- Select OK to save your configurations.
- Reboot your GigaVUE‑FM virtual machine.
You can now access GigaVUE‑FM by opening a browser and entering its IP address (the IP address you specified).
Add Additional vNIC, vCPUs, and Increase Memory
Gigamon allows you to configure GigaVUE‑FM with two network interfaces—eth0 and eth1. The network interface eth0 can be configured to connect to a network used to manage Gigamon devices. The other network interface eth1 can be configured to connect to a network hosting different servers like SMTP server, Archive server, and so on.
Follow the steps given below to add Additional vNIC, vCPUs, and increase memory:
- Right-click the GigaVUE-FM instance and select Edit Settings... . The Edit Settings dialog box opens.
- Click on the Virtual Hardware tab, edit the memory and CPU details to increase the memory and add vCPUs.
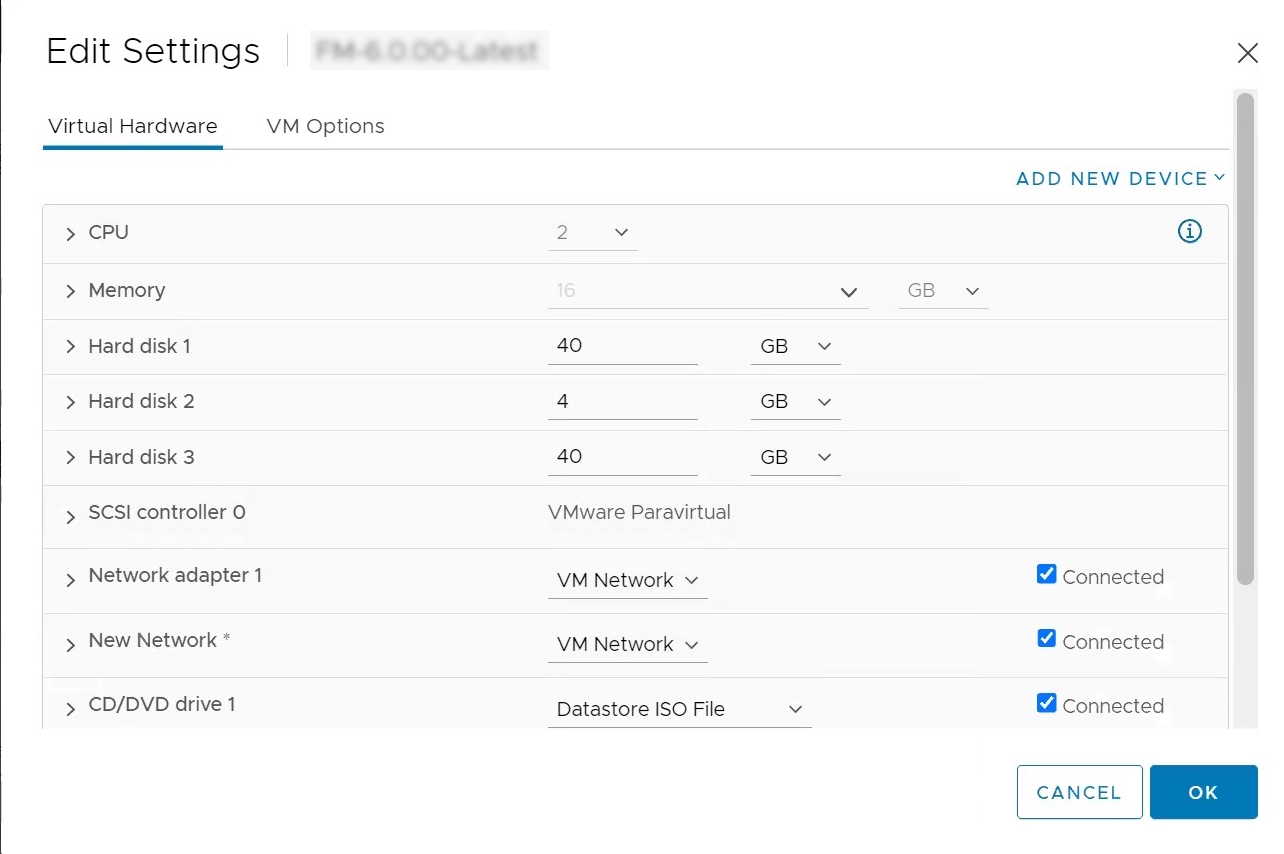
- Click on the Add New Device drop-down in the top right corner.
- Select Network Adapter under Network. A New device (additional vNIC) is added to GigaVUE‑FM.


