Add Users
This section provides the steps for adding users. You can add users only if you are a user with fm_super_admin role or a user with either read/write access to the GigaVUE‑FM security Management category.
Important: It is recommended to create users through GigaVUE‑FM:
|
■
|
You cannot view or manage users created in GigaVUE‑FM CLI using GigaVUE‑FM. |
|
■
|
You cannot view changes made to the users in GigaVUE‑FM CLI in GigaVUE‑FM. |
Note: Monitor and operator users are not available in GigaVUE‑FM. However, if you upgrade from a previous version in which monitor/operator users have been mapped in map default user, then after upgrade:
| ■ | In AAA: Users authenticated through the external servers will be assigned the fm_user role. |
| ■ | In LDAP: Remote group based DN entry will not be migrated. |
To add users perform the following steps:
|
1.
|
On the left navigation pane, click Settings  and select Authentication > GigaVUE-FM User Management > Users. The User page is displayed. and select Authentication > GigaVUE-FM User Management > Users. The User page is displayed. |

|
2.
|
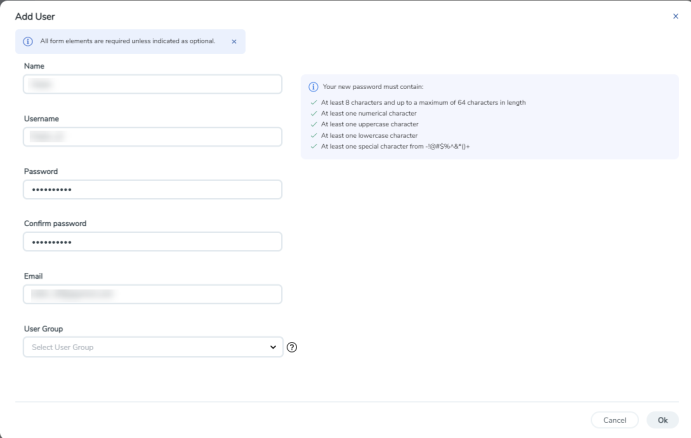
Click New User. In the Add User wizard that appears perform the following steps. |

|
a.
|
In the Add User pop-up box, enter the following details: |
|
o
|
Name: Actual name of the user |
|
o
|
Username: User name configured in GigaVUE-FM |
|
o
|
Email: Email ID of the user |
Note: GigaVUE‑FM will prompt for your password.
|
b.
|
Click Ok to save the configuration. |
The new user is added to the summary list view.
You can also assign users to roles and user groups that set the access permissions. Refer to the following sections for details:
Note: If you have logged in as a user with fm_super_admin role or a user with either read/write access on GigaVUE‑FM security Management category, then click on the ellipsis to:
|
■
|
Assign User Group: Assign user group to users. |
|
■
|
Edit: Edit the user details. |
|
■
|
Unlock: Unlock a locked user. |
How to Unlock User Account
To unlock a locked user, you must be a user with fm_super_admin role or a user with either read/write access on GigaVUE‑FM security Management category.
To unlock:
-
Select the required user whose account you want to lock.
- Click on the ellipses and select Unlock. You can also click the Actions drop-down button and select Unlock.
-
A notification message prompts up. Click Unlock to unlock the user.
The user account is unlocked. An event is triggered in the Events page, and an email will be sent if Email Notification settings are configured.


