Upgrade GigaVUE-FM from the UI
This section describes the steps to upgrade GigaVUE-FM from the UI. You can upgrade by using an image that is located on an external image server, or you can use the image that is available on the internal server.
You can upgrade an image in GigaVUE‑FM from the UI in two ways:
| Upgrade using image in External Image Server |
| Upgrade using image in Internal server |
Before you upgrade GigaVUE‑FM from the UI, follow the given rules and notes:
- When using the GigaVUE-FM UI to upgrade GigaVUE-FM, you can only upgrade to the current version or the next version. You cannot downgrade.
- When upgrading GigaVUE-FM to the latest image file, the upgrade operation will fail if GigaVUE-FM already has three image files. Delete the unused image files before proceeding to download a new image file.
- Starting from software version 5.15.00, subsequent GigaVUE-FM upgrade operation to higher versions deletes the upgraded GigaVUE-FM image file irrespective of the completion status. For example, when upgrading from 5.15.00 to 5.16.00, irrespective of whether the upgrade process fails or succeeds, GigaVUE-FM deletes the 5.16.0.0 image file at the end of the upgrade process.
Note: You can enable auto-purge of GigaVUE-FM images using an API. Contact Gigamon Technical Support for assistance.
IMPORTANT: After upgrading GigaVUE-FM, it is recommended to clear the cache and refresh the browser to avoid any potential browser issues.
Upgrade using image in External Image Server
This section provides the steps for upgrading the GigaVUE-FM from an image stored on an external server. The image can be transferred from the server to the GigaVUE-FM using SCP file protocol.
To upgrade GigaVUE‑FM with an image stored on an external image server, you must sequentially perform the tasks in the following table:
|
S.No |
Task |
Refer to |
|---|---|---|
| 1 | Upload the image to external image server | Upload image to external image server |
| 2 | Add the image from the external server to GigaVUE‑FM | Add image from external server to GigaVUE‑FM |
| 3 | Upgrade GigaVUE‑FM using external image | Upgrade GigaVUE‑FM using External image |
Upload image to external image server
| 1. | Upload the image to the external image server to make it available to GigaVUE-FM. |
Register on the Gigamon Customer Portal to obtain software images and download the software.
| 2. | Add the image server to GigaVUE-FM. This stores the credentials, image file name, and IP address of the server on GigaVUE-FM. |
Add image from external server to GigaVUE‑FM
To add the image from the external server, perform the following steps:
| 1. |
On the left navigation pane, click Settings |
| 2. | Go to System > Images > External Servers. |
| 3. | Click Add. The Add External Server page appears. |
| 4. | In the Add External Server Page enter the following details: |
| • | An alias to help identify the image server. |
| • | The host IP address of the server. |
| • | The protocol to use for the download: SCP. |
| • | The user name and password. |
| 5. | Click OK. |
The External Server page displays the newly added external server.
Upgrade GigaVUE‑FM using External image
| 1. | Click the Profile  options on the top navigation bar. options on the top navigation bar. |
| 2. | Select Upgrade from the drop-down list box to view the Software Upgrade page. |
The Software Upgrade page provides the GigaVUE‑FM details such as Host Name, Node Status, IP Address, Role, System Uptime, and Version.
| 3. | Select the image server type as External Image Server from the Image Server Type drop-down list box. |
| 4. | Select the server in which image is stored from the Image Server drop-down list box. |
Note: If the image server is not available in the Image Server drop-down list box, Click Add External Server and enter the details provided in Step 5 in the section Add image from external server to GigaVUE‑FM
| 5. | Enter the path used for storing the image in the Image File Path. |
| 6. | Click Start Upgrade. |
A confirmation message appears to refrain from performing any task during the process of upgrade.
| 7. | Click OK. |
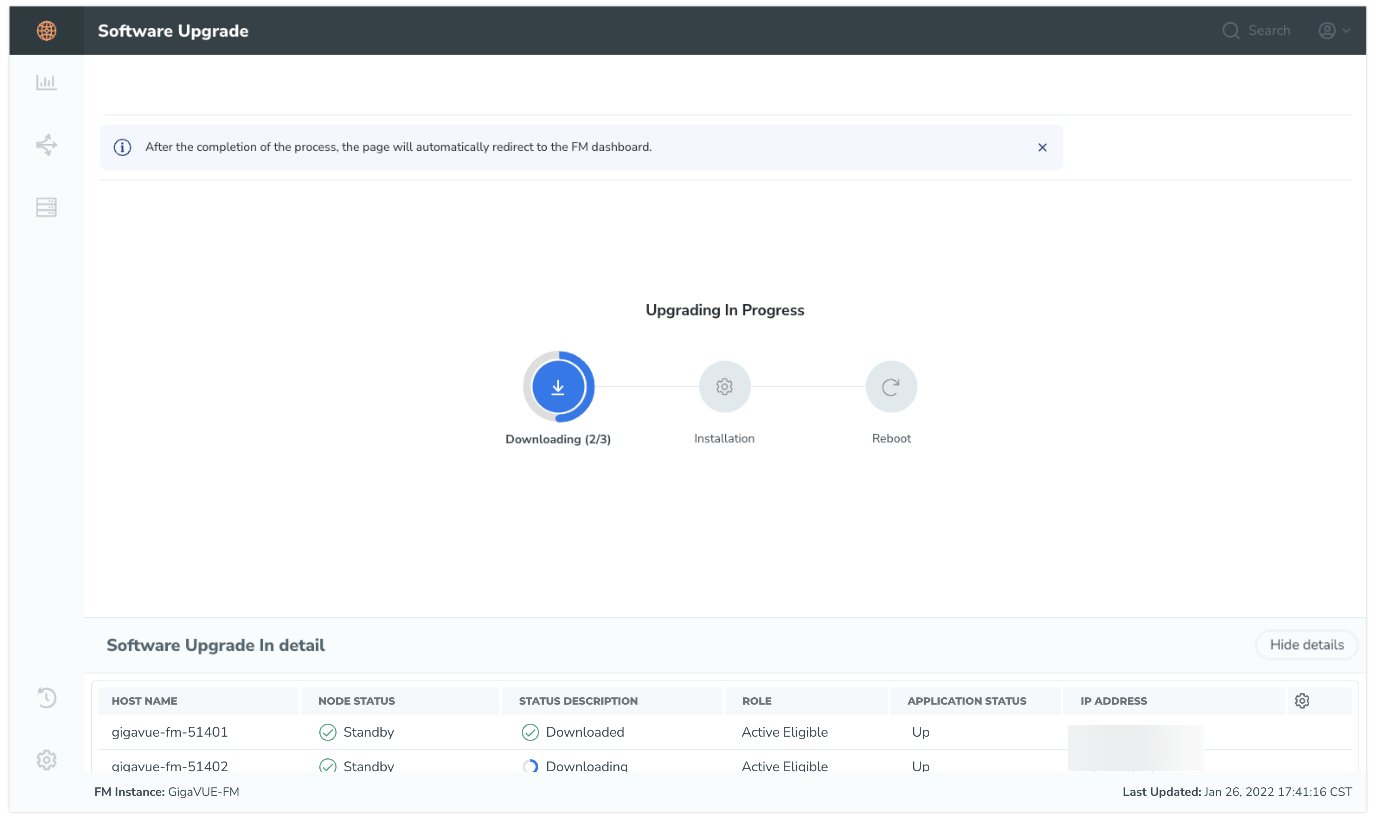
GigaVUE‑FM notifies the various stages of theupgrade and also the completion of the upgrade process.
Upgrade using image in Internal server
This section provides the steps for upgrading GigaVUE-FM when the image is available in the internal server.
Upgrading from GigaVUE-FM 5.6.01 to 5.7.xx.00 or 5.7.01 via an internal image will not work because internal server storage does not function during the upgrade procedure. Alternatively, you can upgrade using an external image server or the GigaVUE-FM CLI or you can store the image in your machine and point to it as if it were an external server as follows :
- Add the GigaVUE-FM image under the GigaVUE-FM internal image server (/config/gigamon/imagesRepo).
- Configure the GigaVUE-FM external server with the GigaVUE-FM IP address.
- Initiate the upgrade process, select External Image Server, and then specify the path to the GigaVUE-FM Image file that you added in step 1 (/config/gigamon/imagesRepo/fma5700.img).
To upgrade a GigaVUE-FM using internal image files, you must sequentially perform the tasks in the following table:
|
S.No |
Task |
Refer to |
|---|---|---|
| 1 | Download the Image | Download Image |
| 2 | Upload the image file to GigaVUE‑FM | Upload the image file to GigaVUE‑FM |
| 3 | Upgrade GigaVUE‑FM using Internal image | Upgrade GigaVUE‑FM using Internal image |
Download Image
Download the images from the Gigamon website and place them where they can be uploaded to GigaVUE-FM. To obtain software images, register on the Gigamon Customer Portal and download the software.
Upload the image file to GigaVUE‑FM
To upload the images file to GigaVUE-FM, follow these steps:
| 1. |
On the left navigation pane, click Settings |
| 2. | Go to System > Images > Internal Image Files and do the following: |
| a. | On the Internal Image File page, click Upload. |
| b. | Click Choose to locate the image file on the Upload Internal Image Files page. |
| c. | Click OK to upload the file. The page displays the progress of the upload. |
After the upload is completed, you can see the GigaVUE-FM image to use for the upgrade on the Internal Images Files page.
Upgrade GigaVUE‑FM using Internal image
| 1. | Click the Profile options on the top navigation bar and select Upgrade. |
| 2. | Select Upgrade from the drop-down list box to view the Software Upgrade page. |
The Software Upgrade page provides the GigaVUE‑FM details such as Host Name, Node Status, IP Address, Role, System Uptime, and Version.
| 3. | Select the image server type as Internal Image Server from the Image Server Type drop-down list box. |
| 4. | From the Version drop-down list, select the version to which you are upgrading. |
| 5. | Click Start Upgrade. |
Note: If the image server is not available in the Image Server drop-down list box, Click Add Internal Server and perform the actions provided in Step 2 in the section Upload the image file to GigaVUE‑FM
A confirmation message appears to refrain from performing any task during the upgrade process.
| 6. | Click OK. |
Note: You can only upgrade to another instance of the current version or the immediate next version. Downgrading to a lower version is not supported through the UI.
GigaVUE‑FM notifies the various stages of upgrade and also the completion of the upgrade process.
Note: When you change the IP address of the GigaVUE‑FM instance using the jump-start configuration, the internal database and the in-memory caches of the GigaVUE‑FM instance are not updated. The Database continues to have the IP address of the old GigaVUE‑FM, and the image upgrade using the internal server option does not work. To fix this, you must restart the GigaVUE-FM instance after upgrade.
On the left navigation pane, click Settings ![]() , to monitor the progress and status of the upgrade and select Events on the left navigation pane. Also, email notifications are sent if email notifications have been configured.
, to monitor the progress and status of the upgrade and select Events on the left navigation pane. Also, email notifications are sent if email notifications have been configured.


