Replacing a Fan Tray
Replace a failed fan tray with a working fan tray using the following procedures.
Note: Work quickly to remove the failed fan tray and insert the working fan tray. The GigaVUE‑HC2 should not be without cooling for more than 60 seconds.
To remove a fan tray:
|
1
|
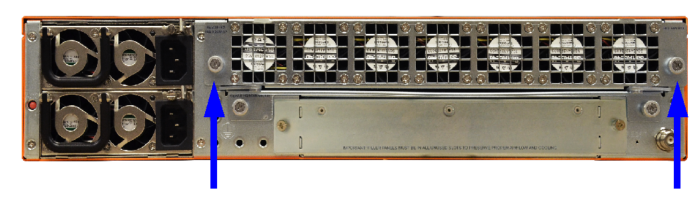
Fan Tray Screw Location on GigaVUE‑HC2 Rear |
|
2.
|
Use a Phillips screw driver to remove the two screws. |
|
3.
|
Pull the failed fan tray out of the slot and set it aside. |
To insert a fan tray:
|
1.
|
Place the working fan tray into the empty slot and slide it in until it is flush with the chassis rear and will not slide in any further. |
|
2.
|
Use a Phillips screw driver to tighten the two screws. |


