Configure GigaVUE Fabric Components in OpenStack
You can use your own OpenStack orchestration system to deploy GigaVUE fabric nodes and use GigaVUE-FM to configure the advanced features supported by these nodes. These nodes register themselves with GigaVUE-FM using the information provided by your OpenStack orchestration system. Once the nodes are registered with GigaVUE-FM, you can configure monitoring sessions and related services in GigaVUE-FM. Health status of the registered nodes are determined by the heartbeat messages sent from the respective nodes.
Note: Deployment of GigaVUE fabric components through a third-party orchestrator is supported on Linux and Windows platforms. Refer to Linux UCT-V Installation and Windows UCT-V Installation for detailed information.
In your OpenStack dashboard, you can configure the following GigaVUE fabric components:
- Configure V Series Nodes and Proxy in OpenStack
- Configure UCT-V Controller in OpenStack
- Configure UCT-V in OpenStack
Configure V Series Nodes and Proxy in OpenStack
To configure V Series Nodes and V Series Proxy in OpenStack platform:
-
Before configuring GigaVUE fabric components through OpenStack, you must create a monitoring domain in GigaVUE-FM. Refer to Create Monitoring Domain for detailed instructions.
Note: You can use OpenStack Orchestrator for GigaVUE fabric node configuration only using V Series 2 nodes.
- In the Monitoring Domain Configuration page, select No for the Use FM to Launch Fabric field as you are going to configure the fabric components in OpenStack Orchestrator.

- In your OpenStack environment, you can deploy V Series nodes or V Series proxy using the following methods:
Register V Series Nodes or V Series Proxy using OpenStack GUI
To register V Series nodes or proxy using the user data in OpenStack GUI:
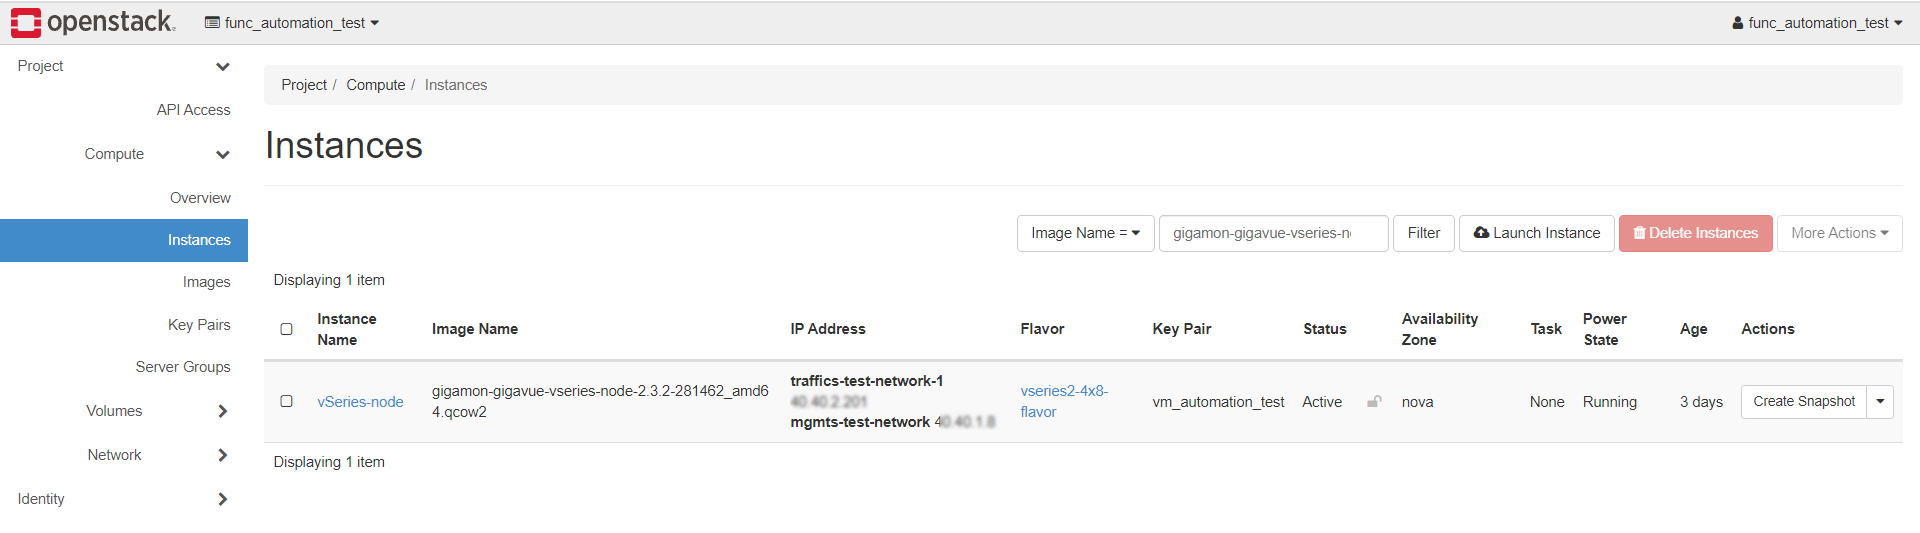
- On the Instance page of OpenStack dashboard, click Launch instance. The Launch Instance wizard appears. For detailed information, refer to Launch and Manage Instances topic in OpenStack Documentation.
- On the Configuration tab, enter the Customization Script as text in the following format and deploy the instance. The V Series nodes or V Series proxy uses this customization script to generate config file (/etc/gigamon-cloud.conf) used to register with GigaVUE-FM.
#cloud-config
write_files:
- path: /etc/gigamon-cloud.conf
owner: root:root
permissions: '0644'
content:
Registration:
groupName: <Monitoring Domain Name>
subGroupName: <Connection Name>
user: orchestration
password: orchestration123A!
remoteIP: <IP address of the GigaVUE-FM>
remotePort: 443
- You can register your V Series node directly with GigaVUE‑FM or you can use V Series proxy to register your V Series node with GigaVUE‑FM. If you wish to register V Series node directly, enter the
remotePortvalue as 443 or if you wish to deploy V Series node using V Series proxy then, enter theremotePortvalue as 8891. - Use only the default
userandpassworddetails given in the user data. - If there is no monitoring domain in GigaVUE‑FM with the same monitoring domain name and connection name as given in your user data, then GigaVUE‑FM automatically creates a monitoring domain under AnyCloud and your V Series nodes or proxys gets deployed under that monitoring domain.
- In this case, the Traffic Acquisition Tunnel MTU is set to the default value 1500. to edit the Traffic Acquisition Tunnel MTU, select the monitoring domain and click on the Edit Monitoring Domain option. Enter the Traffic Acquisition Tunnel MTU and click Save.
Register V Series Node or V Series Proxy using a configuration file
To register V Series node or proxy using a configuration file:
- Log in to the V Series node or proxy.
- Edit the local configuration file (/etc/gigamon-cloud.conf) and enter the following customization script.
Registration:
groupName: <Monitoring Domain Name>
subGroupName: <Connection Name>
user: orchestration
password: orchestration123A!
remoteIP: <IP address of the GigaVUE-FM>
remotePort: 443
Note: If you wish to register V Series node using V Series proxy then, enter the
remotePortvalue as 8891. - Restart the V Series node or proxy service.
- V Series node:
$ sudo service vseries-node restart
- V Series proxy:
$ sudo service vps stop
The deployed V Series node or V Series proxy registers with the GigaVUE-FM. After successful registration the V Series node or proxy sends heartbeat messages to GigaVUE-FM every 30 seconds. If one heartbeat is missing ,the fabric node status appears as 'Unhealthy'. If more than five heartbeats fail to reach GigaVUE-FM, GigaVUE‑FM tries to reach the V Series node or proxy and if that fails as well then GigaVUE‑FM unregisters the V Series node or proxy and it will be removed from GigaVUE‑FM.
- V Series node:
Configure UCT-V Controller in OpenStack
To configure GigaVUE fabric components in OpenStack platform:
- Before configuring GigaVUE fabric components through OpenStack, you must create a monitoring domain in GigaVUE-FM. While creating the monitoring domain, select UCT-V as the Traffic Acquisition Method. Refer to Create Monitoring Domain for detailed instructions.
Note: You can use OpenStack Orchestrator for GigaVUE fabric node configuration only using V Series 2 nodes.
- In the Monitoring Domain Configuration page, select No for the Use FM to Launch Fabric field as you are going to configure the fabric components in OpenStack Dashboard.
- In your OpenStack environment, launch the UCT-V Controller using any of the following methods:
Register UCT-V Controller using OpenStack GUI
To register UCT-V Controller using the user data in OpenStack GUI:
- On the Instance page of OpenStack dashboard, click Launch instance. The Launch Instance wizard appears. For detailed information, refer to Launch and Manage Instances topic in OpenStack Documentation.
- On the Configuration tab, enter the Customization Script as text in the following format and deploy the instance. The UCT-V Controller uses this customization script to generate config file (/etc/gigamon-cloud.conf) used to register with GigaVUE-FM.
#cloud-config
write_files:
- path: /etc/gigamon-cloud.conf
owner: root:root
permissions: '0644'
content:
Registration:
groupName: <Monitoring Domain Name>
subGroupName: <Connection Name>
user: orchestration
password: orchestration123A!
remoteIP: <IP address of the GigaVUE-FM>
remotePort: 443
- Use only the default
userandpassworddetails given in the user data. - If there is no monitoring domain in GigaVUE‑FM with the same monitoring domain name and connection name as given in your user data, then GigaVUE‑FM automatically creates a monitoring domain under AnyCloud and your V Series nodes or proxys gets deployed under that monitoring domain.
- In this case, the Traffic Acquisition Tunnel MTU is set to the default value 1500. to edit the Traffic Acquisition Tunnel MTU, select the monitoring domain and click on the Edit Monitoring Domain option. Enter the Traffic Acquisition Tunnel MTU and click Save.

The UCT-V Controller deployed in OpenStack appears on the Monitoring Domain page of GigaVUE-FM.
Register UCT-V Controller using a configuration file
To register UCT-V Controller using a configuration file:
- Log in to the UCT-V Controller.
- Edit the local configuration file (/etc/gigamon-cloud.conf) and enter the following user data.
Registration:
groupName: <Monitoring Domain Name>
subGroupName: <Connection Name>
user: orchestration
password: orchestration123A!
remoteIP: <IP address of the GigaVUE-FM>
remotePort: 443
- Restart the UCT-V Controller service.
$ sudo service uctv-cntlr restart
The deployed UCT-V Controller registers with the GigaVUE-FM. After successful registration the UCT-V Controller sends heartbeat messages to GigaVUE-FM every 30 seconds. If one heartbeat is missing ,the fabric node status appears as 'Unhealthy'. If more than five heartbeats fail to reach GigaVUE-FM, GigaVUE‑FM tries to reach the UCT-V Controller and if that fails as well then GigaVUE‑FM unregisters the UCT-V Controller and it will be removed from GigaVUE‑FM.
- On the Instance page of OpenStack dashboard, click Launch instance. The Launch Instance wizard appears. For detailed information, refer to Launch and Manage Instances topic in OpenStack Documentation.
Note: When you deploy V Series nodes or UCT-V Controllers using 3rd party orchestration, you cannot delete the monitoring domain without unregistering the V Series nodes or UCT-V Controllers.
Configure UCT-V in OpenStack
UCT-V should be registered via the registered UCT-V Controller and communicates through PORT 8891.
Deployment of UCT-Vs through third-party orchestrator is supported on Linux and Windows platforms.
To register UCT-V using a configuration file:
-
Install the UCT-V in the Linux or Windows platform. For detailed instructions, refer to Linux UCT-V Installation and Windows UCT-V Installation.
- Log in to the UCT-V.
- Edit the local configuration file and enter the following user data.
- /etc/gigamon-cloud.conf is the local configuration file in Linux platform.
- C:\ProgramData\uctv\gigamon-cloud.conf is the local configuration file in Windows platform.
Registration:
groupName: <Monitoring Domain Name>
subGroupName: <Connection Name>
user: orchestration
password: orchestration123A!
	remoteIP: <IP address of the UCT-V Controller 1>,
		   <IP address of the UCT-V Controller 2>
remotePort: 8891
Note: Use only the default
userandpassworddetails given in the user data. - Restart the UCT-V service.
- Linux platform:
$ sudo service uctv restart
- Windows platform: Restart from the Task Manager.
- Linux platform:
Note: You can configure more than one UCT-V Controller for a UCT-V, so that if one UCT-V Controller goes down, the UCT-V registration will happen through another Controller that is active.
The deployed UCT-V registers with the GigaVUE-FM through the UCT-V Controller. After successful registration the UCT-V sends heartbeat messages to GigaVUE-FM every 30 seconds. If one heartbeat is missing, UCT-V status appears as 'Unhealthy'. If more than five heartbeats fail to reach GigaVUE-FM, GigaVUE‑FM tries to reach the UCT-V and if that fails as well then GigaVUE‑FM unregisters the UCT-V and it will be removed from GigaVUE‑FM.


