Upgrade with GigaVUE‑FM as the Image Server
This section provides the steps for upgrading the GigaVUE nodes and clusters when GigaVUE‑FM is used as the file server instead of an external server.
Note: You cannot upgrade GigaVUE‑HC1-Plus using GigaVUE‑FM as the image server. To upgrade GigaVUE‑HC1-Plus image you must use an external server. Refer to Upgrade from an External Image Server for step by step instructions on how to upgrade using external image server. This issue occurs only when upgrading from version 6.0.00 to 6.1.00 or 6.2.00 or 6.3.00, when upgrading from version 6.1.00 to 6.2.00 or 6.3.00, or when upgrading from 6.2.00 to 6.3.00.
To upgrade a node or a cluster using internal image files, do the following:
| 1. | Download the images from the Gigamon website and place them where they can be available for uploading to GigaVUE‑FM. |
To obtain software images, register on the Gigamon Customer Portal and download the software. You must provide the serial number for each node you want to update.
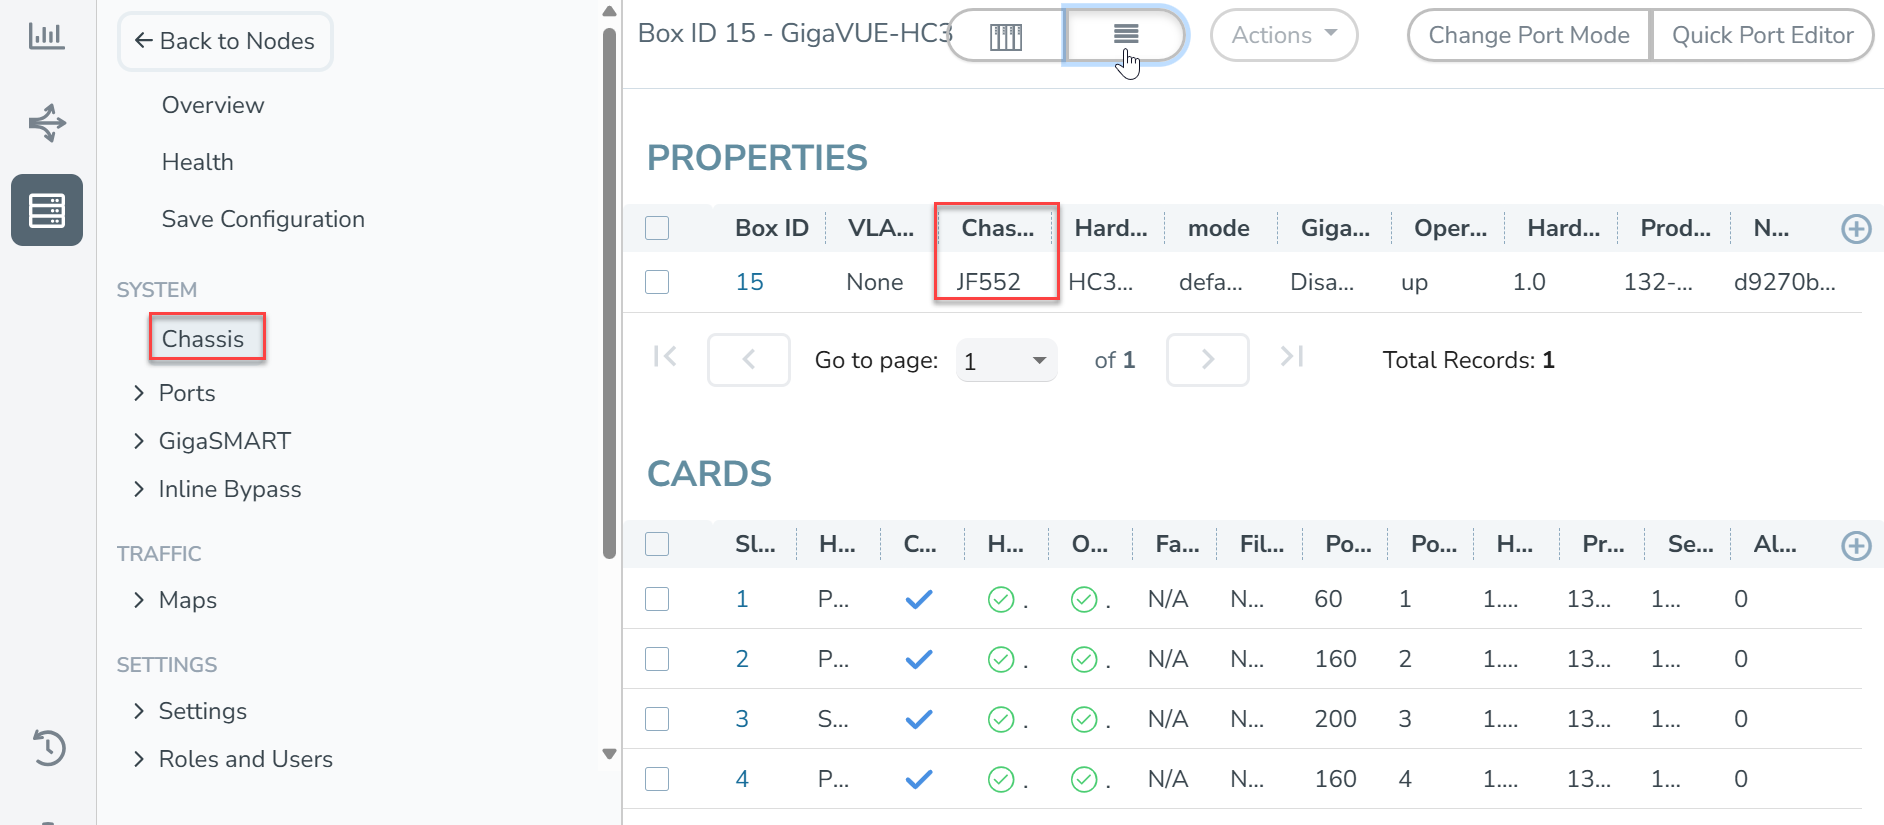
To view the chassis serial number, login to GigaVUE‑OS and follow the below given steps:
| a. | On the left navigation pane, click |
| b. | Click a device from the list, Overview page appears. |
| c. | Click System> Chassis from the navigation pane, the Chassis page appears. |
| d. | Click List View on the chassis page. The device details appears. You will be able to view the chassis serial number. |

| 2. | Select |
| 3. | Select a device on the Physical Nodes page. |
| 4. | Click Actions > Image Upgrade. |
NOTE:
| Use the Node Upgrade option for orchestrated upgrade of nodes, as this Image Upgrade work flow will be deprecated in version 6.10. |
| Use the Signature Upgrade option for orchestrated upgrade of nodes, as this Image Upgrade work flow will be deprecated in version 6.10. |
Under Selected Nodes, the disk space, software version, and hardware type of all the nodes are displayed. When you upgrade a GigaSMART card, under Selected Nodes, additional details like the GigaSMART Build Number, Related GigaSMART Group, GigaSMART Version, GigaSMART Build Date, and GigaSMART Build Release of all the nodes are also displayed. If a device has multiple engine ports then, the GigaSMART card details for all the ports will be displayed.
Note: If the disk space of the selected node or a node in the cluster is low, a message will be displayed indicating that the node will not be upgraded due to low disk space. Delete the unused internal image files to free up the disk space.
| 5. | Enter the following information: |
|
Menu |
Description |
||||||||||||
|
Task Name |
The name of the upgrade task. |
||||||||||||
| Type | Type of upgrade task. For this release version, only the software option is supported. | ||||||||||||
|
Image Server |
The location from where the image can be uploaded. Do the following:
Note: If there is an image file missing in a cluster configuration, the Image file missing error is displayed. |
||||||||||||
|
Backup Config Before Upgrade |
The check box to back up the configuration changes prior to performing the upgrade. |
||||||||||||
|
Reboot After Upgrade |
The check box to reboot the server after performing the upgrade. If you do not select Reboot After Upgrade, you must reload the node manually. To reload the node manually, select the node on the Physical Nodes page and click Actions > Reboot. |
||||||||||||
|
Time |
The time for performing the upgrade. There are two options:
|
| 6. | Click Upgrade. |
Note: When you change the IP address of the GigaVUE‑FM instance using the jump-start configuration, the internal database and the in-memory caches of the GigaVUE‑FM instance are not updated. The Database continues to have the IP address of the old GigaVUE‑FM, and the image upgrade using the internal server option does not work. To fix this, you must restart the GigaVUE-FM instance after upgrade.


