Add Applications (GigaVUE V Series 2)
This section is applicable only if you had deployed your V Series Nodes using third-party orchestration. Refer Configure GigaVUE V Series Nodes using VMware ESXi for more detailed information on how to deploy V Series 2 nodes under AnyCloud Monitoring Domain using VMware ESXi.
GigaVUE Cloud Suite with V Series 2 node supports the following GigaSMART applications:
You can optionally use these applications to optimize the traffic sent from your instances to the monitoring tools.
Slicing
Packet slicing lets you truncate packets after a specified header and slice length, preserving the portion of the packet required for monitoring purposes.
To add a slicing application:
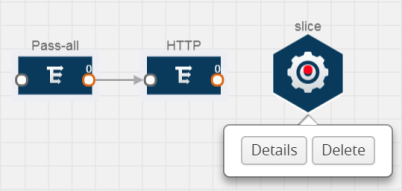
- Drag and drop Slice from APPLICATIONS to the graphical workspace.

- Click the Slice application and select Details.

- In the Alias field, enter a name for the slice.
- For State, select On or Off check box to enable or disable slicing. The state can be changed at a later time whenever required.
- In the Slice Length field, specify the length of the packet that must be sliced.
- From the Protocol drop-down list, specify an optional parameter for slicing the specified length of the protocol. The options are as follows:
- None
- IPv4
- IPv6
- UDP
- TCP
- Click Save.
Masking
Masking lets you overwrite specific packet fields with a specified pattern so that sensitive information is protected during network analysis.
To add a masking application:
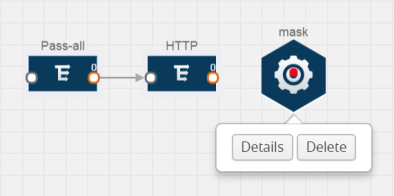
- Drag and drop Mask from APPLICATIONS to the graphical workspace.

- Click the Mask application and select Details.

- In the Alias field, enter a name for the mask.
- For State, select On or Off check box to enable or disable masking. The state can be changed at anytime whenever required.
- In the Mask offset field, enter the offset from which the application should start masking data following the pattern specified in the Pattern field.The value can be specified in terms of either a static offset, that is, from the start of the packet or a relative offset, that is, from a particular protocol layer as specified in the Protocol field.
- In the Mask length field, enter the length of the packet that must be masked.
- In the Mask pattern field, enter the pattern for masking the packet. The value of the pattern is from 0 to 255.
- From the Protocol drop-down list, specifies an optional parameter for masking packets on the data coming from the selected protocol.
- Click Save.
Dedup
De-duplication lets you detect and choose the duplicate packets to count or drop in a network analysis environment. For detailed information on de-duplication, refer to GigaSMART De-Duplication.
To add a de-duplication application:
- Drag and drop Dedup from APPLICATIONS to the graphical workspace.
- Click the Dedup application and select Details. The Application quick view appears.

- In the Application quick view, enter the information as follows:
- In the Alias field, enter a name for the de-duplication.
- In the Action field, select Count or Drop the detected duplicate packets.
- For IP Tclass, IP TOS, TCP Sequence, and VLAN fields, select Include or Exclude the packets for de-duplication.
- In the Timer field, enter the time interval (in seconds) for de-duplicating the packet.
- Click Save.
Passive SSL Decryption
GigaVUE V Series 2 nodes support Secure Sockets Layer (SSL) decryption. SSL is a cryptographic protocol that adds security to TCP/IP communications such as Web browsing and email. The protocol allows the transmission of secure data between a server and client who both have the keys to decode the transmission and the certificates to verify trust between them. Passive SSL decryption delivers decrypted traffic to out-of-band tools that can then detect threats entering the network.
Note: Passive SSL Decryption is called as SSL Decrypt on GigaVUE V Series 2.
Licensing
GigaSMART Passive SSL Decryption on V Series 2 follows Volume Based License (VBL). Refer Base Bundles for more detailed information.
Configure Passive SSL Decryption on V Series 2
To configure passive SSL Decryption on V Series 2, follow the steps given below:
Prerequisite: Register the nodes on the AnyCloud Monitoring Domain using the VMware ESXi host. Refer Configure GigaVUE V Series Nodes using VMware ESXi for more detailed information.
Upload SSL Keys
To upload an SSL private key, do the following:
- On the left navigation pane, select Inventory >Resources > Security to open the Security page. Select SSL Keys on the top navigation bar.
- Click Add. The Create SSL Key page appears.
- In the Create SSL Key page, enter the following details:
- For Alias, enter an alias for the SSL key.
- For Description, enter any additional information for the SSL key.
- For Key Upload Type, select PEM or PKCS12.
- (optional) For Passphrase, enter a passphrase for the key.
- Select a Private Key by pasting the copied key in PEM format or installing from URL or installing from local directory.
- Select a Certificate by pasting the copied key in PEM format or installing from URL or installing from local directory.
Note: Install from URL option only supports scp protocol.
- Click Save.
Note: Passive SSL Decryption on V Series 2 does not support HSM.
Delete SSL Keys
To delete a particular SSL key select the key on the SSL Keys page, and then select Delete. To delete all SSL Keys, select the Delete All button.
Create SSL Service
After you have uploaded a private key, you can add a service. A service maps to a physical server, such as an HTTP server. One server can run multiple services. A service is a combination of an IP address and a server port number. Also, the key and the service must be tied together.
Prerequisite
Before creating a service, upload a private key as described in Upload SSL Keys
To create a service, do the following:
| 1. | On the left navigation pane, select Inventory >Resources > Security to open the Security page. Select SSL Service on the top navigation bar.The SSL Services page appears. |
| 2. | Click Add. |
| 3. | On the SSL Service configuration page, do the following: |
| Enter an alias. |
| Enter the information for the service: Server IP Address, Server Port. |
| 4. | Click Save. |
Delete SSL Service
To delete a particular SSL service select the service on the SSL Services page, and then select Delete. To delete all SSL services, select the Delete All button.
Notes about Private Keys and Passwords
Consider the following notes about private keys and passwords:
| Encrypted private keys are stored on the node. When a private key is uploaded, it is encrypted with a password before it is stored, therefore keys are password-protected. Keychain passwords are not stored on the node. |
| Because only encrypted private keys are stored on the node and because the keychain password is not stored on the node, after any node reboot you will be prompted to enter the password. Until the password is entered, Passive SSL decryption is not working. |
| Key content cannot be displayed. |
| Keys that are synchronized across a cluster are encrypted. |
Key Mapping
After adding the SSL Service, now you map the private key with the service using Key Mapping.
To map a key with the service, follow the steps given below,
- On the left navigation pane, select Inventory >Resources > Security to open the Security page. Select SSL Key Mapping on the top navigation bar.
- Click Add.
- Enter the Key Mapping Alias.
- Select the SSL Service and Key Alias from the drop-down.
- Click Save.
Delete SSL Key Mappings
To delete a particular SSL key map select the key mapping on the SSL Key Mapping page, and then select Delete. To delete all SSL Key Mapping, select the Delete All button.
Add SSL Decrypt to Monitoring Session
After mapping your keys with service, to add GigaSMART applications to V series 2, follow the steps given below,
- Create a new monitoring session. Refer to Create a Monitoring Session for more detailed instructions.
- Drag and drop SSL Decrypt from APPLICATIONS to the graphical workspace.
- Click the SSL Decrypt application and select Details.

- Select the Enable checkbox to enable the application.
- Select the Key Map (created in the previous step) from the drop-down.
- Click Save.
- Click Deploy. The Select nodes to deploy the monitoring session page appears.
- Select the nodes you want to deploy and select an interface for each node. Then, click Deploy.
View Application Statistics
After adding SSL Decrypt to the monitoring session, to view the application statistics, open the Monitoring Session Statistics page. Refer to View Monitoring Session Statistics for more detailed information.
- Click View Monitoring Session Diagram. The monitoring session diagram appears, click the SSL Decrypt application.
- The ssl-decrypt application statistics page appears.
- You can view the following in the SSL application statistics page:
- Application: The application statistics are displayed here.
- Sessions: To view the session summary and session details of the SSL Decryption application, select the V Series Node IP and enter the Server Name and Client/ Server IP address. Then click Apply.
- Server Certificates: To view the server certificate statistics, select the V Series Node IP from the drop-down and enter the Key Alias. Then, click Apply.
- Services: All the service related statistics are displayed here. To view the statistics, select the V Series Node IP and the Service Alias from the drop-down and click Apply.
- Error Codes: The error messages are displayed here.
Server Certificates, Services and Error Codes pages has Refresh and Reset button, which helps you to refresh and reset the statistics.


