Encrypt Syslog Audit Data
Syslog audit data, such as messages and traps, are usually sent unencrypted between a GigaVUE node and the syslog server using UDP over port 514. The messages are sent in plain text. To allow secure transmission, starting in software version 4.4, you can send encrypted syslog audit data by using TCP and SSH options.
Sending syslogs over TCP provides a more reliable transport than UDP, with no dropped data. Tunneling using SSH provides encryption of syslog data.
On the GigaVUE node, the procedure for sending encrypted syslog audit data is as follows:
|
■
|
identify the TCP port on which the syslog server is listening. (Refer to your syslog server administrator for the port number.) |
|
■
|
configure the TCP port of the syslog server on the GigaVUE node |
|
■
|
generate a public key to allow authentication between the GigaVUE node and the syslog server |
|
■
|
configure a secured connection |
On the syslog server, integrate the key into the authorized keys.
Note: There can be multiple logging servers. SSH is optional for each logging server.
Encryption Procedure
Use the following sample procedure to encrypt syslog audit data:
|
1.
|
Generate the public key (for example, using the admin user) with the following steps. |
Note: The SSH Server needs to be enabled before completing these steps.
|
a.
|
Select Settings > Global Settings > SSH. |
|
b.
|
Click Add. The SSH Client Key page appears. |
|
c.
|
In the Username field, enter admin and select rsa2 for Type. |
|
d.
|
Click Generate Client Keys and copy the key contents. |
|
2.
|
Log in to the syslog server to paste the key, and then do the following: |
|
a.
|
Change the directory to .ssh. |
|
b.
|
Edit the authorized_keys file, located in the .ssh directory, using any editor (such as vi), then paste the key contents. |
If the authorized_keys file does not exist, create it
If the authorized_keys file exists but does not have write access, change the access; for example, chmod 644 authorized_keys
|
c.
|
Change the access on the authorized_keys file back to secure. For example, chmod 600 authorized_keys |
|
3.
|
Configure the secured TCP connection. |
|
a.
|
Select Settings > Global Settings > Logging. |
|
c.
|
On the Add Loggings Settings page, select SSH. |
|
d.
|
Enter an IP address, Log Level, TCP port, and user name. |
Note: You can specify an IPv4, IPv6, or hostname.
NOTES:
|
■
|
To ensure the TCP connection is established, check the syslog server logs. |
|
■
|
If the TCP connection goes down, an attempt to re-establish the connection occurs every minute. |
|
■
|
If the database on the GigaVUE node is reset, a new public key will have to be generated and set up. |
|
■
|
In a cluster environment, the public key will be synchronized over the cluster so that all the nodes in the cluster can establish TCP/SSH connections. |
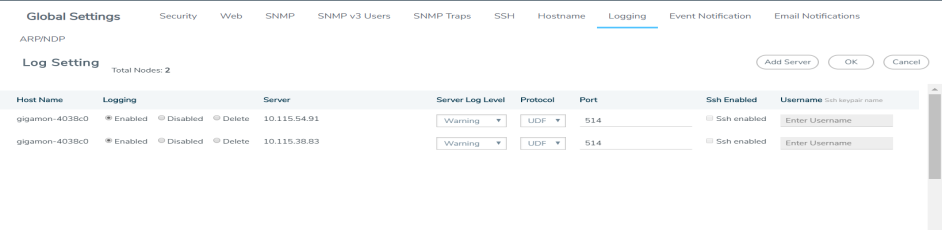
Display Logging Information
To display logging information, select Settings > Global Settings Logging. This displays the Logging page. 1 shows an example.
Note: The SSH Enable column will display Invalid if SSH is enabled, but missing Username or TCP Port information.


