Uploading the Images
First, you must fetch the images from Gigamon Customer Portal using FTP, TFTP, SCP, or other desired method and copy it to your cloud controller. After fetching the images, you must source the credentials file and then upload the qcow2 images to Glance.
For example, you can source the credentials file with admin credentials using the following command:
$ source admin_openrc.sh
To upload the qcow2 images to Glance, use one of the following commands:
glance image-create --disk-format qcow2 --visibility public --container-format bare --progress -name gigamon-gigavue-vseries-cntlr-1.x-x -file gigamon-gigavue-vseries-cntlr-1.x-x.qcow2
OR
openstack image create --disk-format qcow2 -public --container-format bare --file gigamon-gigavue-vseries-cntlr-1.x-x gigamon-gigavue-vseries-cntlr-1.x-x.qcow2
Note: The 1.x-x represents the version number of the image. Enter an appropriate version in the above commands.
While uploading images to OpenStack, the names of the image files should be of the following format:
| • | gigamon-gigavue-vseries-node-1.x-x |
| • | gigamon-gigavue-vseries-cntlr-1.x-x |
| • | gigamon-gigavue-gvtap-cntlr-1.x-x |
| • | gigamon-gigavue-gvtap-ovs-cntlr-1.x-x |
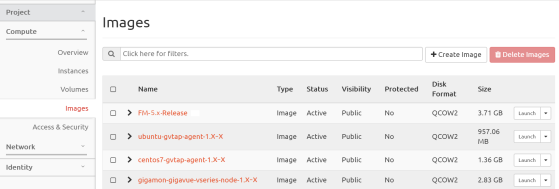
Once the images are uploaded, they are displayed under Compute > Images. Refer to Figure 1272: Instances Uploaded in Images Page .