Initial GigaVUE-FM Configuration
After you have deployed a new GigaVUE-FM instance, you need to perform an initial configuration before you can start using GigaVUE-FM. This is a one time activity that must be performed for each GigaVUE-FM instance deployed.
|
1.
|
In the Instances page, click the GigaVUE-FM instance name. The GigaVUE-FM instance Overview tab is displayed by default. |
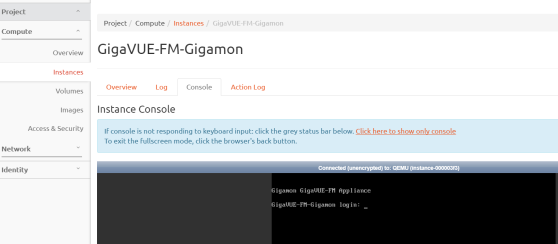
Figure 1283: GigaVUE-FM Instance Console
|
3.
|
Log in as admin with password as admin123A! The jump start configuration for GigaVUE-FM starts automatically. |
|
4.
|
For the hostname, enter a unique hostname for GigaVUE-FM. Note that the hostname may contain letters, numbers, periods (.), and hyphens (-), but may not begin with a hyphen. No other special characters are permitted. The hostname will display as part of the command line prompt after configuration jump-start completes. Refer to Figure 1284: GigaVUE-FM Jump Start Configuration. |
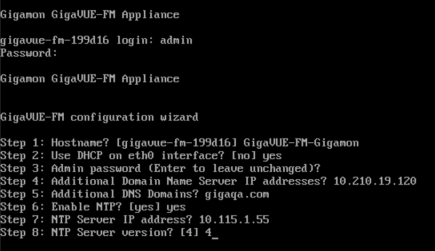
Figure 1284: GigaVUE-FM Jump Start Configuration
|
5.
|
To enable DHCP on eth0 interface, type yes and press enter. |
Note: DHCP must be enabled for GigaVUE-FM.
|
6.
|
For admin password, enter an appropriate password for your environment or just press Enter to leave the password unchanged. |
Note: For admin user, GigaVUE-FM requires a password.
|
7.
|
For additional domain name server IP addresses, enter the address of any additional name servers required. The names must be provided as a set of IP addresses with spaces. |
|
8.
|
For additional DNS domains, enter the DNS domain name. |
|
9.
|
To enable NTP, type yes. |
|
10.
|
Enter the NTP Server IP address and the NTP server version. |
|
11.
|
Click Enter to save the configuration and exit the console. |


