Create Fabric Maps
To create Fabric Maps:
- On the left navigation pane, click on
 and under Physical > Orchestrated Flows> Fabric Maps, click Create.
The following table describes the parameters displayed in the fabric map list view.
|
Field |
Description |
|
Alias |
Alias name of the fabric map. Note: Do not create fabric maps with alias starting with_FM_, _FM-, FMAuto-. These prefixes are used in auto-generated fabric map alias and should not be used when manually creating fabric maps. |
|
Enabled |
Indicates if fabric map is enabled – Yes/No |
|
Source |
Number of source ports associated with fabric map |
|
Destination |
Number of destination ports associated with fabric map |
|
Rules |
Rules for fabric map |
|
GigaSMART Alias |
Alias name of the GigaSMART operation |
|
Type |
Port type |
|
Status |
Health status of the fabric map |
| 1. | Click Create.The create map screen is displayed. |
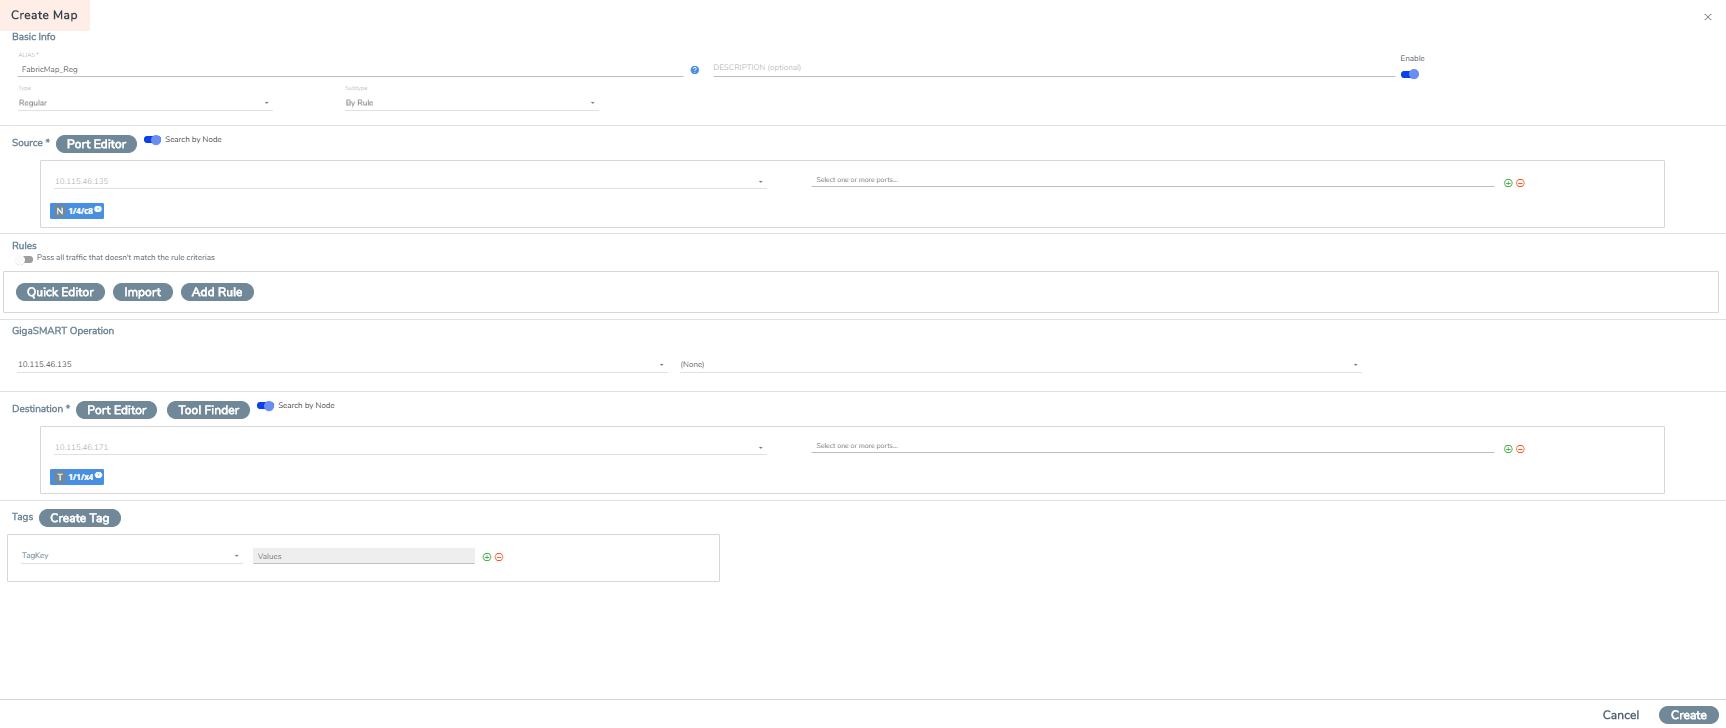
| 2. | Enter map parameters as described in the following table: |
|
Field |
Description |
||||||||||||
|
Basic Info |
|||||||||||||
|
Alias |
Alias name of the fabric map |
||||||||||||
|
Description |
Fabric map description |
||||||||||||
|
Enable |
Toggle option that lets you toggle between:
Note: You cannot disable the second-level maps (option is disabled in the UI). Alternatively, you must disable the corresponding first-level map. |
||||||||||||
|
Type |
Map type. Options are:
|
||||||||||||
|
Subtype |
Map subtype. Options are:
|
||||||||||||
|
Source |
Source port. Use the toggle bar to toggle between the following two options
Note: You cannot use ports already used as source ports in the orchestrated configuration.
|
||||||||||||
|
Rules |
Enable Non-Matching Rules for map type ‘Regular’. Use the toggle bar to either Pass all traffic or not. The following options are available:
Note: When you associate a tag to a rule in Fabric map, GigaVUE-FM associates the same tag to the internally created flow maps. The visualizations displayed in the Map Rule Statistics dashboard is based on the tags associated with the internal flow maps . Refer to the Add Tags to Map Rules section for more details. |
||||||||||||
|
GigaSMART Operation |
Select a GigaSMART OPERATION node and operation. |
||||||||||||
|
Destination |
Destination port. You can either:
Use the toggle bar to toggle between these two options. Click the Tool Finder option to search for the available destination ports.
Note: Starting in software version 5.7, you can also select the Null Port option for the second level maps if you do not want to send the traffic to any physical port. Refer to the “Create Application Filtering Intelligence by Selecting Applications from Dashboard” section for the use of null port in application intelligence solution. |
||||||||||||
|
Tags |
Select the tag key and the tag value to which the Fabric Maps must be associated to. Note: The tag key and the associated tag values must be created in advance in GigaVUE- FM. Refer to the "Tags" and "Role Based Access Control" sections in the GigaVUE Administration Guide for more details You can only view tags that are permitted for your role. Refer to the "Tags" section in the GigaVUE Administration Guide for more details. |
||||||||||||
| 3. | After you enter all the fabric map parameters, click Create. The new fabric map is added to the list view. |


