Install GigaVUE‑FM for Microsoft Hyper-V
The GigaVUE‑FM software package for Microsoft Hyper-V environments is distributed as an ISO image file. This section describes how to deploy a fresh installation of GigaVUE‑FM on a Hyper-V host.
Install GigaVUE‑FM from an ISO Image File
Use the Hyper-V Manager to install the GigaVUE‑FMISO image file.
Note: The ISO image file must be stored in a location that is accessible to the Hyper-V Manager.
To create the Virtual Machine for GigaVUE‑FM in Microsoft Hyper-V:
- Click Start > Administrative Tools > Hyper-V Manager to open the Hyper-V Manager.
- From the Actions pane, click New > Virtual Machine. Refer to 1.
The New Virtual Machine Wizard opens.
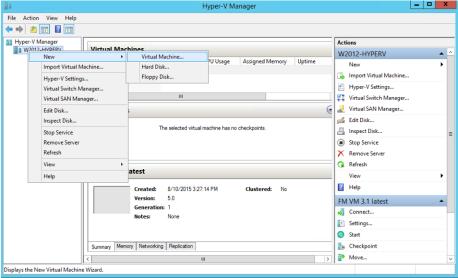
| 1 | Opening the Virtual Machine Wizard |
- Read the notes on the Before You Begin screen (refer to 2), and then click Next to continue.
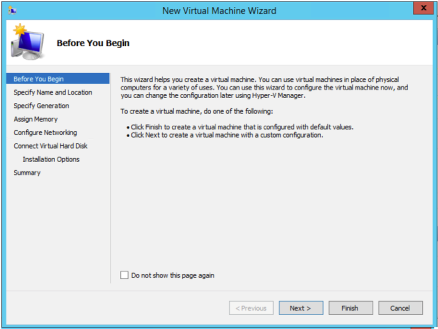
| 2 | Before You Begin Screen |
- After the Specify Name and Location page of the New Virtual Machine Wizard opens, do the following:
| a. | Supply a descriptive name for the GigaVUE‑FM virtual machine in the Name field. |
By default, the virtual machine will be stored in the default configuration folder shown in the Location text box. You can change this default location by checking the Store the virtual machine in a different location check box and providing a custom path.
| b. | Click Next to continue. |
- On the Specify Generation page of the New Virtual Machine Wizard, select Generation 1
Note: It is important to select Generation 1 and not Generation 2. Selecting Generation 2 may lead to failure of the GigaVUE‑FM installation process because the CD Drive is presented as an SCSI device and not IDE.
- Click Next to continue.
The Assign Memory page of the New Virtual Machine Wizardopens.
- Change the Memory assigned to this virtual machine to 16384 MB, and then click Next to continue.
The Configure Networking page of the New Virtual Machine Wizardopens.
- From the Connection drop-down list, select the virtual network to which GigaVUE‑FM will connect to, and then click Next to continue.
The Connect Virtual Hard Diskpage of the New Virtual Machine Wizard opens, which is shown in 3.
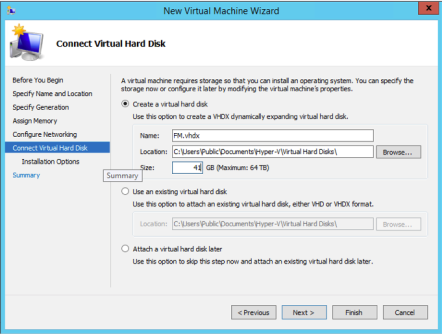
| 3 | Connect Virtual Hard Disk Page |
- Select the Create a virtual hard disk option and set the Size to 41 GB.
You can accept the default Name and Location or customize them according to your needs. When you have finished, click Next to continue.
The Installation Options page of the New Virtual Machine Wizardopens, which is shown in 4.
- Use this dialog box to select the ISO image file for GigaVUE‑FM. As shown in the figure 4, set the following options:
| a. | Select the option Install an operating system from a bootable CD/DVD-ROM. |
| b. | Set the Media option to Image file (.iso). |
| c. | Use the Browse button to navigate to the GigaVUE‑FM ISO image file. |
| d. | Click Next to continue. |
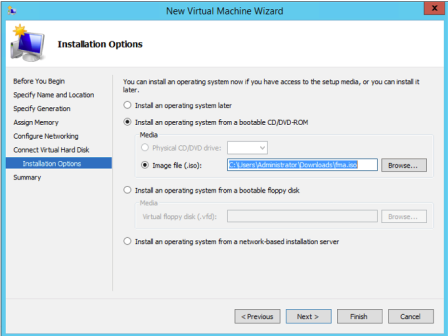
| 4 | Install Options Page |
After you click Next, the summary page of the New Virtual Machine Wizardopens, showing the settings that you configured for the GigaVUE‑FM virtual machine.
- Click Finish to create the GigaVUE‑FM virtual machine as configured. Alternatively, you can use the Previous button to go back and change settings.
The New Virtual Machine Wizard only creates the GigaVUE‑FM virtual machine, returning you to the Hyper-V Manager when creation is complete. The new GigaVUE‑FM virtual machine is listed in the Action pane by the name you supplied during installation.
The procedures given below will take you through the steps of adding an additional virtual hard disk and actually installing GigaVUE‑FM.
Add Additional Virtual Hard Disk and Install GigaVUE‑FM
To add an additional virtual hard disk and install GigaVUE‑FM:
- In Hyper-V Manager, from the Actions pane, select the newly added GigaVUE‑FM virtual machine, and then click Settings.
- In the Settings page, select IDE Controller 0.
- In the IDE Controller pane that appears to the right, select Hard Drive, and then click Add. Refer to the following figure:
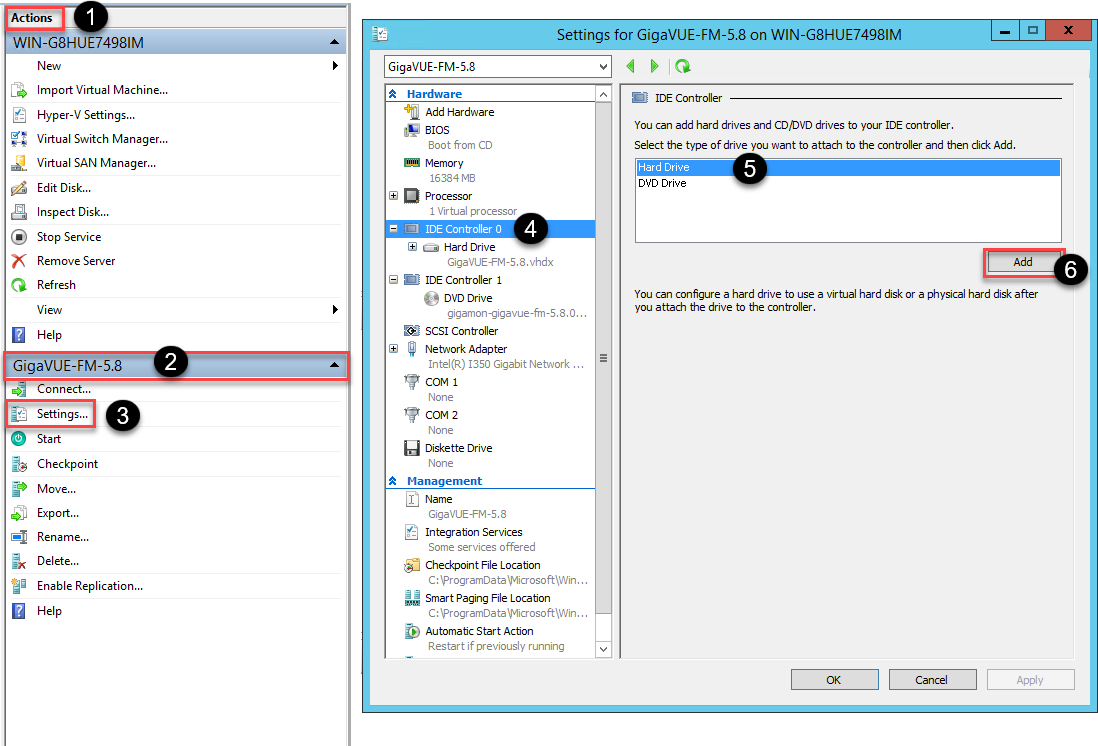
| 5 | Navigating to Add Additional Hard Disk |
A new Hard Drive entry is added under IDE Controller 0.
- Select the Hard Drive entry.
- In the Hard Drive pane that appears to the right, select Virtual hard disk, and then click New as shown in the following figure:
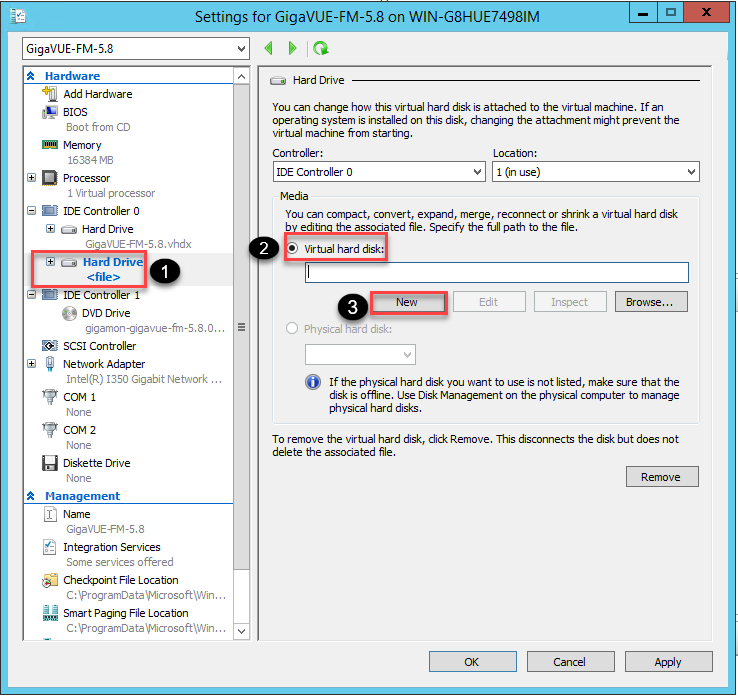
| 6 | Navigating to the New Virtual Hard Disk Wizard |
The New Virtual Hard Disk Wizard opens.
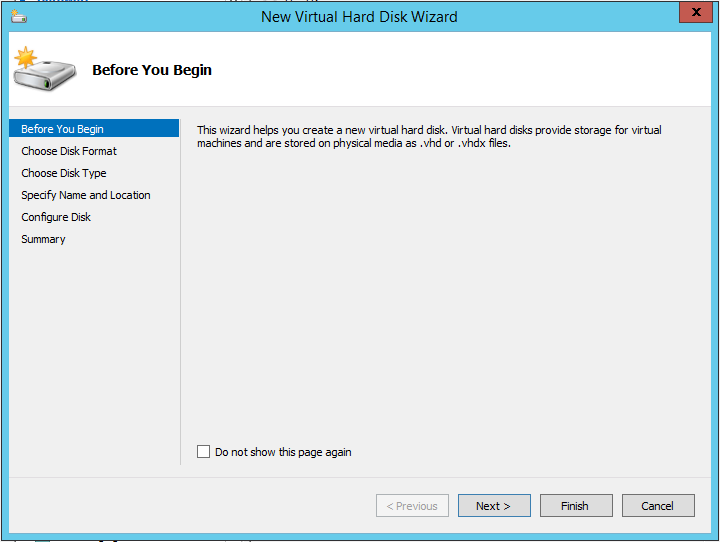
| 7 | New Virtual Hard Disk Wizard |
- Click Next to go to the Choose Disk Format page of the wizard.
- Select the required format that you want to use for the virtual hard disk, and then click Next.
The Choose Disk Type page of the wizard appears.
- Select the required disk type for the virtual hard disk, and then click Next.
The Specify Name and Location page of the wizard appears.
- Specify a unique name for the virtual hard disk, and then browse and select the location where you want to save the disk.
- Click Next. The Configure Disk page of the wizard appears.
- You can choose one of the following options to configure the virtual hard disk:
| Create a blank virtual hard disk of size 41 GB. |
| Choose a physical hard disk from which you can copy the contents into the new virtual hard disk. |
| Browse and select a virtual hard disk from which you can copy the contents into the new virtual hard disk. |
- Click Next to exit the New Virtual Hard Disk Wizard.
- Click OK. The GigaVUE‑FM installation begins as shown in the following figure:
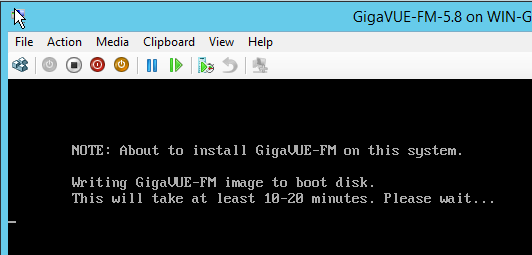
| 8 | GigaVUE‑FM Installation Begins |
It may take several minutes for the installation to complete. The system will reboot after the installation is completed.
Connect and Power On the GigaVUE‑FM Virtual Machine
The next step is to connect to the GigaVUE‑FM virtual machine from within Hyper-V Manager and start it. This begins the actual installation of the GigaVUE‑FM Virtual Appliance from the connected ISO image file. Once GigaVUE‑FM finishes installing from the ISO image file, you will then disconnect the ISO image file and restart the virtual machine.
| 1. | In Hyper-V Manager, locate the Virtual Machines entry in the results pane, right-click the GigaVUE‑FM virtual machine, and click the Connect option. |
| 2. | The Virtual Machine Connection tool opens for the GigaVUE‑FM virtual machine. |
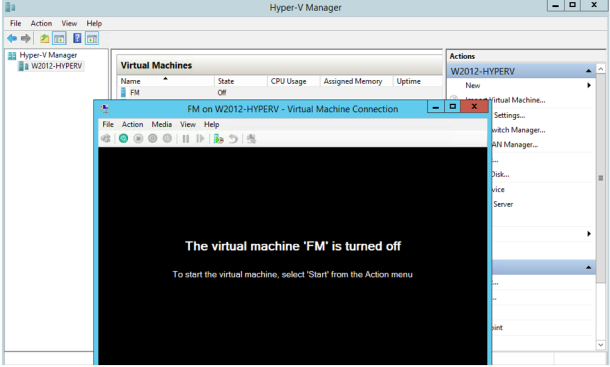
| 3. | Select Action > Start to start the GigaVUE‑FM virtual machine from the Virtual Machine Connection tool. |
| 4. | The GigaVUE‑FM virtual machine powers on. You can monitor the progress of the system start in the Virtual Machine Connection tool. |
The system power-on can take several minutes as GigaVUE‑FM is installed from the ISO image file. Disconnect the media before Powering On as shown below:
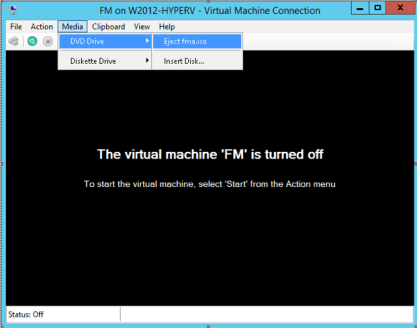
Disconnect the ISO Image File
It is important to disconnect the ISO image file before you power on GigaVUE‑FM again so you don’t have to go through the image install process again. Disconnect the ISO image file as follows:
| 1. | In Hyper-V Manager, locate the Virtual Machines entry in the results pane and select the GigaVUE‑FM virtual machine. |
| 2. | In the Actions pane, click the Settings entry under the GigaVUE‑FM virtual machine name. |
A Settings dialog box for the GigaVUE‑FM virtual machine appears.
| 3. | Select the DVD Drive entry in the panel on the left of the Settings dialog box and change its setting from Image file to None, as shown in the figure below. |
| 4. | Click the OK button to apply the changes. |
This concludes the installation procedure for GigaVUE‑FM on Hyper-V. The next step is to power on the virtual machine and perform its initial configuration, as described in Initial GigaVUE‑FM Configuration .
IMPORTANT: Clear the browser cache before logging in to GigaVUE‑FM.


