Configure GCB for Service Mesh and HTTPS/2 Support with Metadata through GigaVUE-FM
This section describes how to configure GCB through GigaVUE-FM GUI. Refer to the following section for details.
- Launch GigaVUE-FM
- Create Metadata Field Names
- Create Monitoring Domain
- Configure Service Identification
- Configure Traffic Policy
Launch GigaVUE-FM
The recent GigaVUE-FM image files can be downloaded from Gigamon Customer Portal. After fetching the image, upload and launch GigaVUE-FM on your OpenStack environment. For assistance, Contact Technical Support of Gigamon or refer to the GigaVUE Cloud Suite for OpenStack Guide for more information on GigaVUE V Series 2 configuration on OpenStack environment.
Create Metadata Field Names
To create metadata field names in GigaVUE-FM:
- In GigaVUE-FM, on the left navigation pane, select Inventory > CONTAINER > Gigamon Containerized Broker > Settings. The Settings page appears.
- In the Settings page, click Add. The Add Metadata Field Names wizard appears.
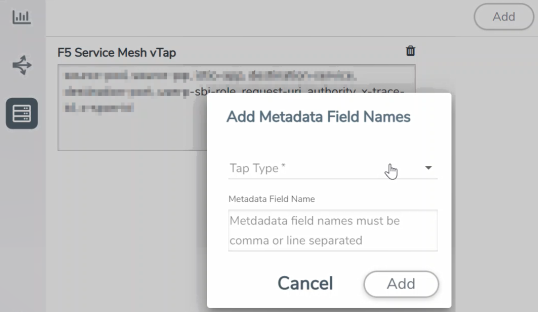
- Select the Tap type as F5 Service Mesh vTAP and enter the Metadata Field Names.
- Click Add. The newly added metadata field names appear on the Settings page.
Create Monitoring Domain
To create a monitoring domain in GigaVUE-FM:
- In GigaVUE-FM, on the left navigation pane, select Inventory > CONTAINER > Gigamon Containerized Broker > Monitoring Domain. The Monitoring Domain page appears.
- In the Monitoring Domain page, click New. The Monitoring Domain Configuration wizard appears.
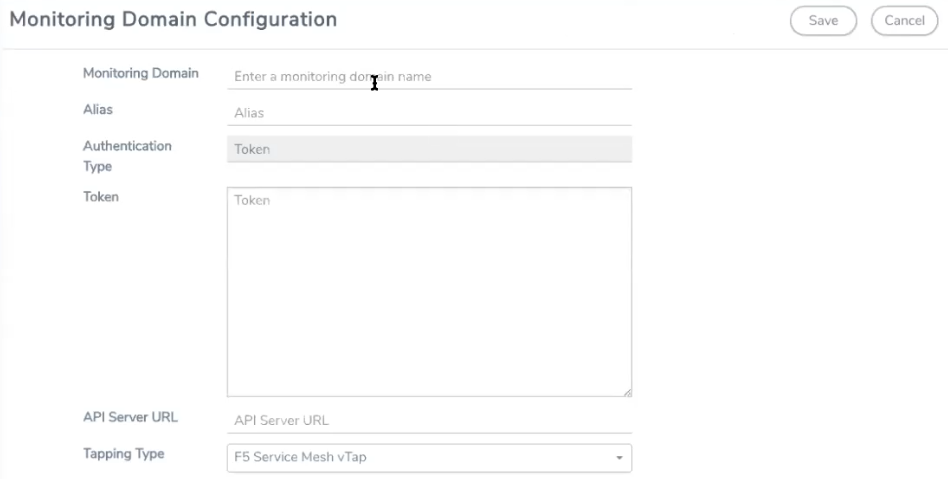
- Enter or select the required information as described in the following table,
Fields
Description
Monitoring Domain
Enter a name for the monitoring domain
Alias
Enter a name for the GCB connection
Authentication Type
Select Token as the authentication type
API Server URL
Enter the URL of the API server
Tapping Type
Select F5 Service Mesh vTap as the Tapping Type
- Click Save to create a monitoring domain.
Configure Service Identification
In the Service mesh and HTTP/s supported platform, the GCB receives packets to be monitored in the form of HTTPS/2 requests. On receiving the HTTPS/2 request from Pcapper, GCB applies the rules configured in GigaVUE-FM and forwards the filtered traffic to V Series 2 nodes deployed on the OpenStack platform through L2GRE or VXLAN tunnels.
In a Kubernetes environment, the IP addresses associated with pods and services are temporary and can change regularly. For the external tools, these changing IP addresses are difficult to consistently correlate incoming data to the services and the sources related to that data. The same IP addresses may also exist in multiple Kubernetes clusters adding difficulty in identifying the true source of the monitored traffic. To correlate these temporary and same IP addresses, the GigaVUE-FM and GCB use information supplied in the .csv text files to map the temporary IP addresses to IPv6 addresses that the external tools can consistently use.
The CSV file must contain a header row with two columns. The first column is for the Metadata value and the second column is for the IPv6 address. The metadata value specified in the header row and the values in the first column of the CSV file must match theMetadata Field Names.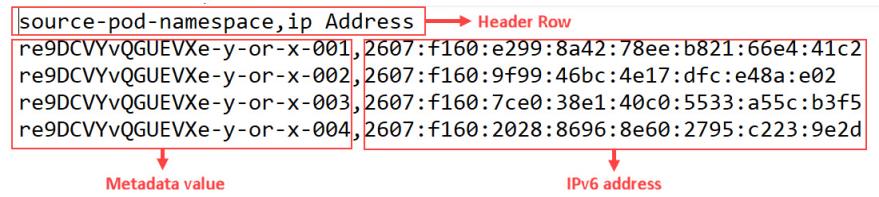
Note: The length of the metadata value in first column of the non-header row must be less than or equal to
The Service Mesh and HTTPS/2 supported platform must provide the following CSV files:
| a src-ip-mapping.csv file to translate the temporary source IP (IPv4) address to an external IPv6 address. |
| a dest-ip-mapping.csv file to translate the temporary destination IP (IPv4) address to an external IPv6 address. |
To upload the mapping CSV files to GigaVUE-FM:
- After creating a Monitoring Domain, in GigaVUE-FM, from the left navigation pane, select Inventory > CONTAINER > Gigamon Containerized Broker > Service Identification. The Service Identification page appears.
- In the Service Identification page, click Upload. The File Upload wizard appears.
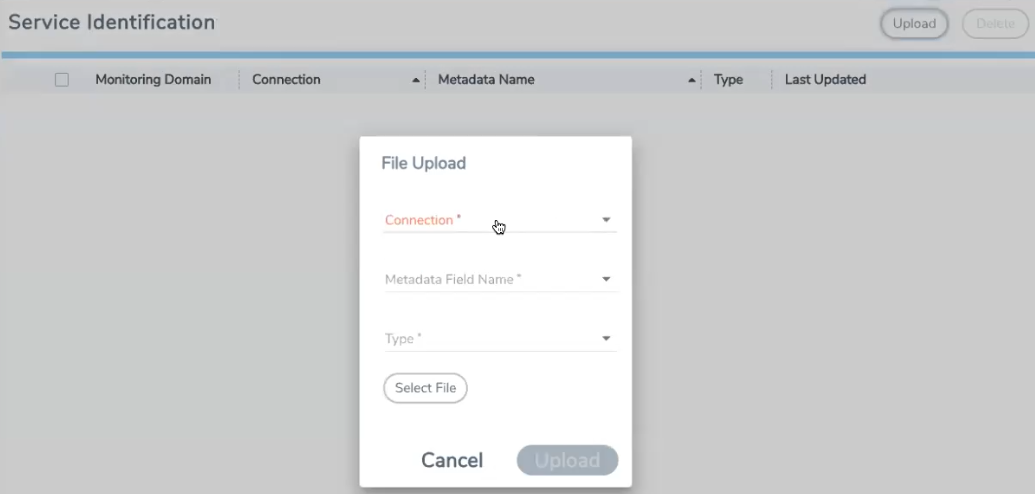
- Enter or select the required information as described in the following table:
Fields
Description
Connection
Select an existing monitoring domain
Metadata Field Name
Select a Metadata field to search in the CSV file.
If the value for the metadata field matches the content of the received packets, then GCB use the mapping tables to convert the ephemeral IPv4 addresses to external IPv6 addresses and replaces the incoming IPv4 header with an IPv6 header, before forwarding the packets to the Tools or V Series nodes.
- If the value for the metadata field doesn't match the content of the received packets, then the GCB forwards the packets without translation.
Type
Select an IP address type from the following:
SRC - Source IP DST - Destination IP Select (CSV) File
Select an IP mapping CSV file to upload to GigaVUE-FM.
- Click Upload to upload the selected CSV file for the monitoring domain.
Note: You must upload a source and a destination IP mapping CSV file for the IP translation.
Once the CSV file is uploaded successfully, GigaVUE‑FM displays the status of the uploaded file. If no error is found in the meta-data, then the status is displayed as Ok. However, if there is any error in the meta data or processing, then the error message is displayed under the Status column. Click on the error message to get detailed information about the error.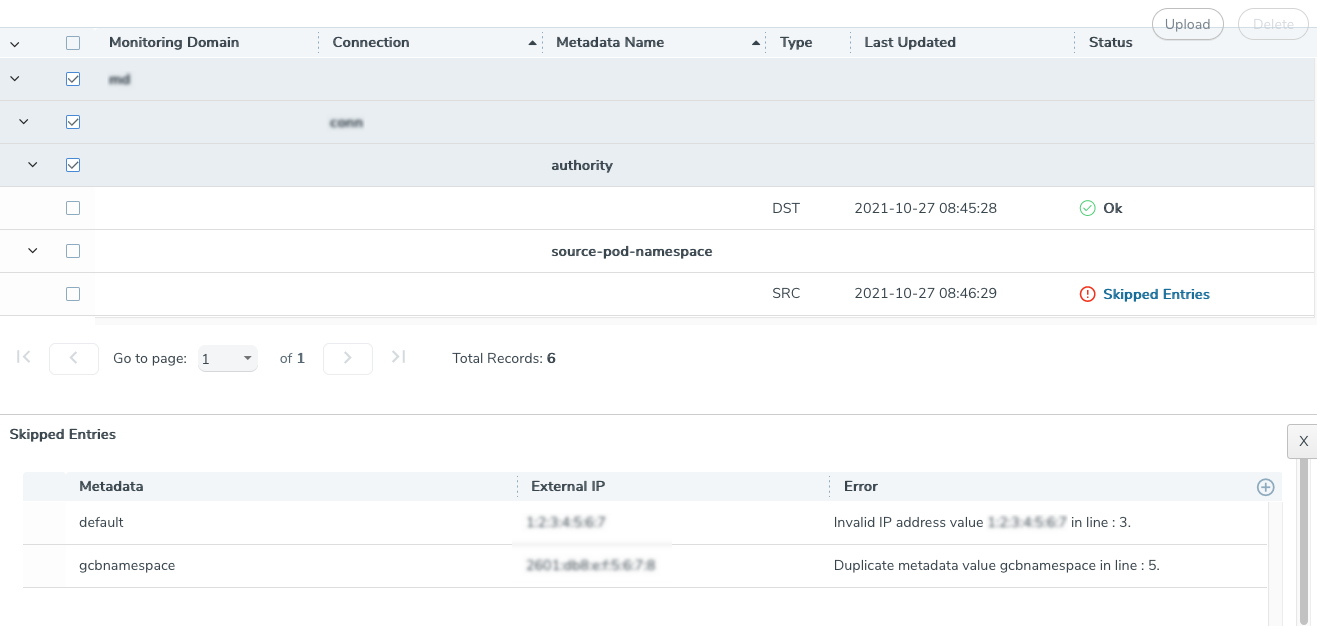
Types of Error messages:
-
Skipped Entries: This error message is displayed:
- If the metadata value is blank or more than 127 characters.
- If the IP address is invalid.
- If there are more than 4096 entries in the file excluding the header. In this case, only the first 4096 entries will be sent to GCB and the rest would be skipped.
- If the uploaded CSV file contains two or more identical entries, or two or more entries with the same meta data values. In this case only the first entry will be sent to GCB and the rest would be skipped.
-
GCB: This error message is displayed due to processing errors or a failure.
Configure Traffic Policy
To create a Traffic Policy in GigaVUE-FM:
- From the GigaVUE-FM left navigation pane, select Traffic > CONTAINER > Gigamon Containerized Broker. The Traffic Policy page appears.
- In the Traffic Policy page, click Create. The Create Tunnels and Rules wizard appears.
- In the Tunnels tab, enter or select the required information as described in the following table:

Fields
Description
Tunnel Name
Enter a name for the Tunnel.
Remote IP Address
Enter an IP Address for the Tunnel.
Tunnel Type
Select L2GRE or VXLAN as the tunnel type.
Tunnel Key
Enter a value for the tunnel key.
Destination Port
If the tunnel type is VXLAN, enter the tunnel destination port number.
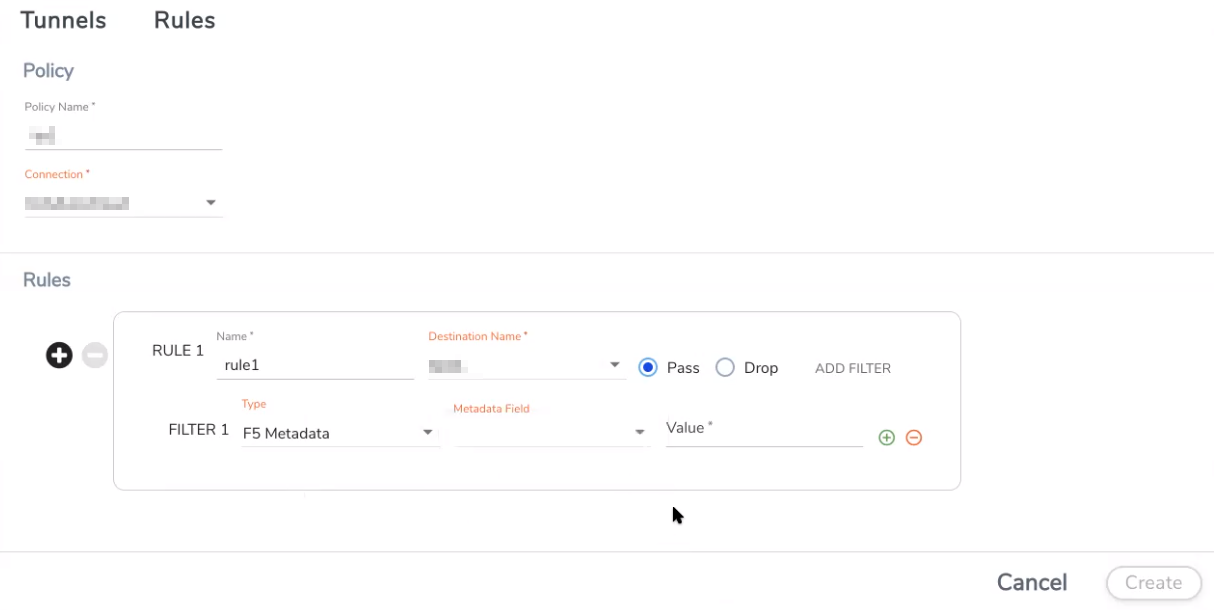
- Switch to Rules tab, and enter or select the required information as described in the following table:
Fields
Description
Policy
Policy Name
Enter a name for the policy.
Connection
Select a connection for the policy.
Rules
Name
Enter a name for the Rule.
Destination Name
Select a tunnel destination.
Pass/Drop
Select Pass to allow the packets or select Drop to block the packets based on the filters.
Click ADD FILTER to add filters for the rule.
Type
Select the type as F5 Metadata.
Metadata Field
Select a Metadata field name.
Filter value
Enter a value for the filter type.
- Click Create and this new Traffic Policy deploys itself in the GCB.
The Traffic Policy processes the Pcapper traffic and forwards the traffic to the tunnel destination IP address.


