Upgrade the Software
This section provides the steps for upgrading the software version on a standalone GigaVUE node.
In a cluster configuration, if you try to update the software through GigaVUE-FM, the following message is displayed across the Images tab:
This is just a WARNING. It is recommended that you use the CLI to upgrade software on the GigaVUE HC Series nodes when in a cluster.
Important: The default password on the admin account is admin123A!. If the node is upgraded through the configuration-jumpstart command, the password for the admin user is required to be set to a non-default value. This will be the password when the admin user logs into GigaVUE-FM after the upgrade.
If the node is upgraded through GigaVUE‑FM, H-VUE does require the default password to be reset. However, you should change the admin default password after upgrading.
Save the Configuration
Before upgrading the software, save your current running configuration by doing the following:
|
1.
|
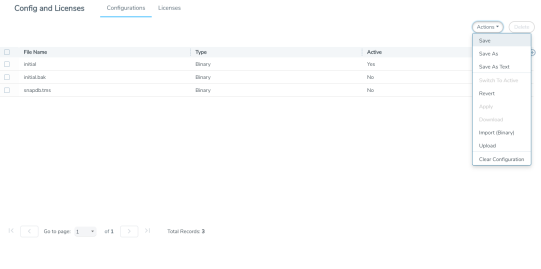
Select Setting > Config and Licenses > Configurations > Actions. |
|
2.
|
Select Action > Save menu as shown in the following figure. |

Note: You can also save the current configuration by selecting Admin > Save Configuration a shown in the following figure.
|
3.
|
If you used the Action menu, confirm that you want to save the configuration by Clicking Save on the dialog screen that displays, as follows: |
Upgrade the Software
Use the following steps to upgrade the software:
|
1.
|
Access the GigaVUE node using a Web browser and log in with administrator user credentials. |
|
2.
|
Select Settings > Reboot and Upgrade > Images. |
The Images page shows the currently installed images and indicates the which image will boot next. 1 shows an example where three images are currently installed. To change the image that will boot next select, Action > Switch Boot Partition.

|
1
|
Active Images Page Showing Both Partitions |
|
3.
|
Remove all the currently uploaded images. |

|
2
|
All Image Files Selected |
|
4.
|
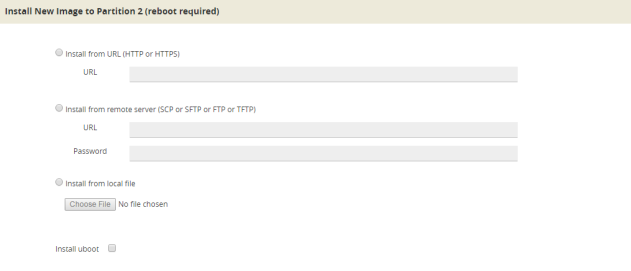
On the Images page, click New to access a new application image. The Install New Image page displays as shown in 3. |

|
3
|
Install a New Image Page |
|
5.
|
Select the method for installing the new image, which is one of the following: |
|
o
|
Install from URL — Enter the URL from which to fetch the image. |
|
o
|
Install from scp or sftp — Enter the URL and password of the SCP or SFTP server from which to fetch the image. |
|
o
|
Install from local file — Use this option to upload the image file from your local environment. Click Choose File to select the file. |
Note: The image must match the type of control card system (for example, HCCv2, GigaVUE-TA1, or GigaVUE‑HC2).
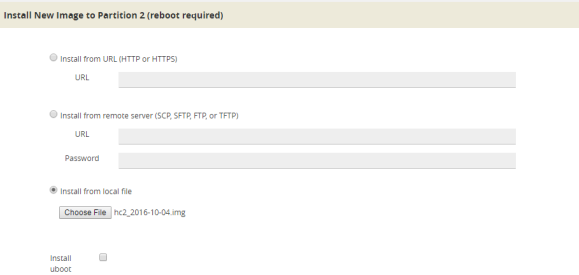
In 4, a local file is selected for the install.

|
4
|
Local File Selected for Install |
|
6.
|
Click OK after the software path is selected. A progress bar appears below the title bar. |
The new software is uploaded and installed. It is then active upon the next reboot.
|
7.
|
To make the image effective, reboot the system. |
Refer to Reboot the Nodes for the steps to reboot the system.
Upgrade Uboot and PLD
Use the following steps to upgrade Uboot and Programmable Logic Device (PLD):
|
1.
|
Access the GigaVUE node using a Web browser and log in with administrator user credentials. |
|
2.
|
Select Settings > Reboot and Upgrade > PLD and Uboot. |
|
3.
|
For Uboot upgrade, check Uboot to upgrade to a new Uboot version, then click Upgrade. |
|
4.
|
For PLD upgrade, check PLD to upgrade Programmable Logic Devices (PLDs) such as Field Programmable Gate Arrays (FPGAs) on GigaVUE‑HC3 nodes. |
|
5.
|
Select the slot, then click Upgrade. |


