Add Applications to Monitoring Session
GigaVUE Cloud Suite with V Series 2 node supports the following GigaSMART applications in the GigaVUE-FM canvas:
You can also configure the following GigaSMART operations from the Traffic > Solutions > Application Intelligence:
| Application Metadata Intelligence |
| Application Filtering Intelligence |
For the detailed list of GigaSMART Operation supported for V Series 2 nodes, refer to Supported GigaSMART Operations.
You can optionally use these applications to optimize the traffic sent from your instances to the monitoring tools. Refer to the All the V Series 2 nodes connected to GigaVUE-FM reports the stats. All licensed applications, when running on the node, generate usage statistics. In the Volume-Based Licensing scheme, a license entitles specific applications on your devices to use a specified amount of total data volume over the term of the license. The distribution of the license to individual nodes or devices becomes irrelevant for Gigamon’s accounting purpose. GigaVUE-FM tracks the total amount of data processed by the various licensed applications and provides visibility into the actual amount of data, each licensed application is using on each node, and track the overuse if any. You will have grace period for each license that are conveyed in the license file. section for more information on Licenses for using V Series 2 Nodes.
To add a GigaSMART application:
- Drag and drop an application from APPLICATIONS to the canvas.
- In the canvas, click the application and select Details.
- Enter or select the required values for the selected application and click Save.
Slicing
Packet slicing lets you truncate packets after a specified header and slice length, preserving the portion of the packet required for monitoring purposes. For detailed information on Slicing, refer to GigaSMART Packet Slicing.
To add a slicing application:
- Drag and drop Slicing from APPLICATIONS to the graphical workspace.
- Click the Slicing application and select Details. The Application quick view appears.
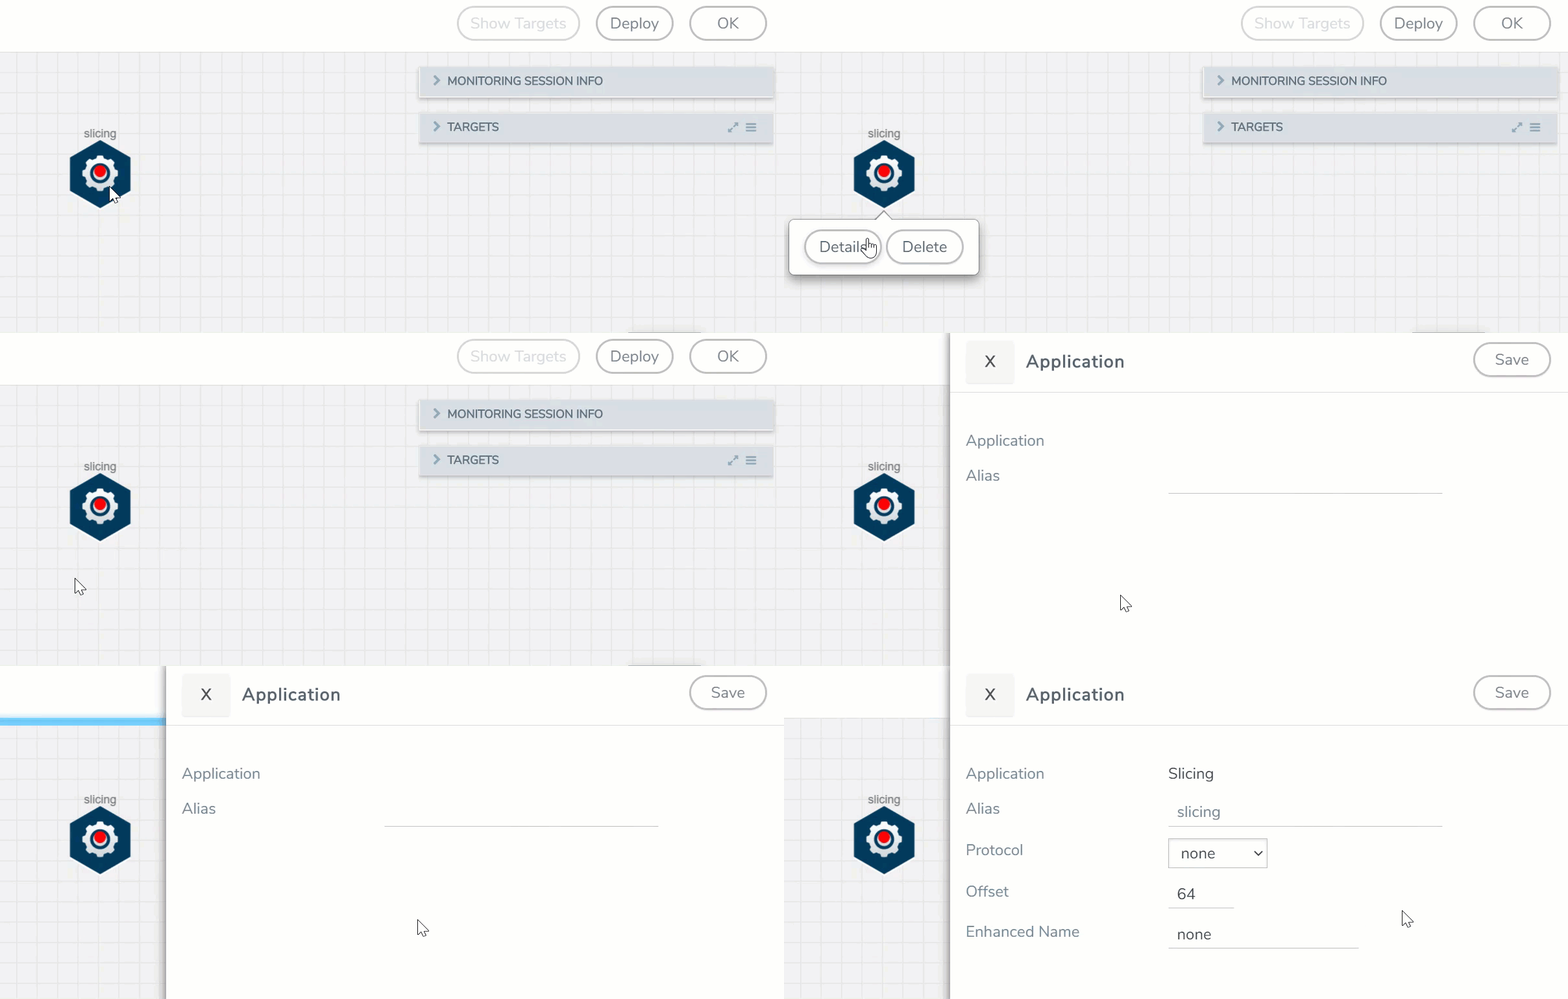
- In the Application quick view, enter the information as follows:
- In the Alias field, enter a name for the slicing.
- From the Protocol drop-down list, specify an optional parameter for slicing the specified length of the protocol.
- In the Offset field, specify the length of the packet that must be sliced.
- In the Enhanced Name field, enter the Enhanced Slicing profile name.
- Click Save.
Masking
Masking lets you overwrite specific packet fields with a specified pattern so that sensitive information is protected during network analysis. For detailed information on masking, refer to GigaSMART Masking.
To add a masking application:
- Drag and drop Masking from APPLICATIONS to the graphical workspace.
- Click the Masking application and select Details. The Application quick view appears.
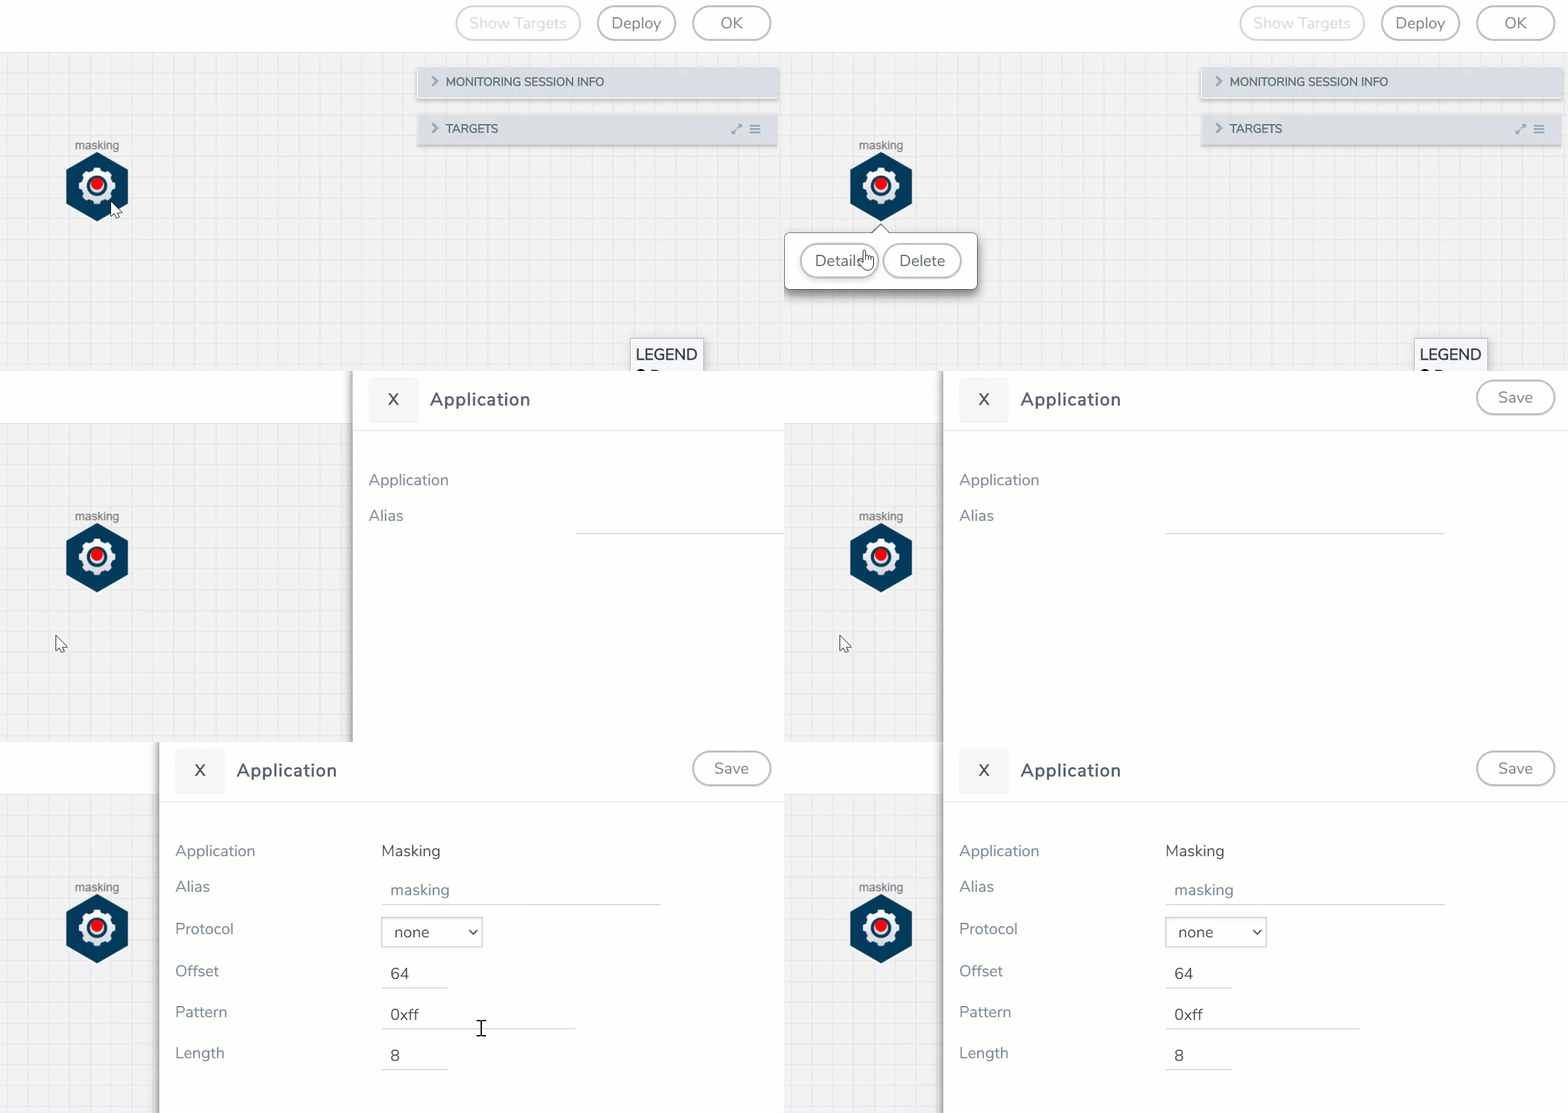
- In the Application quick view, enter the information as follows:
- In the Alias field, enter a name for the masking.
- From the Protocol drop-down list, specify an optional parameter for masking the specified length of the protocol.
- In the Offset field, specify the length of the packet that must be masked.
- In the Pattern field, enter the pattern for masking the packet.
- In the Length field, enter the length of the packet that must be masked.
- Click Save.
Dedup
De-duplication lets you detect and choose the duplicate packets to count or drop in a network analysis environment. For detailed information on de-duplication, refer to GigaSMART De-Duplication.
To add a de-duplication application:
- Drag and drop Dedup from APPLICATIONS to the graphical workspace.
- Click the Dedup application and select Details. The Application quick view appears.
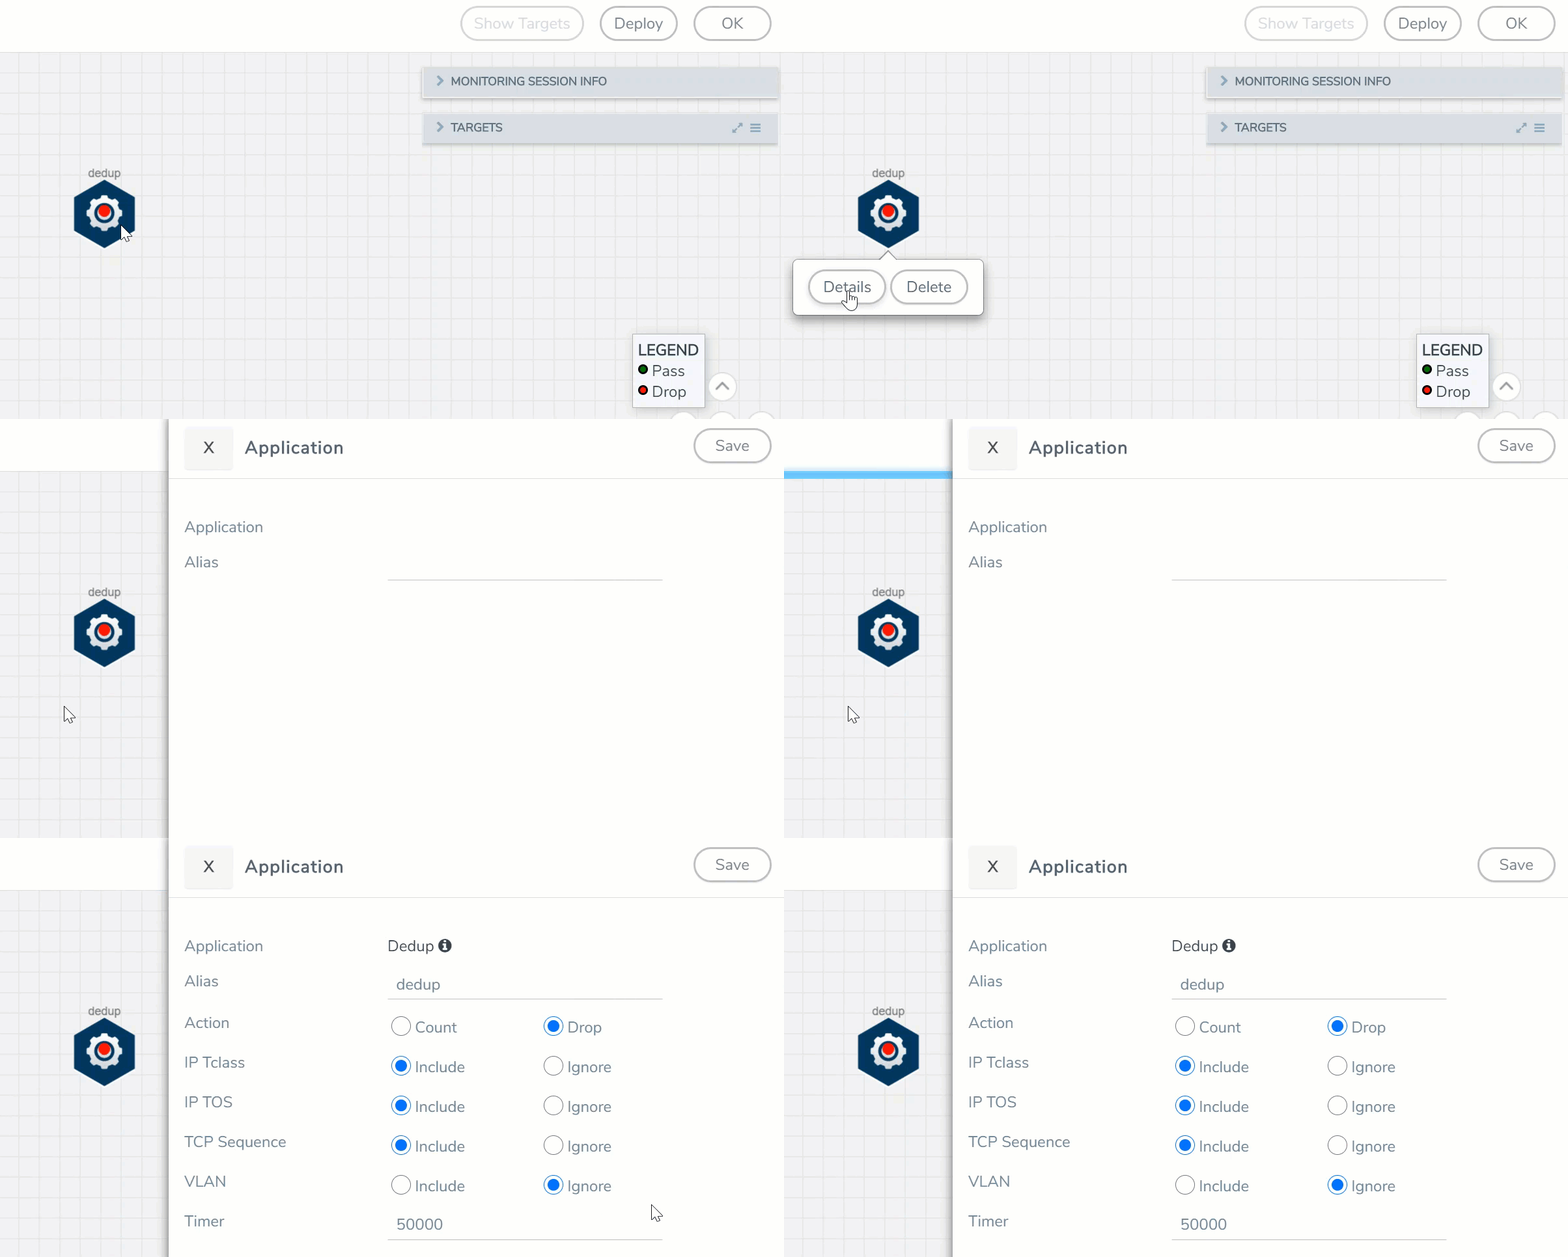
- In the Application quick view, enter the information as follows:
- In the Alias field, enter a name for the de-duplication.
- In the Action field, select Count or Drop the detected duplicate packets.
- For IP Tclass, IP TOS, TCP Sequence, and VLAN fields, select Include or Exclude the packets for de-duplication.
- In the Timer field, enter the time interval (in seconds) for de-duplicating the packet.
- Click Save.
Load Balancing
Load balancing app performs stateless distribution of the packets between different endpoints. For detailed information on load balancing, refer to GigaSMART Load Balancing.
To add a load balancing application:
- Drag and drop Load Balancing from APPLICATIONS to the graphical workspace.
- Click the load balancing application and select Details. The Application quick view appears.
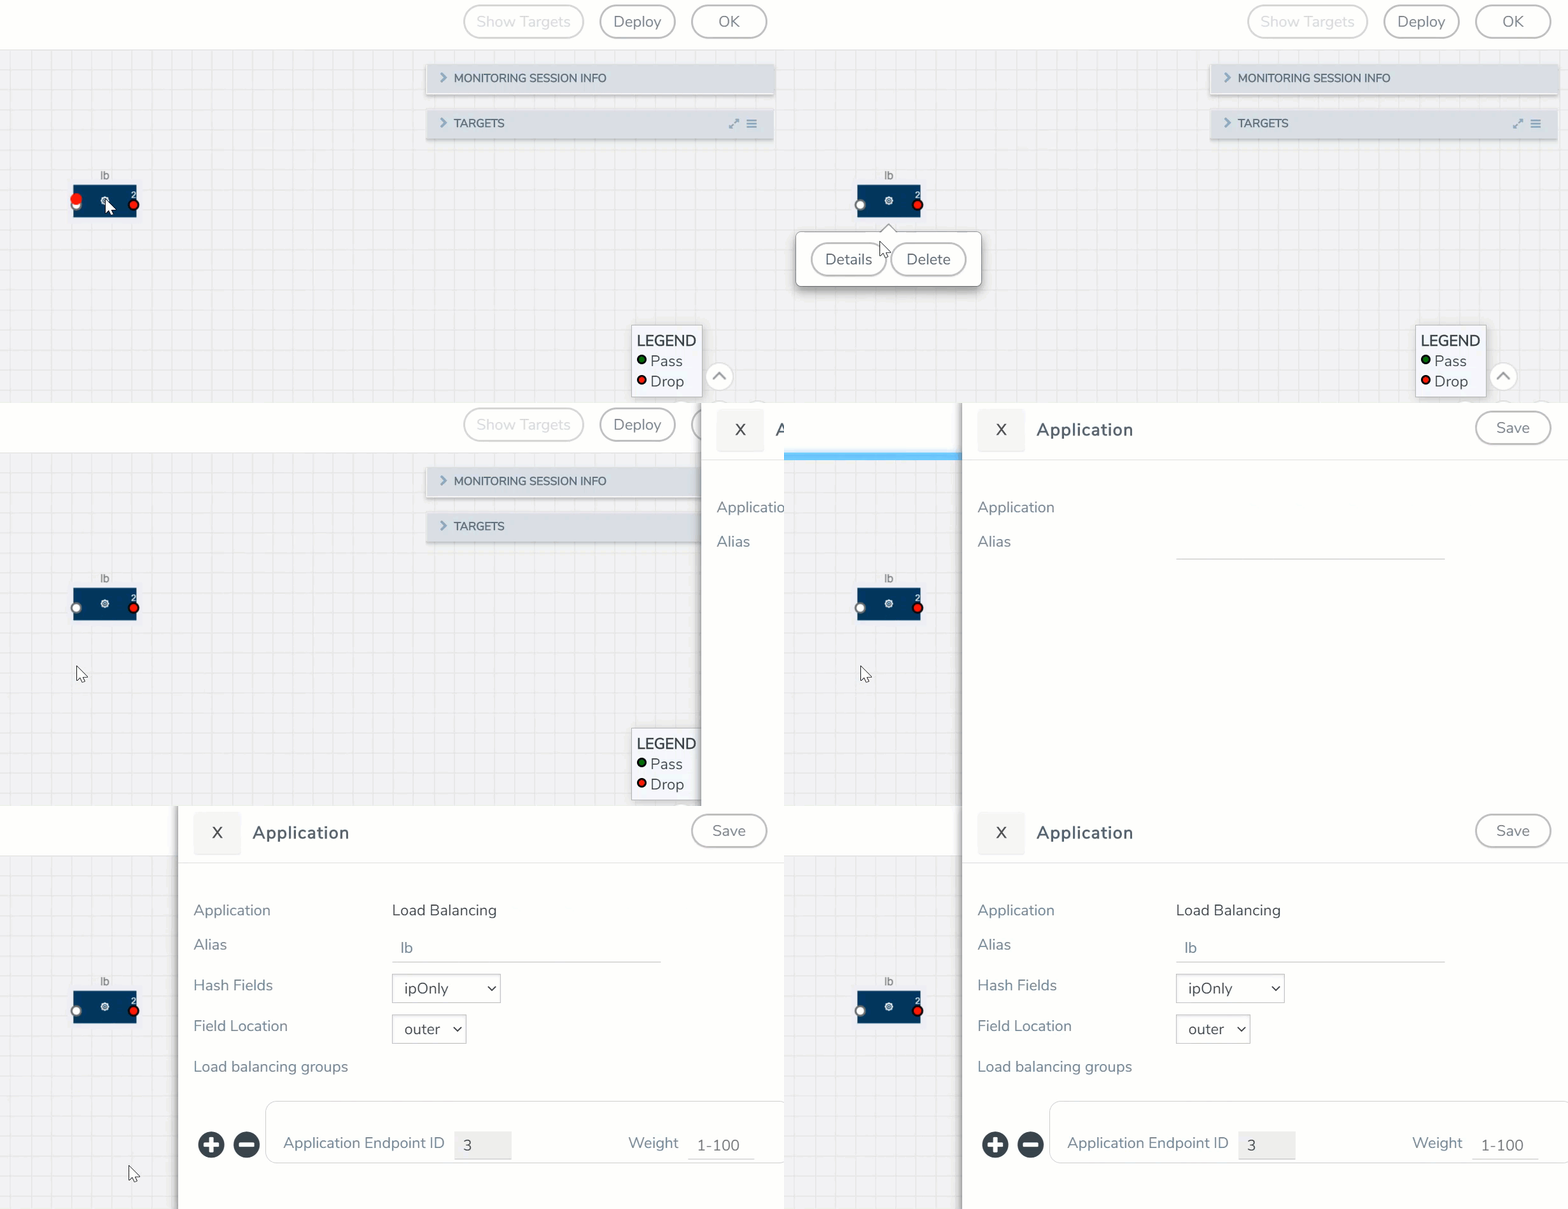
- In the Application quick view, enter the information as follows:
- In the Alias field, enter a name for the load balancing app.
- For Hash Fields field, select a hash field from the list.
- ipOnly—includes Source IP, and Destination IP.
- ipAndPort—includes Source IP, Destination IP, Source Port , and Destination Ports.
- fiveTuple—includes Source IP, Destination IP, Source Port, Destination Port, and Protocol fields.
- gtpuTeid—includes GTP-U.
- For Field location field, select Inner or Outer location.
Note: Field location is not supported for gtpuTeid.
- In the load balancing groups, add or remove an application with the Endpoint ID and Weight value (1-100). A load balancing group can have minimum of two endpoints.
- Click Save.
GENEVE De-encapsulation
The GENEVE De-encapsulation application is used to acquire and strip GENEVE headers. To route the traffic through the third-party network appliances seamlessly, the AWS gateway load balancer with a VPC adds GENEVE header to packets as they are forwarded to a third-party network appliance. Each appliance is expected to terminate the GENEVE tunnel and process the GENEVE encapsulated traffic traffic. When the GigaVUE-FM directs the acquisition of the customer traffic, the packets are encapsulated and forwarded as GENEVE tunnels that are terminated in GigaVUE V Series nodes.
To add a GENEVE application:
- Drag and drop GENEVE from APPLICATIONS to the graphical workspace.
- Click the GENEVE application and select Details. The Application quick view appears.
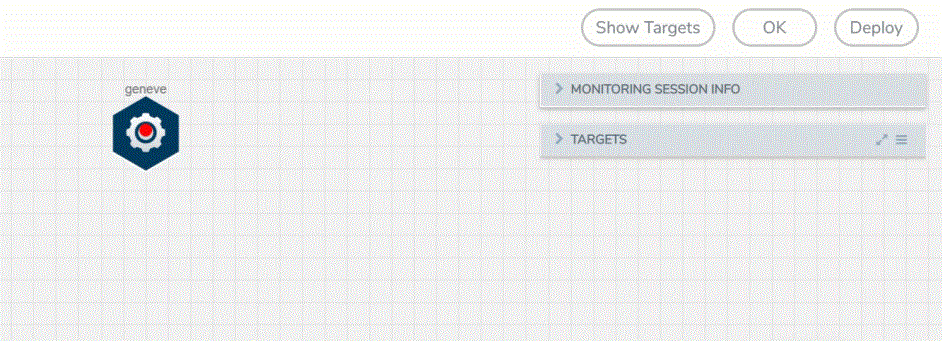
- Enter an alias for the GENEVE application.
- Click Save.


