Launch GigaVUE-FM
The GigaVUE-FM software package is available in multiple formats such as OVA, QCOW2, ISO. Use the appropriate media format to deploy GigaVUE-FM.
After you deploy GigaVUE-FM you must perform an initial configuration before you start using GigaVUE-FM. Refer to the GigaVUE Fabric Management Guide for details.
Launch GigaVUE-FM using ESXi Host
You can use your VMware ESXi host to deploy GigaVUE-FM using OVA or OVF files. To deploy GigaVUE-FM using ESXi host follow the steps given below:
- Login to VMware ESXi host using your web browser.
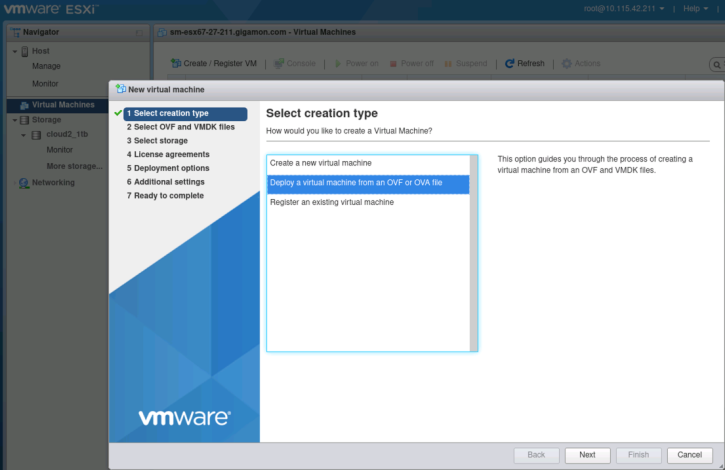
- On the left navigation pane, select Virtual Machines and click Create/Register VM. The New Virtual Machine page appears.

- On the New Virtual Machine page, click on Select Creation Type from the left navigation pane. Then, select Deploy a Virtual Machine from an OVF or OVA file.
- On the left navigation pane, click on Select OVF and VMDK files. Provide virtual machine name and upload the ova file. Data is extracted from the OVA or OVF files and based on the data extracted from the image, the ESXi wizard displays the necessary parameters that need to configured.
- Click on Select Storage, to choose the storage type and data store.
- Under the Deployment Options, provide the necessary details given below.
- Select the network port group associated with the host from the Network Mappings drop-down.
- Select Thick/Thin from the Disk provisioning field.
- (optional) Enable the Power on automatically check-box to power on the Virtual Machine automatically.
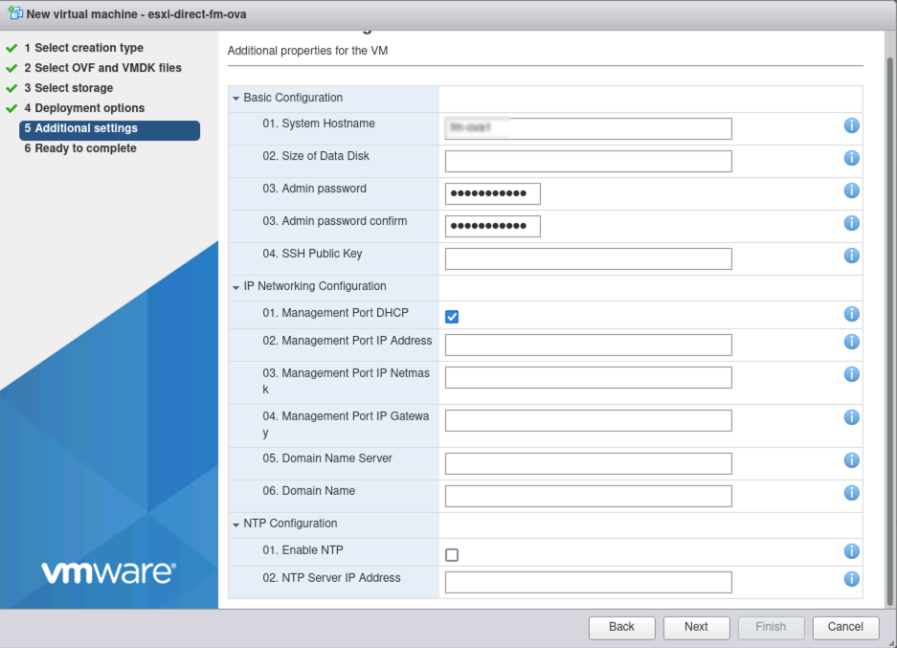
- Under the additional settings page, provide Basic Configuration, IP Network Configuration, NTP Configuration details.
- DHCP Configuration:
- Under Basic Configuration provide the System Hostname and Admin password.
Note: Use only the default password (admin123A!!) for admin password.
- Under IP Network Configuration, enable the Management Port DHCP checkbox.
- Under NTP Configuration details, provide the NTP server details.
- Under Basic Configuration provide the System Hostname and Admin password.
-
Static Configuration:
- Under Basic Configuration provide the System Hostname and Admin password.
Note: Use only the default password (admin123A!!) for admin password.
-
Under IP Network Configuration, enter the Management Port IP address, Management Port IP Netmask, Management Port IP Gateway, Domain Name Server and Domain Name details.
- Under NTP Configuration details, provide the NTP server details.
- Under Basic Configuration provide the System Hostname and Admin password.
-
Review the setting selection in the Ready to Complete page, then click Finish.

Deploy V Series Nodes using VMware ESXi GUI
You can use your own VMware ESXi host system to deploy V Series nodes and use GigaVUE-FM to configure the advanced features supported by these nodes. These nodes register themselves with GigaVUE-FM using the information provided by the user in the virtual machine creation wizard. Once the nodes are registered with GigaVUE-FM, you can configure monitoring sessions and related services in GigaVUE-FM.
This section describes how to deploy V Series Nodes under AnyCloud Monitoring Domain using VMware ESXi Host.
-
The nodes will be deployed under the Monitoring Domain created in AnyCloud.
- When registering V Series nodes in GigaVUE‑FM, the connection name under each monitoring domain must be unique.
- Login to VMware ESXi host using your web browser.
- On the left navigation pane, select Virtual Machines and click Create/Register VM. The New Virtual Machine page appears.

- On the New Virtual Machine page, click on Select Creation Type from the left navigation pane. Then, select Deploy a Virtual Machine from an OVF or OVA file.
- On the left navigation pane, click on Select OVF and VMDK files. Provide virtual machine name and upload the ova file.
- Click on Select Storage, to choose the storage type and data store.
- Under the Deployment Options, provide the necessary details given below.
- Select the network port group associated with the host, network ports and tunneling port details from the Network Mappings drop-down.
- Select Thick/Thin from the Disk provisioning field.
- Select Management Port DHCP from the Deployment type drop-down.
- (optional) Enable the Power on automatically check-box to power on the Virtual Machine automatically.
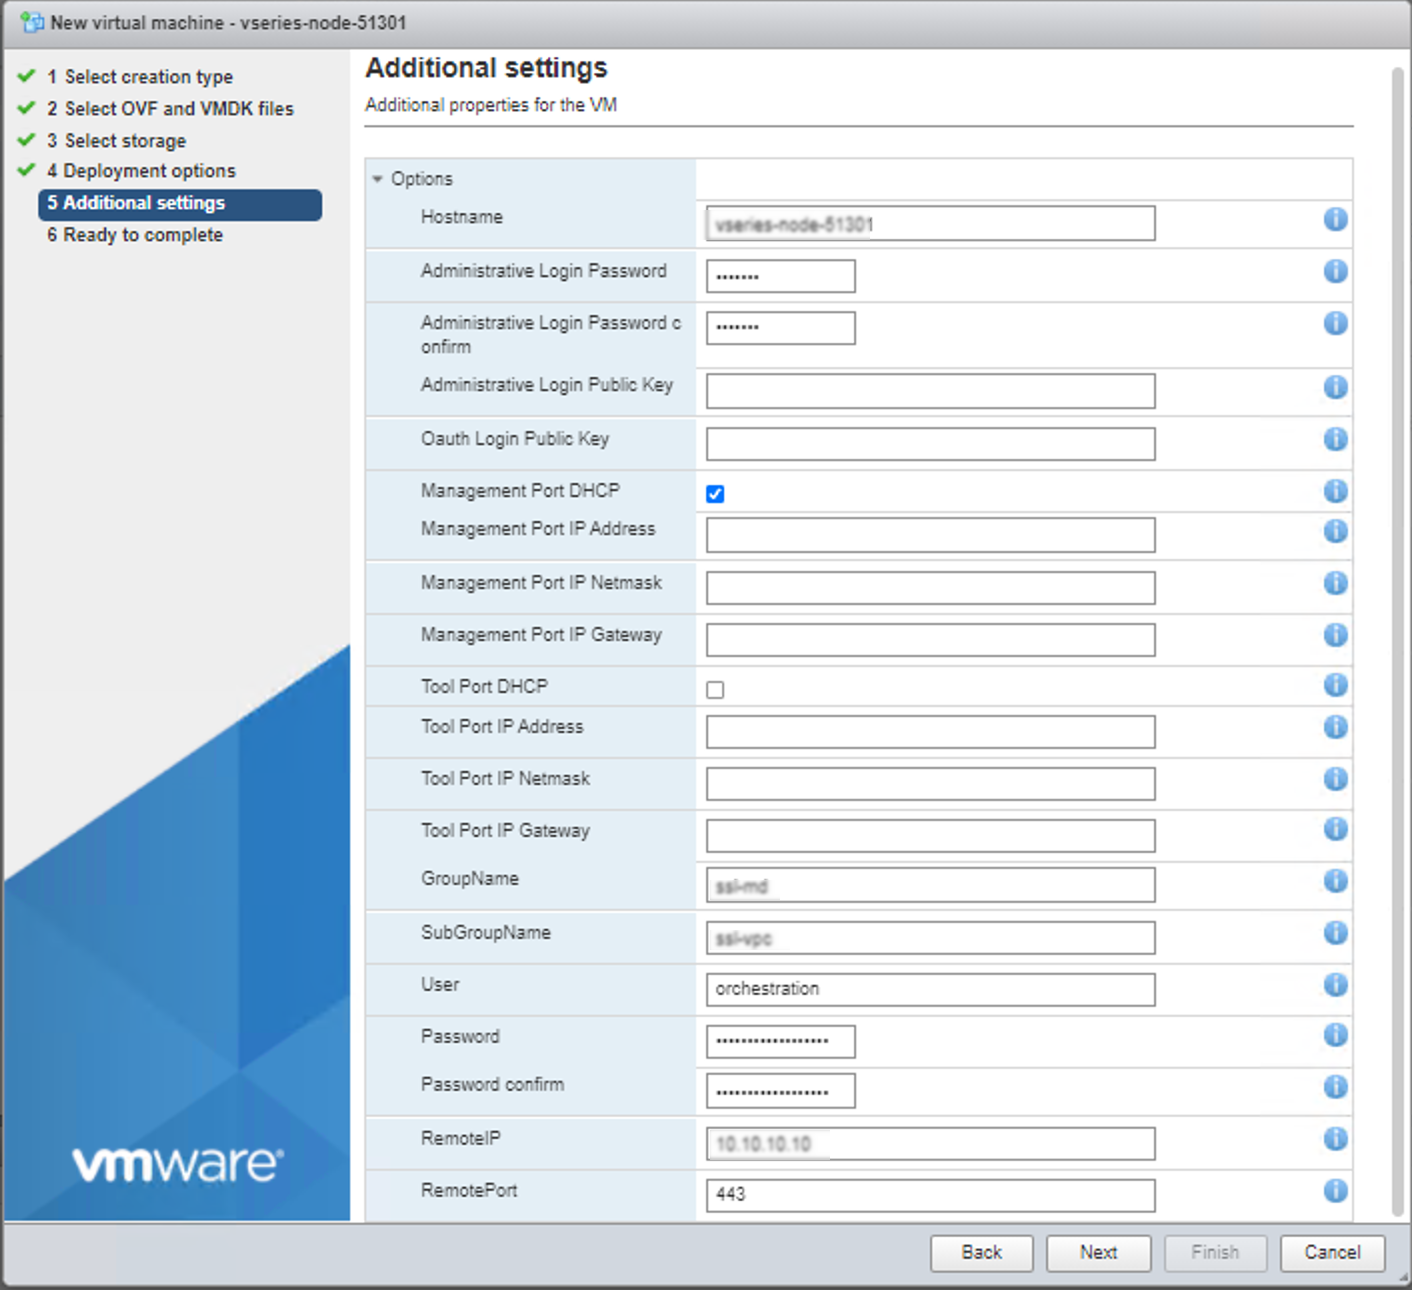
- Under the additional settings page, provide the user data as shown in the figure.

Enter the following values in the additional settings:
- Hostname: <Host Name>
- Administration Password: <Your Password>
- GroupName: <Monitoring domain name>
- SubGroupName: < Connection name>
- User: Description: orchestration
- Password: orchestration123A!
- remoteIP: <IP address of the GigaVUE-FM>
- remotePort: 443
-
Review the setting selection in the Ready to Complete page, then click Finish.
The V Series Node deployed in VMware ESXi host appears in AnyCloud Monitoring Domain page of GigaVUE‑FM.


