Enabling the GigaVUEWeb Server
H-VUE is Gigamon’s Web-based management interface for the GigaVUE H Series. Use H-VUE or GigaVUE-FM for many node configuration, management, and operations tasks.
To use H-VUE with a GigaVUE H Series node, you must enable its Web server with the web enable command. For example:
(config) # web enable
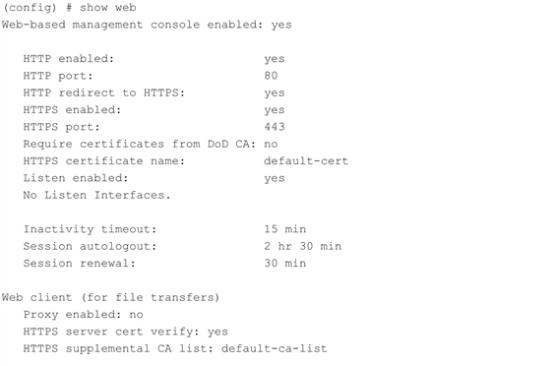
Check the status of the Web server using the show web command. Make sure that Web-based management console enabled: is set to yes, indicating that the Web server is enabled. For example:

Once the Web server is enabled, you can use H-VUE for GigaVUE H Series connections, as described in Connecting to the GigaVUE H Series Node from H-VUE. Refer to the GigaVUE-OS CLI Reference Guide for information on other Web server settings you can configure.
Connecting to the GigaVUE H Series Node from H-VUE
After you enable the Web server on the GigaVUE H Series node, it automatically listens for connections from H-VUE using either HTTP on port 80 or HTTPS on port 443. Use the following procedure to connect to a GigaVUE H Series node using H-VUE.
Note: You can configure whether the GigaVUE H Series node redirects all incoming HTTP connections to the HTTPS port with the web http redirect command.
| 1. | Open a supported browser. Refer to the GigaVUE-OS H-VUE Administration Guide. |
| 2. | Enter one of the following URLs: |
https://<GigaVUE Node IP Address>http://<GigaVUE Node IP Address>
| 3. | The first time you connect to H-VUE, your browser will prompt you regarding an invalid security certificate. Depending on the browser you are using, you can avoid these warnings either by installing a certificate or adding an exception. The following table has the details: |
|
Browser |
Add Exception? |
Install Certificate? |
|
Mozilla Firefox |
Y |
Y |
|
Windows Internet Explorer |
N |
Y |
Note: Gigamon provides the GigaVUE H Series with self-signed certificates for use with H-VUE; you can also create and install a third-party certificate on these nodes.
Add an exception in Firefox as follows:
| a. | Click the Or you can add an exception link. |
| b. | Click the Add Exception button. |
| c. | Click the Get Certificate button. |
| d. | Click the Confirm Security Exception button. |
The H-VUE login page appears.
| 4. | Enter a valid user name and password and click Login. |
Configuring Internet Explorer for Use with H-VUE
H-VUE works best in Internet Explorer when the browser is configured to check for newer versions of stored pages every time pages are visited. Enable this option as follows:
| 1. | Open Internet Explorer. |
| 2. | Select the Tools > Internet Options command. |
| 3. | In the General tab, locate the Browsing history section and click its Settings button. |
| 4. | Set the Check for newer version of stored pages: option to Every time I visit the webpage. |
| 5. | Click OK on the Temporary Internet Files and History Settings dialog. |
| 6. | Click OK on the Internet Options dialog. |
Next Steps?
Refer to the online help for details on configuring and operating the GigaVUE‑HC2 from the H-VUE interface. Keep in mind that each of the initial configuration settings described in the rest of this chapter can also be set in H-VUE.


