Step 4: Configure GigaVUE‑FM Tunnels and Virtual Maps
NSX-T traffic needs to be sent to the H-Series device. A tunnel must be created in the Tunnels Library that defines the destination port to which the traffic is to be sent.
Virtual maps are also needed to monitor NSX-T traffic. A separate map needs to be created for each separate GigaSMART tunnel destination to send NSX-T traffic, or if a specific map rule or slicing is required. If the same parameters are applied for all NSX-T traffic, only one map is required to handle all NSX-T traffic. Creating a map creates a corresponding profile in NSX-T that is used to associate the NSX-T traffic with the virtual map during service chain creation.
Create Tunnel to GigaSMART Device
To create a tunnel in GigaVUE‑FM:
- From the left navigation pane, select Inventory > VIRTUAL > VMware > NSX-T > Management. The Management page appears.
- In the Tunnel Library tab, click Add to open the Add Tunnel Endpoint page. The page displays a list of available GigaVUE tunnels, if the H-series device is a physical node.
If the list of tunnels is displayed, do the following:- Select the tunnel that is configured to receive traffic from NSX-T.
- Enter the Tunnel Source Port. This value will be used on the H-Series GigaSMART device to specify the port from which the mirrored traffic is originating. The port range is from 0 to 65535.
If the desired GigaVUE tunnel was not discovered, the tunnel was not configured properly on the H Series device. For information on how to configure the tunnel, refer to Configure Tunnel Endpoint.
- Click OK. A Tunnel Endpoint is created.
To view the status of the virtual nodes, navigate to NSX-T > Virtual Nodes. The NSX-T Virtual Nodes page displays the list of GigaVUE-VMs and respective details.
Create Virtual Maps in GigaVUE‑FM
To create a virtual map:
|
1.
|
From the left navigation pane, select Traffic > VIRTUAL > Virtual Maps > NSX-T. The NSX-T Virtual Maps page appears.
|
|
2.
|
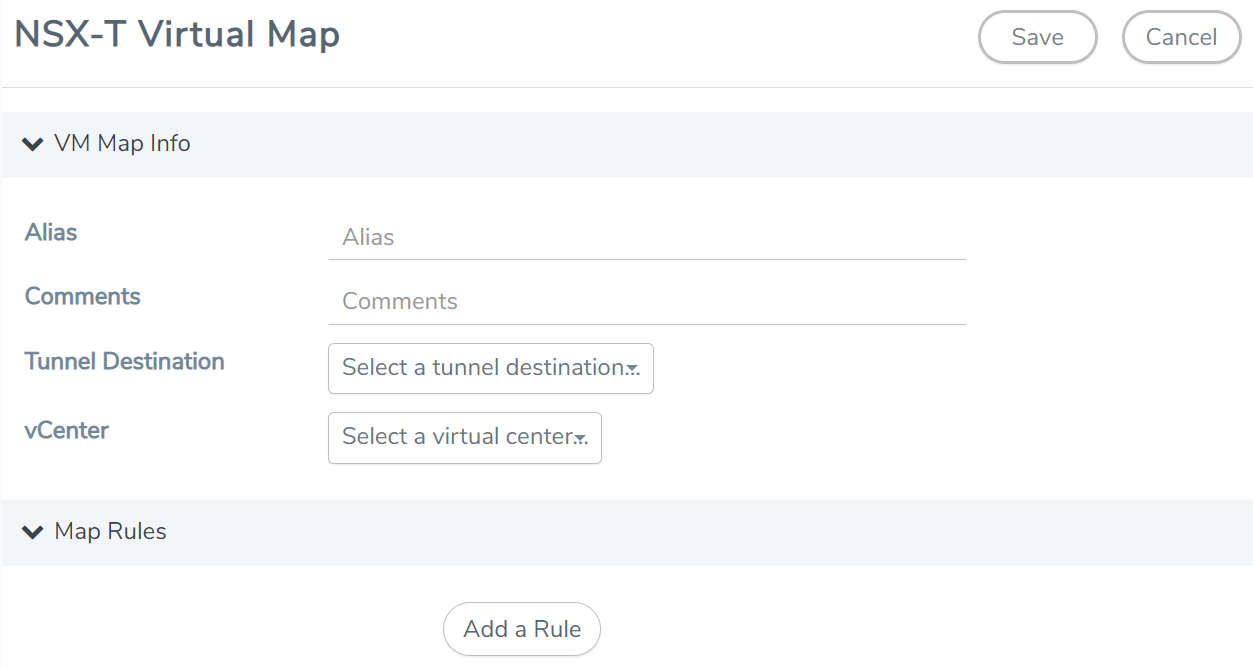
On the NSX-T Virtual Maps page, click New. The NSX-T Virtual Map wizard appears.
 |
|
3.
|
On the NSX-T Virtual Map page, do the following: |
|
a.
|
For Alias, enter an alias that will help you identify this map. |
|
b.
|
For Comments, enter any additional comments for the Virtual Map. |
|
c.
|
For Tunnel Destination, click in the field and select the GigaSMART tunnel destination to which NSX-T traffic will be sent. |
|
d.
|
For vCenter, select the VMware vCenter registered with the NSX-T Manager to be monitored. |
|
e.
|
(Optional) Click Add a Rule if you need slicing or filtering beyond what the NSX-T security filtering provides. |
|
f.
|
Click Save. A Virtual Map is created and you can view the Virtual Map in the SERVICE PROFILES tab of Network Introspection (E-W) page in NSX-T. |
The GigaVUE‑FM virtual maps is distributed to every GigaVUE-VM installed in the NSX-T clusters and an NSX-T Profile is also created for the map.
Note: GigaVUE‑FM verifies the NSX-T license while creating or updating the Virtual Map.


