Deploy the Monitoring Session
To deploy the monitoring session:
|
1.
|
Drag and drop one or more maps from the MAP Library to the workspace. |
|
2.
|
(Optional) To add Inclusion and Exclusion maps, drag and drop the maps from the Map Library to their respective section at the bottom of the workspace. |
|
3.
|
(Optional) Drag and drop one or more applications from the APPLICATIONS section to the workspace. |
Note: For information about adding applications to the workspace, refer to Adding Applications to the Monitoring Session.
|
4.
|
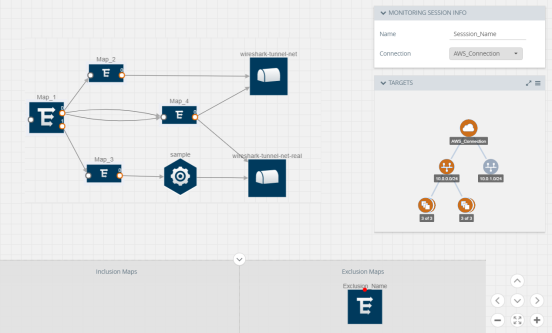
Drag and drop one or more tunnels from the TUNNELS section. The following figure illustrates three maps, one exclusion map, one application, and two tunnel endpoints that have been dragged and dropped to the workspace. |
|
6.
|
Hover your mouse on the map, click the red dot, and drag the arrow over to another map, application, or tunnel. |
Note: You can drag multiple arrows from a single map and connect them to different maps and applications.
|
7.
|
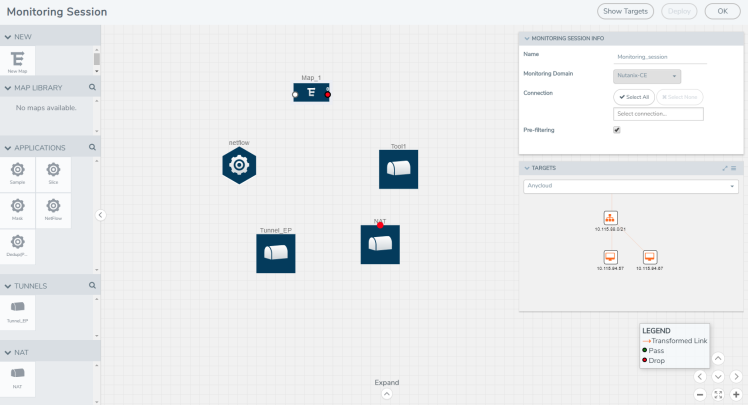
Hover your mouse on the application, click the red dot, and drag the arrow over to the tunnel endpoints. In the following figure, the traffic matching the rules in each action set is routed to maps, applications, or monitoring tools. |

|
8.
|
Click Show Targets to view details about the subnets and monitoring instances. The instances and the subnets that are being monitored are highlighted in blue. |
|
9.
|
Click Deploy to deploy the monitoring session. The status is displayed as Success in the Monitoring Sessions page. The session is successfully deployed on all V Series nodes and G-vTAP Agents. Click on the status link in the Status column on the Monitoring Session page to view the Monitoring Session Deployment Report. |
When you click on the Status link, the Deployment Report is displayed.
If the monitoring session is not deployed properly, then one of the following errors is displayed in the Status column.
|
o
|
Partial Success—The session is not deployed on one or more instances due to G-vTAP or V Series node failure. |
|
o
|
Failure—The session is not deployed on any of the V Series nodes and G-vTAP Agents. |
If there was an error in deploying, the Monitoring Session Deployment Report will display the information about it.
Note: After rebooting your Ubuntu, you must redeploy the respective monitoring sessions to restore the mirror traffic on the respective Ubuntu VM interfaces.
The Monitoring Session page also has the following buttons:
|
■
|
Redeploy—Redeploys the selected monitoring session. |
|
■
|
Undeploy—Undeploys the selected monitoring session. |
|
■
|
Clone—Duplicates the selected monitoring session. |
|
■
|
Edit—Opens the Edit page for the selected monitoring session. |
|
■
|
Delete—Deletes the selected monitoring session. |


