Installing the Cable Management Trays in the GigaVUE‑HC2 Chassis
Decide whether you want to install the optional cable management assembly.
The GigaVUE‑HC2 chassis includes two cable management trays for installation at the side of the node. Installing the cable management trays is optional. However, because of the high number of ports potentially available on the GigaVUE‑HC2 node, Gigamon recommends installing the cable management trays. Use the following procedure:
|
1.
|
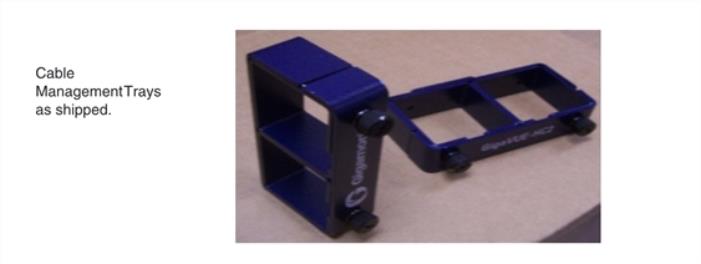
Remove the cable management trays from the foam packaging shipped on top of the GigaVUE‑HC2 chassis (Figure 1). |

|
Figure 5
|
Cable Management Trays |
|
2.
|
Remove the front panel from each of the cable management trays by loosening the thumb screws. |
|
3.
|
The cable management assembly is included in the parts kit with the chassis shipment. Installation of the cable management assembly is optional. To install the cable management assembly on the GigaVUE‑HC2 node, you must attach it to the rack ear on the left and right sides of the chassis rack ear: |
|
a.
|
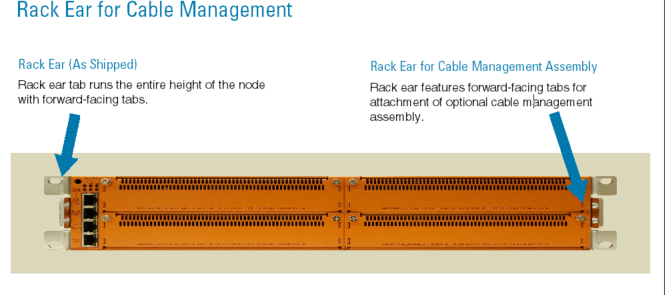
Locate the cable management assembly (Figure 2). |

|
Figure 6
|
GigaVUE‑HC2 Cable Management Assembly and Rack Ear |
|
b.
|
Attach the Cable Management assembly to the forward facing rack ear tab with two machine screws. |

|
Figure 7
|
Standard Rack Ears on GigaVUE‑HC2 |
If you installed the custom rack ear for the cable management assembly in Step , you can now attach the assembly using the four screws provided. The screws attach through the recessed holes on the inside of the rack ear and into the cable management assembly, as shown in Figure 4 Cable Management Assembly Attached to Node.

|
Figure 8
|
Cable Management Assembly Attached to Node |
|
4.
|
As shown in Figure 4, the thumb screws on the cable management assembly’s front panel allow quick removal and reattachment whenever you want to route cables. |
|
5.
|
Use the provided screws to attach the lower halves of the cable management tray to the top and bottom of the GigaVUE‑HC2 chassis. Each lower half has a protruding “lip” on one side of the assembly – position this lip so you can route cables into the assembly. |
|
o
|
Attach the top assembly with the lip at the top of the node. |
|
o
|
Attach the bottom assembly with the lip at the bottom of the node |
This completes the assembly of the cable management trays on the GigaVUE‑HC2.


