Default Alignment
The first time Topology opens, GigaVUE‑FM presents the elements in a predetermined alignment. The elements are aligned in general columns according to the following order from left to right:
|
1.
|
Clusters and standalone nodes with links. |
|
2.
|
Manually added network nodes |
|
4.
|
Clusters without links. |
|
5.
|
Standalone Gigamon nodes. These are ordered by dimension: |
|
6.
|
Manually added tool nodes |
You can restore the default alignment at any time by selecting Actions > Reset Alignment.
Move Elements in Topology
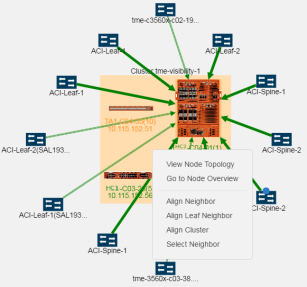
The Topology provides a context menu that makes it possible to quickly move elements on the page. To open the context menu, select an element and then right-click. For a traditional cluster configuration, Figure 1 Context Menu Displayed for Traditional Configuration shows the context menu with a number of options for aligning the elements in the topology. These options are:
|
Figure 23
|
Context Menu Displayed for Traditional Configuration |
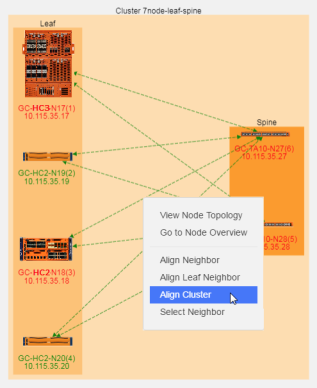
For a leaf and spine topology, following options are displayed in the context menu (refer to Figure 2 Context Menu Displayed for Leaf and Spine):
|
Figure 24
|
Context Menu Displayed for Leaf and Spine |
Resize Links
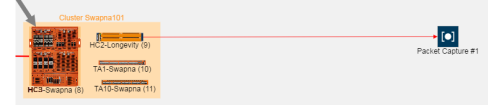
When the topology is first created, a link may appear too long or too short. You can change the length of the link by selecting the node at either end of the link and dragging the node so that the link is the length that you want. For example, in Figure 3, the link between the node named Packet Capture #1 and the node named HC2-Longevity in the cluster is too long. To make it shorter, select the node and drag it closer to the cluster.
|
Figure 25
|
Long Link Between Devices |
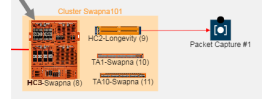
Figure 4 show the topology after dragging the node to adjust the length of the link.
|
Figure 26
|
Length of Link Adjusted |
In addition to dragging individual items on the page, you can use the Align Neighbor and Align Leaf Neighbor options from the context menu. For details, refer to Align Neighbors and Align Leaf Neighbor.
Align Neighbors
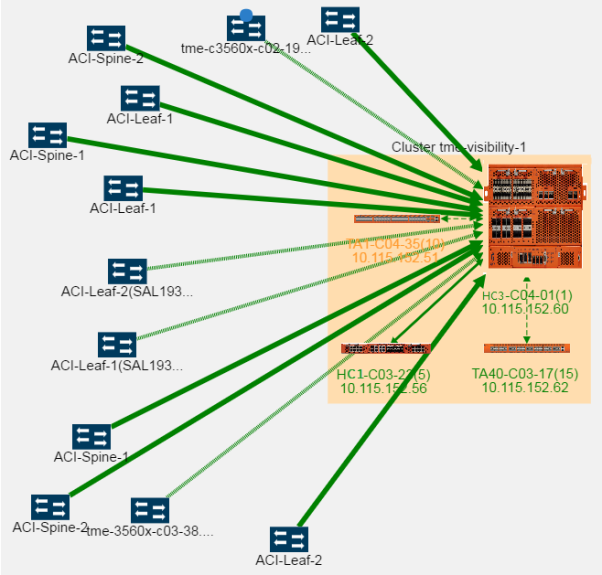
The Align Neighbor option aligns all the neighbors of a selected node and any neighbors of those neighbors. The alignment follows the path of all the linked neighbors, aligning neighbors equidistant from the central neighbor based on a 360 degree arc. In Figure 5 Aligning Neighbors, the GigaVUE‑HC3-C04-01 has 12 neighbors. The neighbors are arranged at 30 degree angles around GigaVUE‑HC3. If any of the neighbors have linked neighbors, the alignment of those neighbors are also calculated in the same manner. In Figure 5 Aligning Neighbors, the linked neighbors are on one side of the cluster and all neighbors are on the left side of the cluster.
|
Figure 27
|
Aligning Neighbors |
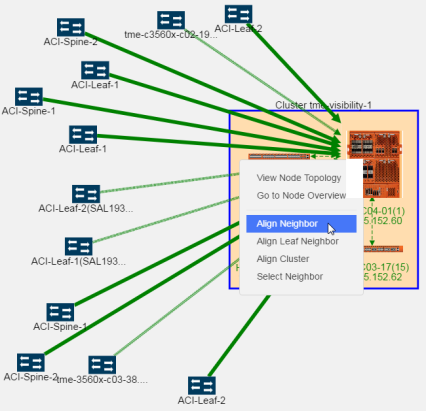
To realign the neighbors, do the following:
|
8.
|
Right-click to open the context menu and select Align Neighbor. |
|
Figure 28
|
Displaying Align Neighbor Option |
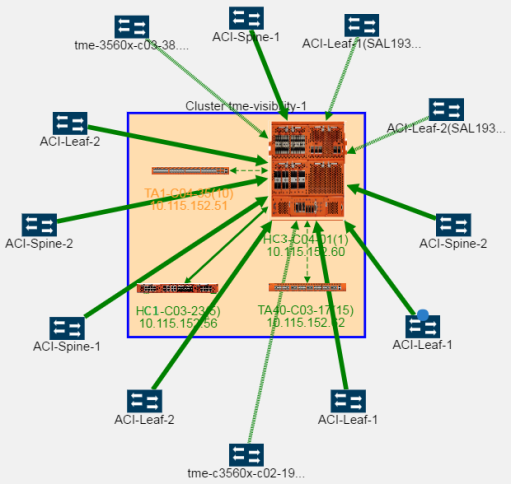
The neighbors are realigned around the selected element as shown in the following figure.
|
Figure 29
|
Nodes Aligned after Selecting Align Neighbor Option |
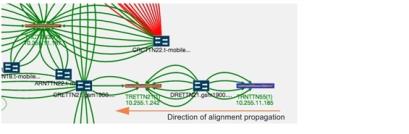
When there are multiple neighbors, the alignment propagates through the topology. The neighbors of the selected element are aligned, then the neighbors of those neighbors, and so on throughout the topology. This makes it possible to realign an entire topology very quickly. In Figure 8, the right-most element was selected and alignment propagation flows to the left and throughout the topology.
|
Figure 30
|
Neighbor Alignment Propagation |
Align Leaf Neighbor
The Aligning Neighbor realigns all neighbors linked to the selected node and alignment is propagated throughout the topology. To align only the immediately adjacent neighbors, use Align Leaf Neighbor. The alignment will occur with the immediate neighbors and alignment will not propagate throughout the entire topology.
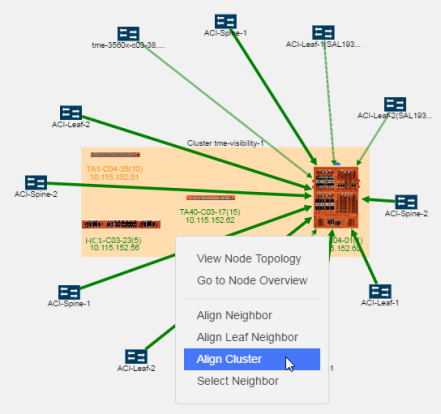
Align Cluster
Nodes within a cluster container can be repositioned by selecting and dragging individual nodes or using the Align Cluster option. To select this option, right-click on the cluster container and select Align Cluster Spine as shown in Figure 9.
|
Figure 31
|
Align Cluster Option Selected |
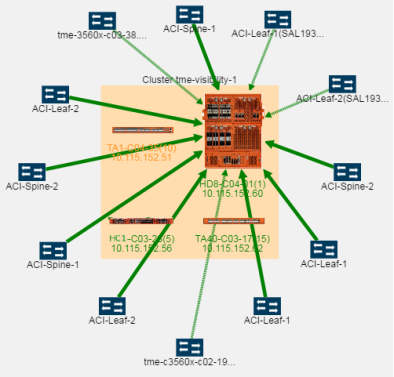
After selecting the Align Cluster option in Figure 9, the nodes in the cluster are rearranged. Figure 10 Nodes in a Cluster Container Arranged Horizontally shows the results of applying Align Cluster to the cluster in Figure 9.
|
Figure 32
|
Nodes in a Cluster Container Arranged Horizontally |
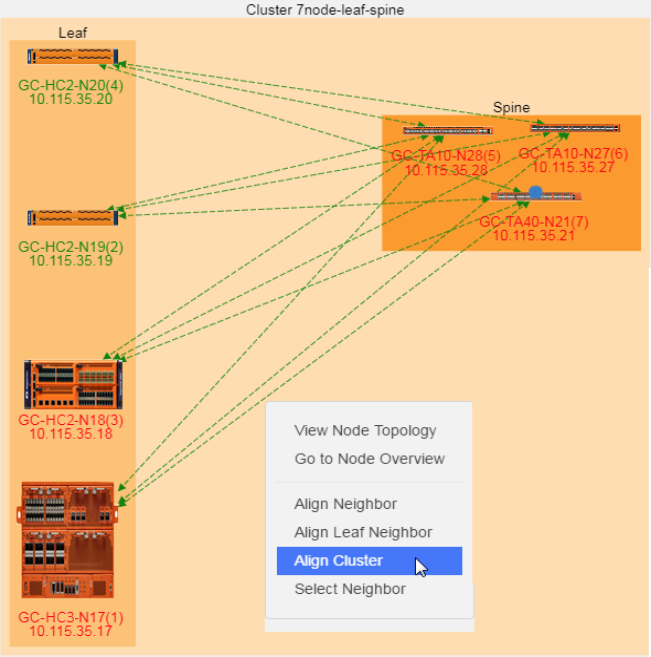
For leaf and spine cluster configuration, the Align Cluster option aligns the spine nodes within the spine container and leaf nodes within the leaf container.
|
Figure 33
|
Displaying Align Cluster Option |

|
Figure 34
|
Spine and Leaf Nodes after Selecting Align Cluster Option |
Select Neighbor
The Select Neighbor option is used to move an entire neighbor in the topology. This option selects a node or cluster and its linked nodes so you can move all of the elements at one time. To move a cluster or node and all its neighbors, do the following:
|
9.
|
Select the cluster or node with linked neighbors. |
|
10.
|
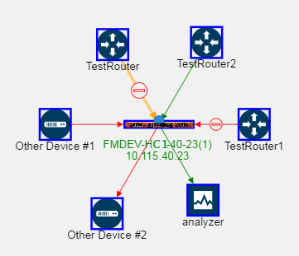
Right-click to open the context menu and select Select Neighbor. The node or cluster and its neighbors are highlighted in blue. In the following figure, the GigaVUE‑HC1 node and its linked neighbors are selected. |
|
11.
|
Drag the selected cluster and node to the new position. The linked neighbors will move with the node or cluster. |


