Single Sign-On
Single sign-on (SSO) is an authentication process that allows a user to access multiple applications with a single set of log in credentials. GigaVUE‑FM provides the following Single sign-on options, which are discussed in this topic:
First, check out this video from Gigamon Basics as a primer: Understanding how to configure user access to GigaVUE-FM using Single Sign-On and SAML helps you meet your security, compliance, and password management requirements. This video provides a primer on SSO, discusses SAML flows, and then shows you how to configure Single Sign-On via GigaVUE-FM.
Enabling Single Sign-On into GigaVUE-FM (SAML) [12:42]
Find more Gigamon Basics videos on Gigamon TV!
GigaVUE‑FM uses Shibboleth SAML 2.0 identity provider (open source IdP ) as an internal IdP for authentication and authorization. Shibboleth reads the data from GigaVUE‑FM’s local database and performs the authentication based on the authentication mechanism selected in the Authentication Type settings. GigaVUE‑FM is independent of the authentication mechanism (as Shibboleth takes care of authentication and authorization).
Notes:
- GigaVUE‑FM starts with internal IdP, by default.
- When you access GigaVUE‑FM, you will be navigated to the IdP's URL. You must then log in with your user name and password.
- If you cannot access GigaVUE‑FM (due to server issues or any other issues), you can use the special access provided (https://<fm ip address/dns name>/admin). This access is applicable only for local users with super admin privileges.
- You must restart GigaVUE‑FM every time you configure IdP.
The following external IdPs are qualified to be operational with GigaVUE‑FM:
To configure ADFS as external IdP you must perform the following:
- To configure GigaVUE‑FM in ADFS. Refer to Configure GigaVUE‑FM in ADFS for details.
- Configure external IdP, that is ADFS, in GigaVUE‑FM. Refer to Configure External IdP in GigaVUE‑FM for details.
- Refer to the "Trust Store" on page 1.
Note: When you access GigaVUE‑FM using the external IdP, you will be navigated to the external IdP URL (Microsoft ADFS). You must then log in using the external IdP user name and password for logging in to GigaVUE‑FM.
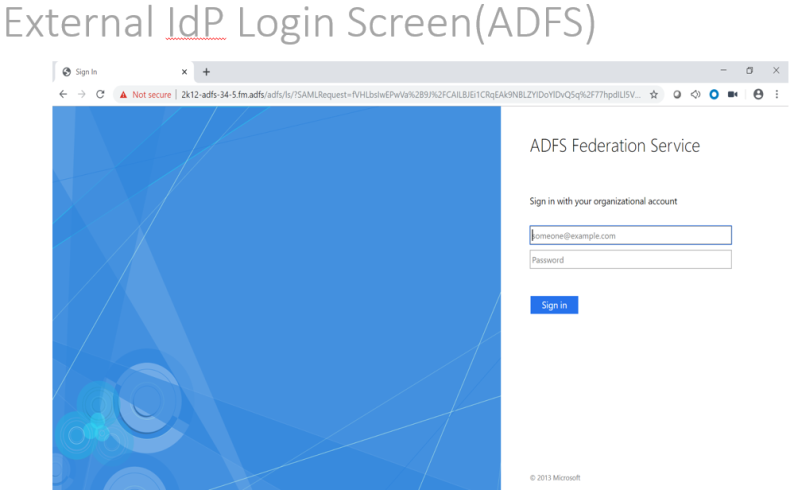
| Figure 1 | External IdP Login Screen (ADFS): |
Configure GigaVUE‑FM in ADFS
Prerequisite:
You must retrieve the Service Provider metadata (which is GigaVUE‑FM’s metadata) from https://<FM IP Address>/saml/metadata. This will serve as the service provider metadata file to configure in IDP.
To configure GigaVUE‑FM in ADFS as Relying Party:
- From the windows server, select Start > Administrative Tools > ADFS Management. The ADFS administrative console appears.
- Select ADFS folder. Go to the Actions menu and select Add Relying Party Trusts.
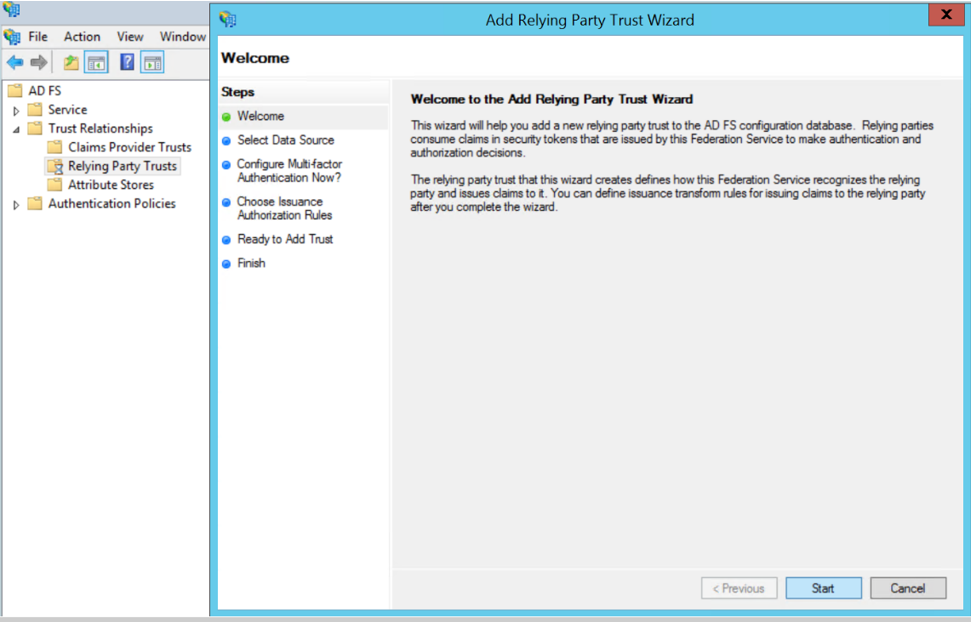
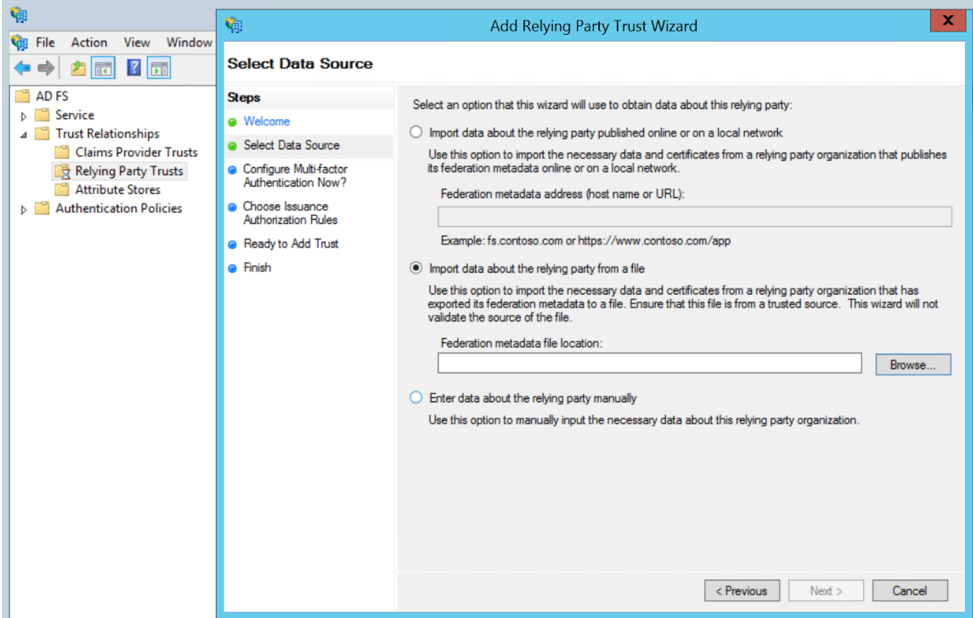
- Select Data Source: Select the Import Data About the Relying Party from a File option. Browse for the SAML metadata file as mentioned in the prerequisites.
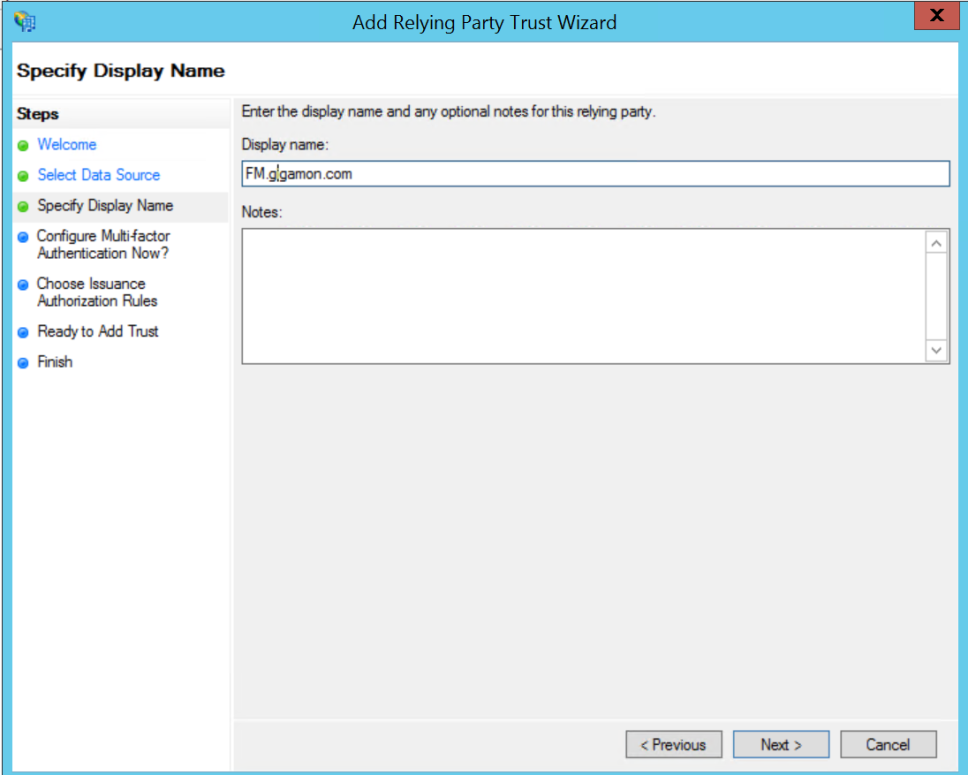
- Specify a Display Name that identifies the application, example, FM.gigamon.com. Click Next.
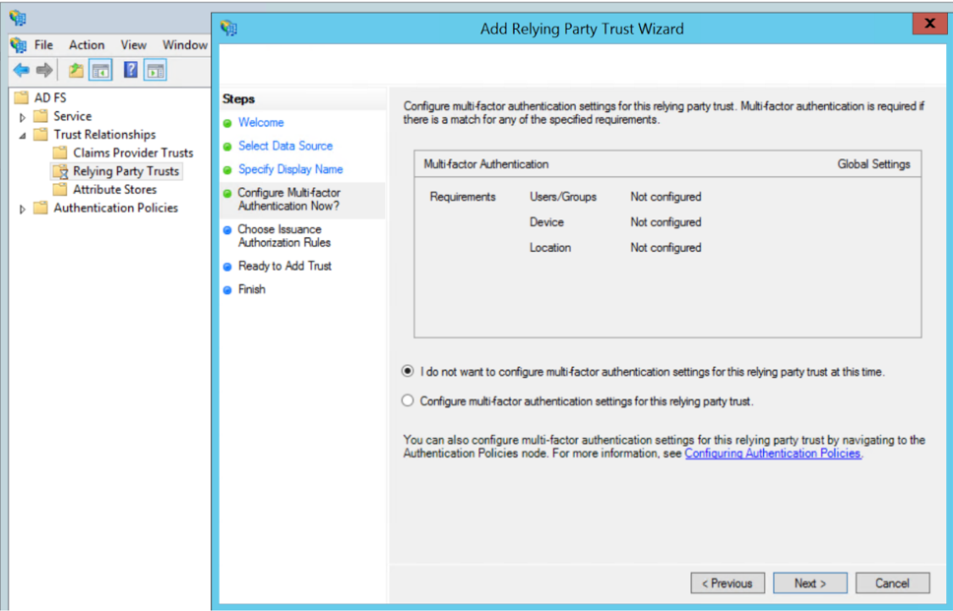
- Select the option I do not want to configure MFA and click Next.
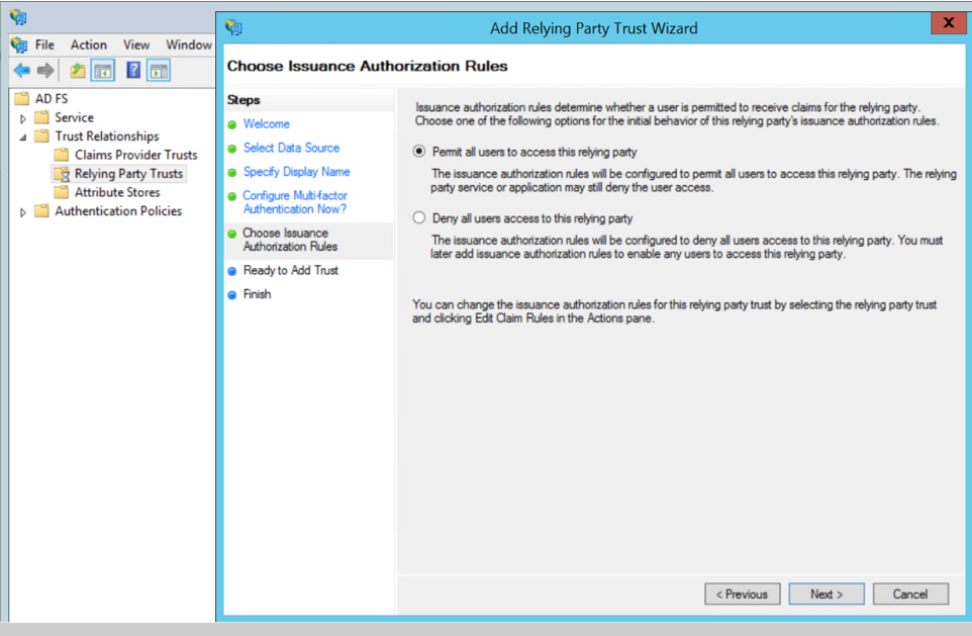
- Select Permit all users to access this relying party. Click Next.
- Review the data available in preview section and add the relying party.
- Open Edit Claim rules to grant user access:
- Add a New claim rule to transform UserPrincipalName as NameId:
- Choose the option send LDAP Attributes as claims.
- Specify claim rule name and choose the required LDAP store.
- Select LDAP Attribute as UserPrincipalName and outgoing claim type as NameId.
- Add a New Claim Rule to specify user specific access:
- Choose the option send Group Membership as claim.
- Specify claim rule name and select AD user group for which FM roles/user Groups must be assigned.
- Enter outgoing claim type as SAML User Group value configured in GigaVUE‑FM (default value is eduPersonAffiliation) and outgoing claim value as one of the following:
- GigaVUE‑FM specific user groups (Super Admin Group or Admin Group or User Group)
- Organizational specific user group. If organizational specific user group is provided, then you must enable Organizational Group Mapping.
To configure OKTA as external IdP you must perform the following:
- Configure GigaVUE‑FM in OKTA. Refer to Configure GigaVUE‑FM in OKTA for details.
- Configure external IdP, that is OKTA, in GigaVUE‑FM. Refer to Configure External IdP in GigaVUE‑FM for details.
- Install IdP signing certificates (OKTA) in GigaVUE‑FM. Refer to the "Trust Store" on page 1.
Note: When you access GigaVUE‑FM using the external IdP, you will be navigated to the external IdP URL (OKTA). You must then log in using the external IdP user name and password for logging in to GigaVUE‑FM.
Configure GigaVUE‑FM in OKTA
Prerequisite:
You must retrieve the Service Provider metadata (which is GigaVUE‑FM’s metadata) from https://<FM IP Address>/saml/metadata. This will serve as the sp metadata file to configure in IDP.
Watch the video for configuring OKTA here: Gigamon Basics: Enabling Single sign-on into Fabric Manager (SAML).
To configure GigaVUE‑FM in OKTA as External IdP:
- Login to Okta.
- Enter the following details:
|
Field |
Description |
|---|---|
| New Application | |
| Platform | Web |
| Sign on Method | SAML 2.0 |
| General Settings | |
|
App Name |
Fabric Manager |
|
Configure SAML |
|
|
Single Sign on URL |
Assertion Consumer Service URL from the service provider metadata. Enable the Use this for Recipient and Destination Address check box. |
|
Entity ID |
Paste the entity id copied from the Authentication Type page. |
|
Name ID Format |
Enter Email Address as name id format. |
|
Authentication User Name |
OKTA User Name |
|
Attributes |
|
|
Name |
SAML User Group Name |
|
Name Format |
Basic |
|
Value |
|
|
Group Attribute Statements |
Configure the proper Group Attribute Statements in OKTA |
|
Create SAML Integration |
|
|
Enable the check box I am on OKTA Customer adding an internal app. |
|
|
|
|
Note: Click Identity Provider Metadata and copy the URL in the address bar and paste it under third party authentication URL.
Note: Ensure to download the OKTA Certificate for uploading in Trust Store.


