Step 1: Create Users in VMware vCenter and GigaVUE-FM
For NSX-T and GigaVUE-FM to communicate, a Gigamon-FM user must be created in NSX-T, and an NSX-T user must be created in Gigamon-FM. Also, a GigaVUE-FM user must be created in NSX-T for GigaVUE-FM to perform NSX-Tinventory functions. For NSX-T and GigaVUE FM to communicate, users with the proper permissions must be created in both GigaVUE-FM and VMware NSX-T. Refer to Required VMware Virtual Center Privileges for more information on user roles and privilieges.
Note: GigaVUE-FM connects to NSX-T Manager that supports TLSv1.0, TLSv1.1, and TLSv1.2.
Create GigaVUE-FM User in NSX-T manager
For GigaVUE-FM to communicate with NSX-T, you must first create a user with an NSX-T Enterprise Admin role in NSX-T manager. This user will be a GigaVUE-FM user that the GigaVUE-FM uses to communicate with NSX-T Manager.
To add an NSX-T Enterprise admin role for a user, do the following:
- In NSX-T, navigate to System > Settings > Users and click ROLES ASSIGNMENTS tab.
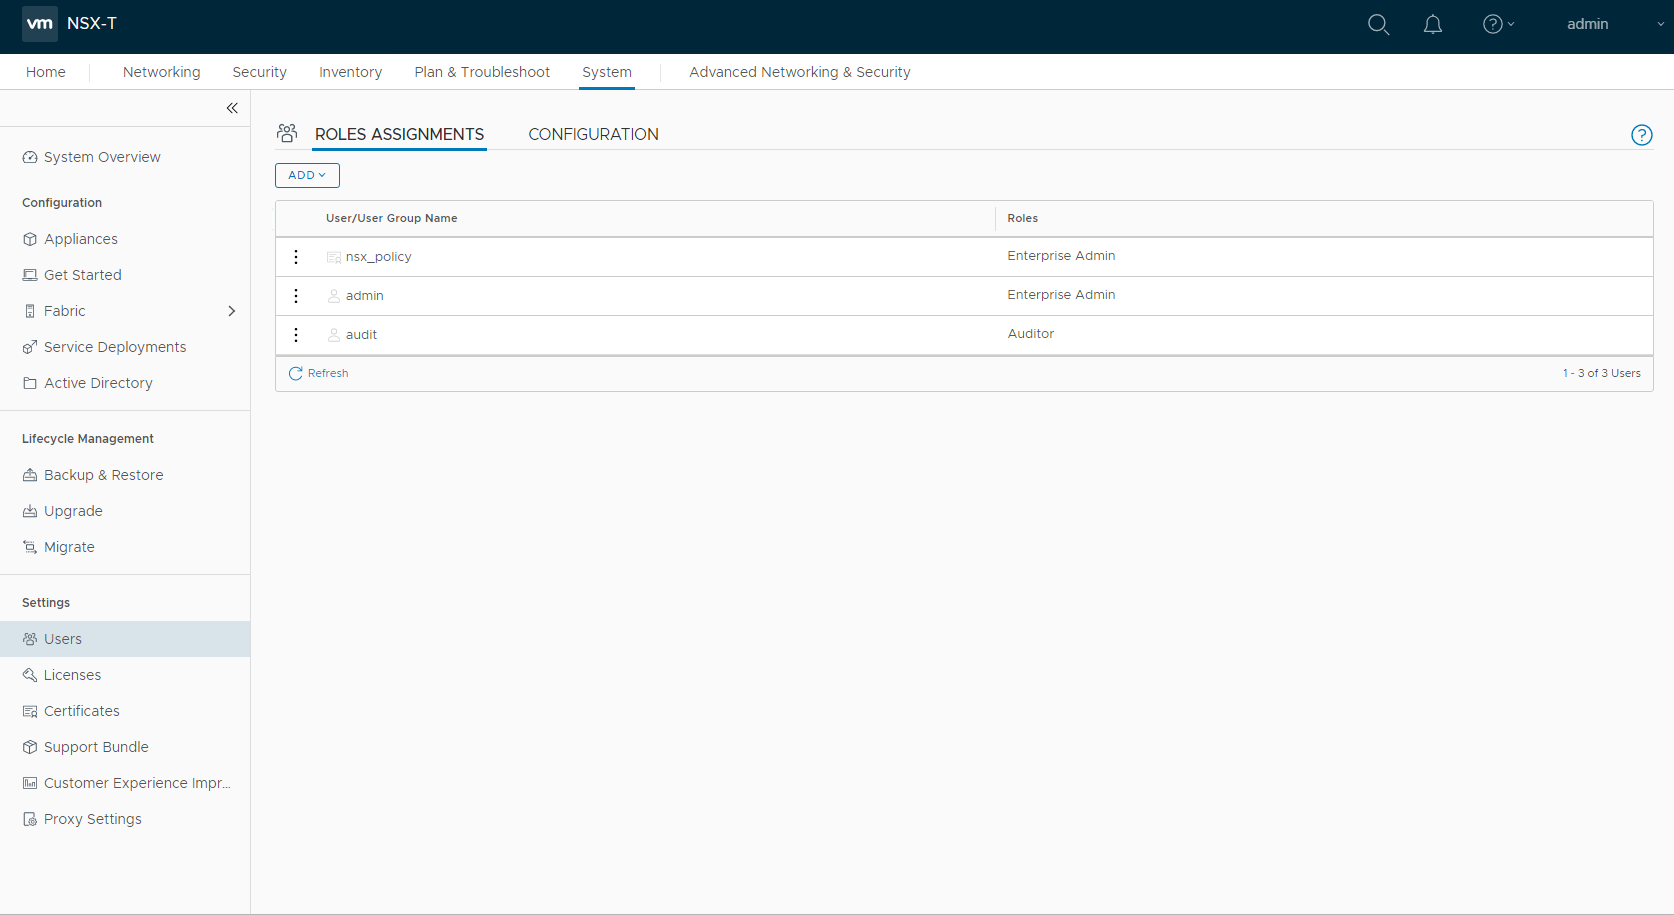
- On the ROLES ASSIGNMENTS tab, click ADD and then select Principal Identity with Role from the drop-down list.
- On the New User/User Group, enter the required information and select the Role as Enterprise Admin.
- Click Save and then a GigaVUE-FM user is created in NSX-T.
Create VMware NSX-T user in GigaVUE-FM
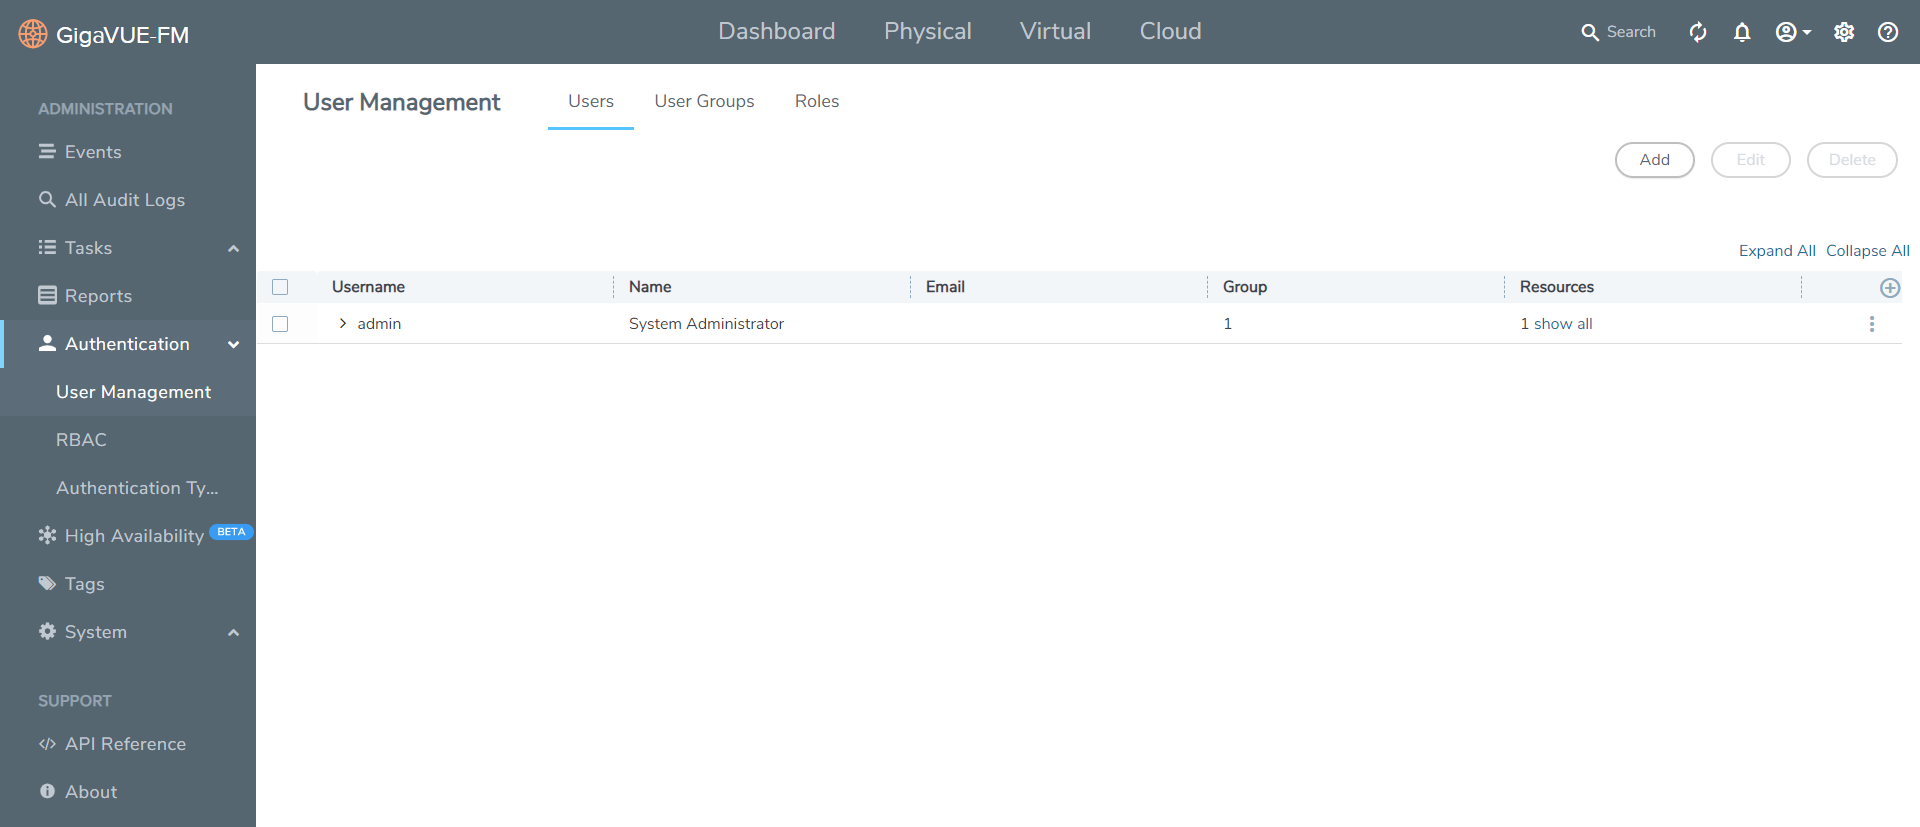
For NSX-T to be able to communicate with GigaVUE-FM, you need to create a user in GigaVUE-FM who has the admin role. To create an NSX-T user in GigaVUE-FM, do the following:
|
1.
|
On the right side of the top navigation bar, click  . . |
|
2.
|
On the left navigation pane, select Authentication > User Management. |
|
3.
|
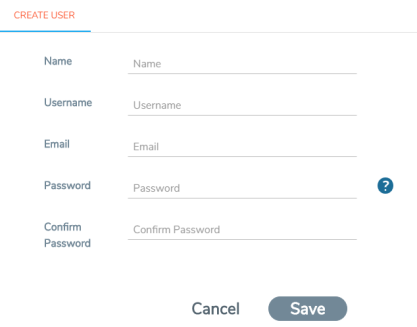
Click Add. The CREATE USER dialog box appears.
 |
|
4.
|
On the CREATE USER dialog box, enter or select the information as follows:
 |
|
•
|
In the Name field, enter the name of the call back user. |
|
•
|
In the Username field, enter a user name for the user. |
|
•
|
In the Email field, enter the Email address of the user. |
|
•
|
In the Password field, enter the password for the user. |
|
•
|
In the Confirm Password field, enter the same password that you entered for Password. |


